|
|
Post by pete on Jun 16, 2020 17:44:41 GMT -7
Revells 70 Charger kit is a re-release of the " Dominic's Charger " From the fast and furious franchise. They got rid of the race parts and added in the "Stock" parts, making for a nice factory stock 70 charger R/T kit. I will be changing a few things on the build for preference and accuracy. Doing away with the magnum 500 road wheels and red line tires. May do steel wheels and dog dish hub caps or Mopar Rally wheels, Jury is still out. if I go with steel wheels, the car will get a set of ( My last set) Blue wall firestones. These were a standard equipment tire when steel wheels were optioned. If I do Rally wheels, then its raised white letter good year poly glass tires. Don't have to decide just yet though. Next...426 Hemi or 440 6 pack. I tend to do Hemi cars so I might choose to be different with this one. Time for that later as well. That said: I haven't done a model car build thread...Ever... On a forum, So this will be a first for me. Gotta remember to document stuff as opposed to just going from one part of a build to another. I also am not the best photographer but I will endeavor to show clear pics of what I am doing/talking about. Since I tend to build for show/competition this will be a long haul and will be detail oriented. That said, you guys will get an inside look at how my mind works. Warning! This may cause nightmares and or manic behavior! follow along at you own peril!!! I tend to be long winded also (See above) So I will try to be concise in my descriptions/processes. As the title states...This will be my 70 Charger build...Yes I am doing it in Ivy Green by popular demand.   |
|
|
|
Post by mustang1989 on Jun 16, 2020 17:52:10 GMT -7
Revels 70 Charger kit is a re-release of the " Dominic's Charger " From the fast and furious franchise. They got rid of the race parts and added in the "Stock" parts, making for a nice factory stock 70 charger R/T kit. I will be changing a few things on the build for preference and accuracy. Doing away with the magnum 500 road wheels and red line tires. May do steel wheels and dog dish hub caps or Mopar Rally wheels, Jury is still out. if I go with steel wheels, the car will get a set of ( My last set) Blue wall firestones. These were a standard equipment tire when steel wheels were optioned. If I do Rally wheels, then its raised white letter good year poly glass tires. Don't have to decide just yet though. Next...426 Hemi or 440 6 pack. I tend to do Hemi cars so I might choose to be different with this one. Time for that later as well. That said: I haven't done a model car build thread...Ever... On a forum, So this will be a first for me. Gotta remember to document stuff as opposed to just going from one part of a build to another. I also am not the best photographer but I will endeavor to show clear pics of what I am doing/talking about. Since I tend to build for show/competition this will be a long haul and will be detail oriented. That said, you guys will get an inside look at how my mind works. Warning! This may cause nightmares and or manic behavior! follow along at you own peril!!! I tend to be long winded also (See above) So I will try to be concise in my descriptions/processes. As the title states...This will be my 70 Charger build...Yes I am doing it in Ivy Green by popular demand. Waaaa Hoooo!!! Partee time!!!!!!!!     |
|
|
|
Post by mustang1989 on Jun 16, 2020 17:53:51 GMT -7
Can't wait to see this bad boy being built Pete. Very much looking forward to your first model build thread. Something tells me that we're all going to be in for a treat. No worries about how your mind works bud. We're all birds of a feather in here.  |
|
|
|
Post by pete on Jun 16, 2020 17:58:06 GMT -7
After going through all the parts in the box like its Christmas morning. I go through whats right/wrong needs to be replaced/modded to my satisfaction and according to my plan (Always have a plan...Always). Then the first order of business is to get the body right. After scrubbing the body inside and out with dish soap. (Mold release agent repels paint like it is its job) I get out a pencil or in this case Tamiya panel line enhancer and apply it to all the areas I can find faults/mold lines.   |
|
|
|
Post by mustang1989 on Jun 16, 2020 18:06:26 GMT -7
Man you're nailin' it with all the problematic areas of these Revell Charger bodies. This kit shares a lot of the same parts as it 68 and 69 year model counterparts. I spent ALOT of time on my 69 Charger straightening out all the blemishes.
|
|
|
|
Post by stitchdup on Jun 16, 2020 18:15:02 GMT -7
Ah man I've built one of them and i didn't notice half the blems you've seen so I'll be watching for tips and hints. I'll have to watch for them on the other 3
|
|
|
|
Post by pete on Jun 16, 2020 18:34:35 GMT -7
Now...Some like to prime first then sand fill imperfections. Some don't bother at all...It's all good! you do you man! Me...I start with what the manufacturer gives me. As far as the manufacturer is concerned, Out of the box, the body is ready for a paint finish. Clean up some flash and your good to go...Nah. Great paint requires a great surface to put it on. Manufacturer supplied surfaces are not conducive to great paint finishes. Generally they are too smooth and filled with imperfections. See above post...I do all the correction and filling I can on the bare plastic before going to primer. Its just easier (And more cost effective) than burning off a coat of primer looking for imperfections. I start with the mold lines. They are the easiest things to remove. Get/make yourself a few small sanding blocks in various shapes and sizes. These are necessary if you want to make/keep accurate lines/contours as well as create smooth flat surfaces to lay your paint on. Keep some masking tape handy too. Use it to protect contours, scripts and body lines you don't want to loose. As you can see in the enclosed pics. I sanded the mold lines off the body. Wherever you still see a black line or shadow is a low spot that will have to be filled. Masking tape is protecting the body line that traverses front to back on all second gen chargers. I use a well worn piece of 320 grit sandpaper and a small rubber block. Go slowly and gently here, its too easy to burn off too much material. A little tip here for you guys if you didn't know this: Always sand towards the edge of a panel whenever possible. This keeps you from burning off the panel edge and having to rebuild it with filler later. I sanded all these mold lines from the tape up, towards the top edge of the panels. I could have sanded all the black enhancer off but, that would force me to do more filling than necessary to restore the panels shape. Gotta know when and where to stop.   Both sides of the body looked like this after sanding. So far so good. |
|
|
|
Post by pete on Jun 16, 2020 18:43:09 GMT -7
 My little rubber sanding block. This is my go to for 90% of my blocking/body work. |
|
|
|
Post by pete on Jun 16, 2020 18:44:40 GMT -7
 A shot of the tops of the doors at the base of the A pillars after sanding the mold line off. |
|
|
|
Post by pete on Jun 16, 2020 19:00:10 GMT -7
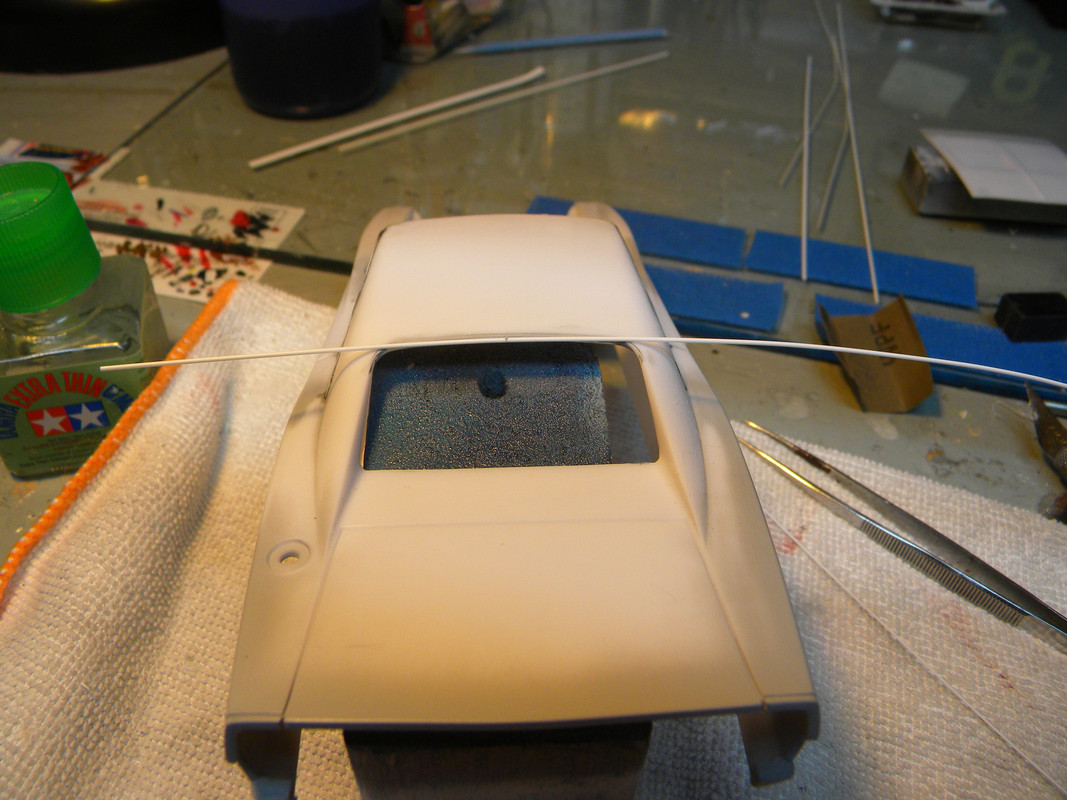
AS we continue on to the rear of the body...Yeah, more bad gree gree to correct. Revell in their infinite wisdom thought it was a good idea to put a break in the mold right below the rear deck lid duck tail contour.  this will be interesting to remove without burning off the contour on the top edge of the deck lid. But wait!... That's not all!! Got a two fer here. The trim around the back light is deformed and...Wrong. Thank the lucky stars for strip styrene in many shapes and sizes...Gonna need it here. Till next time gang, enjoy!!! Pete   |
|
|
|
Post by pete on Jun 16, 2020 19:11:48 GMT -7
I hear ya Joe, Stitch. Sometimes I drive myself nuts sussing this stuff out. ( Manic comes to mind) LOL...Gotta laugh though. Took way longer to write this stuff up than it did to do the work and take pics
|
|
|
|
Post by poet on Jun 17, 2020 5:51:13 GMT -7
Great project, and great work Pete. I too like to do as much as I can in bare plastic, just works best for me. I love your process, though I don't have the patience for your level of attention to detail, but I applaud it. Please continue sir.
|
|
|
|
Post by mustang1989 on Jun 17, 2020 6:27:09 GMT -7
I hear ya Joe, Stitch. Sometimes I drive myself nuts sussing this stuff out. ( Manic comes to mind) LOL...Gotta laugh though. Took way longer to write this stuff up than it did to do the work and take pics I completely understand that with the writing the story line that comes with the building. There's a balance point there with updates vs. build progress. lol |
|
|
|
Post by stitchdup on Jun 17, 2020 8:59:05 GMT -7
I hear ya Joe, Stitch. Sometimes I drive myself nuts sussing this stuff out. ( Manic comes to mind) LOL...Gotta laugh though. Took way longer to write this stuff up than it did to do the work and take pics I wouldn't worry too much Pete, half the time i have things assembled before i mind on to take pics |
|
|
|
Post by pete on Jun 17, 2020 12:43:27 GMT -7
Ok back to the back of the car...Rear valance/tail panel fitment: I never liked how the lower valance was designed on these charger kits, I understand why they are the way I dislike em but... Its an easily remedied issue. I cut a horizontal slot on both ends of the valance panel just above the top edge of the panel, before gluing it to the body. I only glued the corners of the valance panel to the lower quarters so I can remove the tail panel for further work/detailing after cutting it loose. My reason for dislike is this...The seam at the bottom corner of the quarters/valance is too prominent after final assembly. I have seen this seam on real chargers both original and restored, it is never very prominent and in some restorations the builder will fill this seam completely for appearance reasons. I plan to fill mine completely too.  Before cutting it off on the black lines.   after cutting the panel loose. |
|
|
|
Post by pete on Jun 17, 2020 12:49:54 GMT -7
These are the offending seams I am referring to:They will get filler when everything else on the body does.   |
|
|
|
Post by pete on Jun 17, 2020 13:03:34 GMT -7
I did manage to remove most of the mold line on the deck lid with my favorite sanding block and a worn out square of 320 grit paper. I didn't loose the contour of the ducktail either. A bit of filler primer will finish this out and life is good!!  You may have noticed the little chunk missing on the end of the sanding block? This is what it is:  And this is what its for:  Had the same predicament with another build years ago and this was my solution. See, filler wont stay put in a tiny groove, like the mold line on the deck lid here once you start sanding. Two passes and "POOF" fillers gone, line aint. Or worse happens, been there and don't care to go back. Next up will be front clip/valance, hood and bumper fitment. Till then, enjoy!! PS: If you have any questions regarding what you see/read in this thread...Please please please, do not hesitate to ask. No such thing as a dumb question accept for the one that isn't asked. Pete |
|
|
|
Post by stitchdup on Jun 17, 2020 13:54:48 GMT -7
You say there are no dumb questions. Heres one nobody has ever answered for me that I use at job interviews to ensure they remember me. Why do pjamas have pockets and what are you supposed to put in them? Every time i've asked I've gotten the jobs
|
|
|
|
Post by pete on Jun 17, 2020 19:07:01 GMT -7
LOL... Not a dumb question man! Just one that makes you say Hmm  Kinda like this one...Why are sneakers called sneakers?...Cant you just walk in em?? I'm gonna go out on a limb and guess the pockets are so you have a place to keep your rubber...duckie...  |
|
|
|
Post by pete on Jun 17, 2020 19:26:01 GMT -7
|
|
|
|
Post by pete on Jun 17, 2020 19:33:41 GMT -7
This is what I used to fix the gap...Evergreen quarter round.  Heres the panel with the corrected gap. 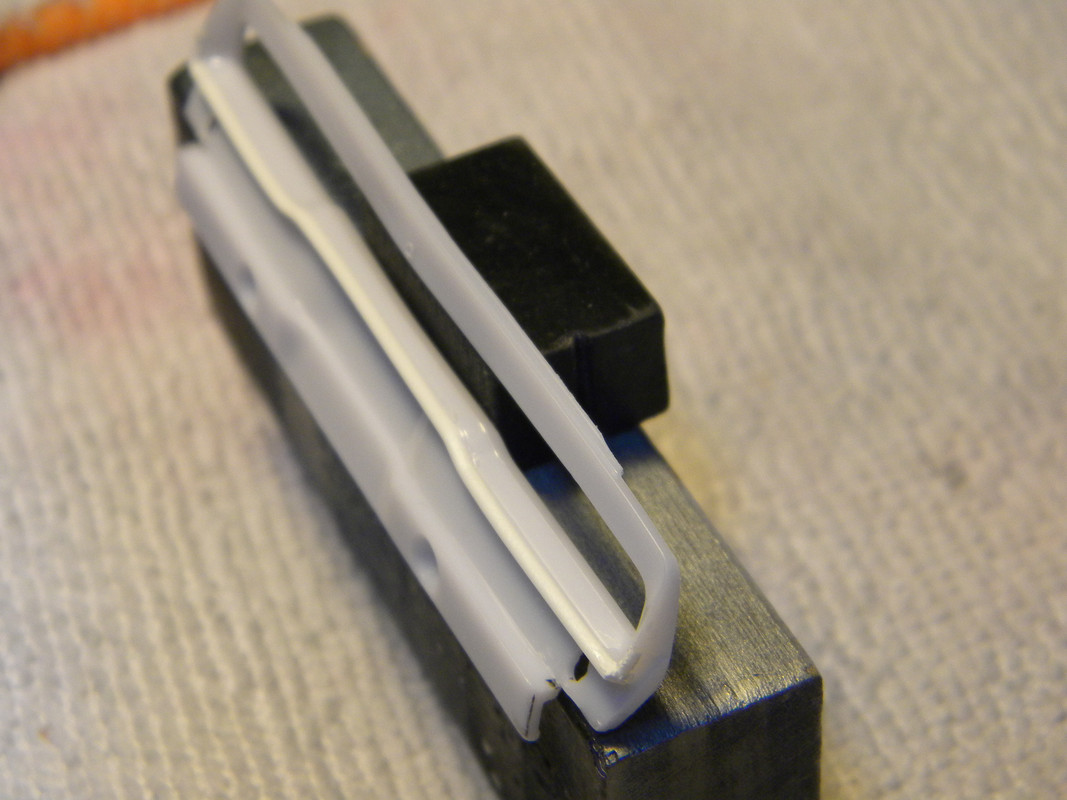 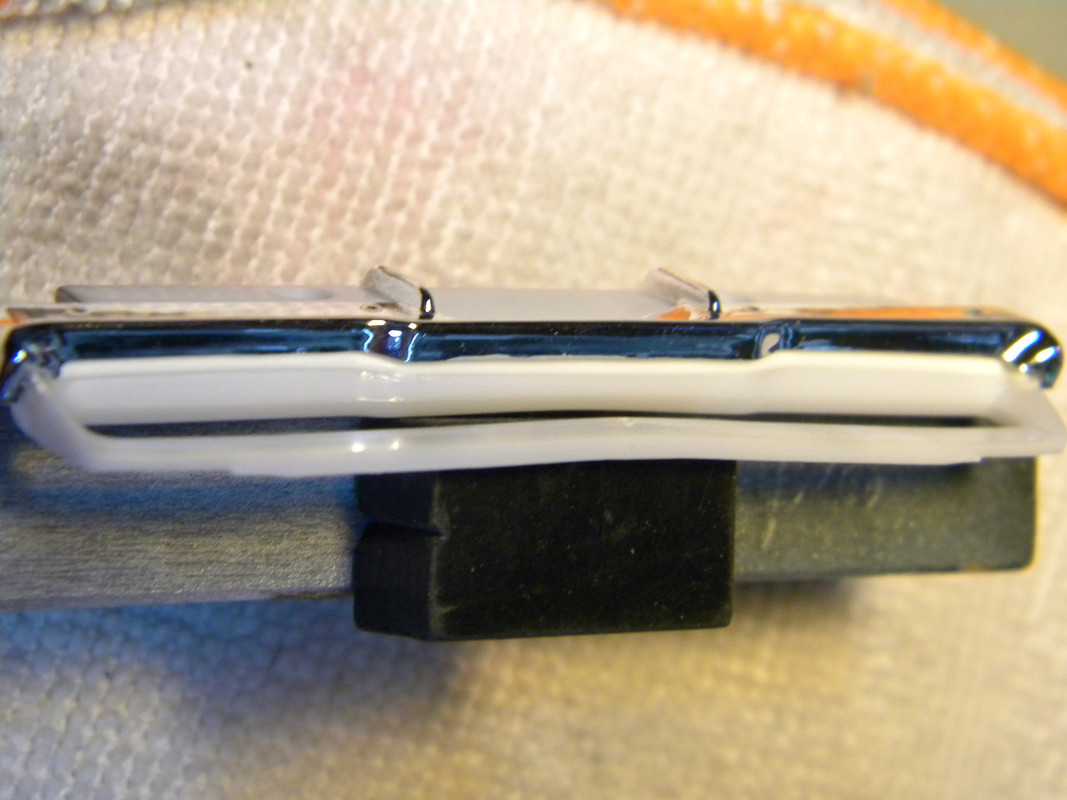 Next: Have to fix the end gaps (Tighten them up) Then, on to the front clip...Yeah, had a surprise there too.  |
|
|
|
Post by stitchdup on Jun 17, 2020 20:49:59 GMT -7
LOL... Not a dumb question man! Just one that makes you say Hmm  Kinda like this one...Why are sneakers called sneakers?...Cant you just walk in em?? I'm gonna go out on a limb and guess the pockets are so you have a place to keep your rubber...duckie...  Funnily enough I know the answer for that one, its cos when they first arrived kids called them sneakers cos they were much quieter than the dress shoes used previously |
|
|
|
Post by pete on Jun 18, 2020 18:52:16 GMT -7
|
|
|
|
Post by stitchdup on Jun 18, 2020 19:00:39 GMT -7
That looks much cleaner Pete. Its gonna make the finished model stand out from the others
|
|
|
|
Post by pete on Jun 18, 2020 19:05:07 GMT -7
|
|
|
|
Post by pete on Jun 18, 2020 19:08:10 GMT -7
That looks much cleaner Pete. Its gonna make the finished model stand out from the others Thanks! Yeah I like to make it all fit nice and tight and or cleanly. Your right, it really does make a difference. Just gotta remember to leave enough room for the paint, or nuthin fits...LOL |
|
|
|
Post by pete on Jun 20, 2020 14:17:27 GMT -7
|
|
|
|
Post by pete on Jun 20, 2020 14:30:00 GMT -7
|
|
|
|
Post by sharp on Jun 20, 2020 18:52:58 GMT -7
This is looking good! Nice work Pete
|
|
|
|
Post by DeeCee on Jun 21, 2020 3:20:59 GMT -7
Amazing work Pete, it's a pleasure to watch you do all of this,
and thank you for posting up all the small details, it is very much appreciated mate.
|
|





 Both sides of the body looked like this after sanding. So far so good.
 My little rubber sanding block. This is my go to for 90% of my blocking/body work.
 A shot of the tops of the doors at the base of the A pillars after sanding the mold line off.


 Before cutting it off on the black lines.
 after cutting the panel loose.


 And this is what its for:
 Had the same predicament with another build years ago and this was my solution. See, filler wont stay put in a tiny groove, like the mold line on the deck lid here once you start sanding. Two passes and "POOF" fillers gone, line aint. Or worse happens, been there and don't care to go back. Next up will be front clip/valance, hood and bumper fitment. Till then, enjoy!!
 Kinda like this one...Why are sneakers called sneakers?...Cant you just walk in em??


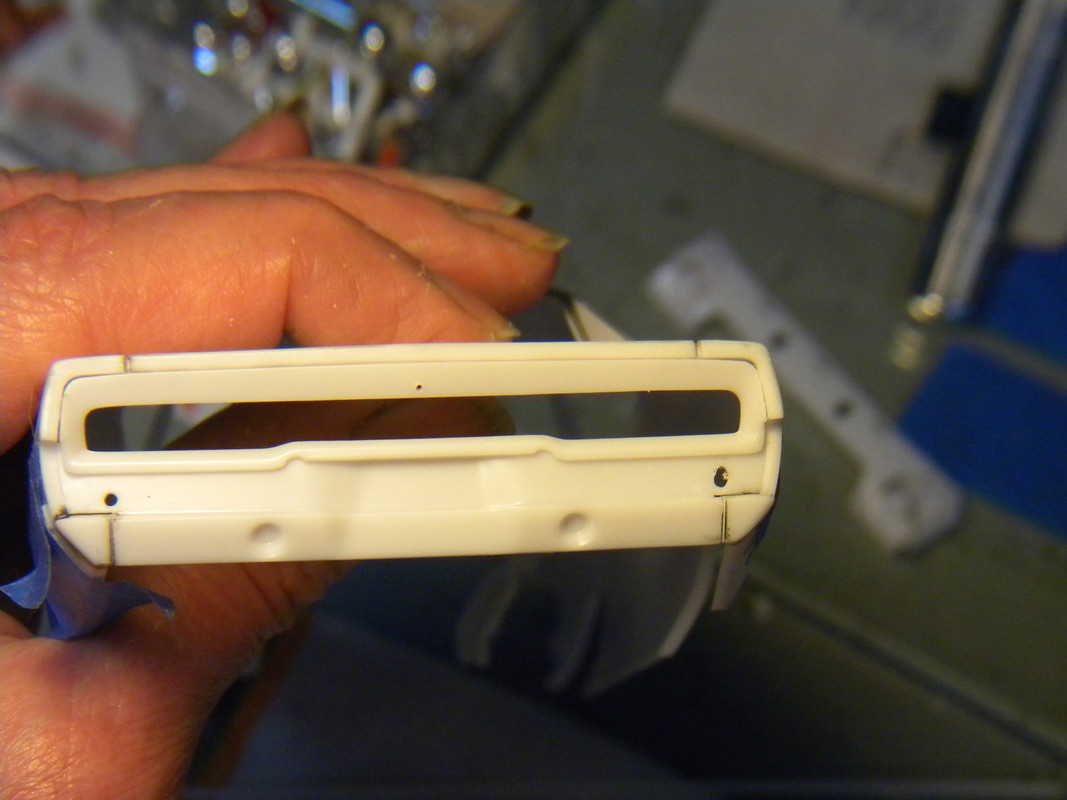


 Tightened up the front bumper/valance panel to get the fit right. Bumper assembly was pushing the fenders apart causing my already adjusted hood gaps to go wide.
  Easy to file down the inside of the fenders to close the gap back up where it belongs. Oh yeah, I stripped the chrome off the bumpers and a few other things. Alclad chrome paint will fix it all when the time comes. Also: I scribed the separation line between the bumper and the grill insert to give both a bit more depth and definition. There really was no separation between the two. Even after the chrome was stripped off. Heres a few more pics!


