|
|
Post by mmthrax on Apr 14, 2019 19:56:58 GMT -7
Looking good Joe.
Your hard work is paying off.
|
|
|
|
Post by mustang1989 on Apr 19, 2019 16:08:19 GMT -7
Thanks Mike, Leon and Mark. I’ve since applied the gloss coat and decals onto the wings and fuselage. Will post photos when I get back from out of town.
|
|
|
|
Post by kpnuts on May 12, 2019 5:32:56 GMT -7
Looking great mate
|
|
|
|
Post by mustang1989 on May 13, 2019 14:44:27 GMT -7
Thanks Ken. I'm still working on this one even though I haven't posted anything on it in a while. Progress is slow but I don't want to rush the cockpit framing. Very difficult part of the model. |
|
|
|
Post by Deano on May 14, 2019 3:14:34 GMT -7
This build just keeps getting better.
|
|
|
|
Post by mustang1989 on May 15, 2019 8:27:29 GMT -7
This build just keeps getting better. Thanks Dean. I'm still pluggin' away at it. The cockpit enclosure is one of the hardest I've ever done in terms of painting and assembly. |
|
|
|
Post by mustang1989 on Jun 20, 2019 6:33:59 GMT -7
Finally got the nose/ gondola/ cockpit assy installed and worked in. All I can say is WOW!! And I do mean me some WOW!! Utterly ridiculous how Hasegawa designed this kit in terms of assembly. I got it though.
It took me a while to get it all sorted out with an approach to this but I think I found one that worked for me. I had glossed the entire aircraft, applied the decals and then adhered the cockpit assy to the front of the aircraft and masked it off. From there I filled the huge lip that was on the top of the fuselage to cockpit join and worked it all in together by sanding and yet more filling. This resulted in the seam not disappearing from the top of the fuselage at the cockpit join so I added a seam in the name of uniformity. It's not "correct" but it looks uniform. After that I black based the entire sanded and filled area, applied the irregular gray pattern and went back over it in RLM 82. Here it is with a little touch up painting to do on the starboard side of the affected area.

And here it is with the flat coat with fading effect applied. No fading on the sides but some on the upper surfaces of the bird. I'm hoping I didn't go too far. icon_hmm_zps07rcoppf
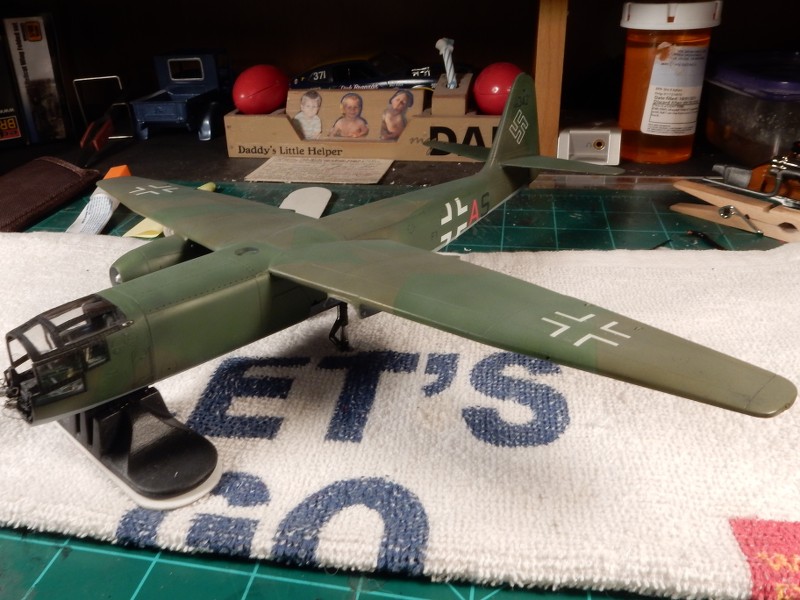
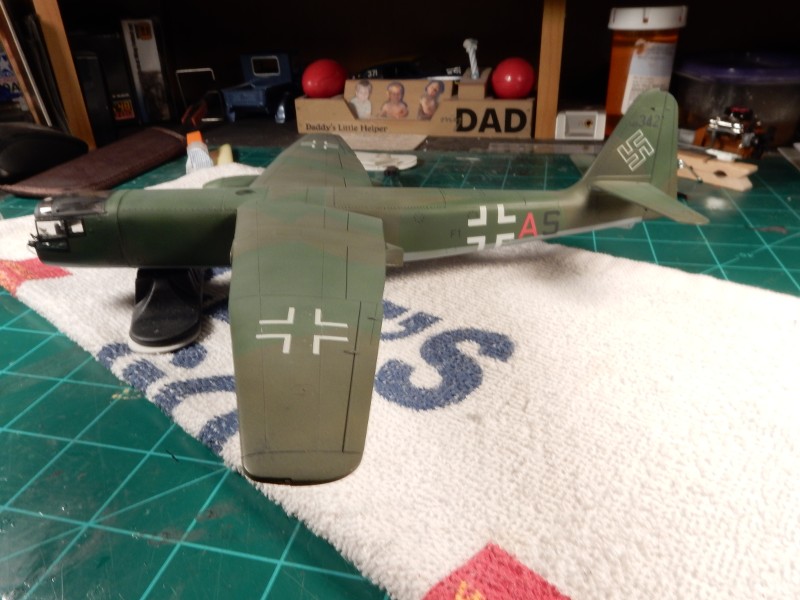
Currently working on the main and nose wheel part of the landing gear and painting up the landing gear doors. I didn't like how flimsy the main landing gear was so I braced it against the outside of the fuselage on both sides where the landing gear doors will cover it so as to conceal the braces. Still truckin' along......
|
|
|
|
Post by mmthrax on Jun 20, 2019 13:37:31 GMT -7
Looking good sir. This is an interesting project. You're doing some great work.  |
|
|
|
Post by leon on Jun 20, 2019 13:50:30 GMT -7
This looks fantastic Joe! Your getting close now.
|
|
|
|
Post by sharp on Jun 20, 2019 20:12:06 GMT -7
This is looking great Joe. That Vallejo model air sprays nice.
|
|
|
|
Post by Deano on Jun 20, 2019 22:29:18 GMT -7
Looks good Joe. I think the fade is spot on.
|
|
|
|
Post by DeeCee on Jun 21, 2019 2:29:42 GMT -7
That's looking pretty damn cool Joe, love the attention to detail, as always mate.
|
|
|
|
Post by mustang1989 on Jun 21, 2019 5:33:03 GMT -7
Thanks you guys for all the good comments. 
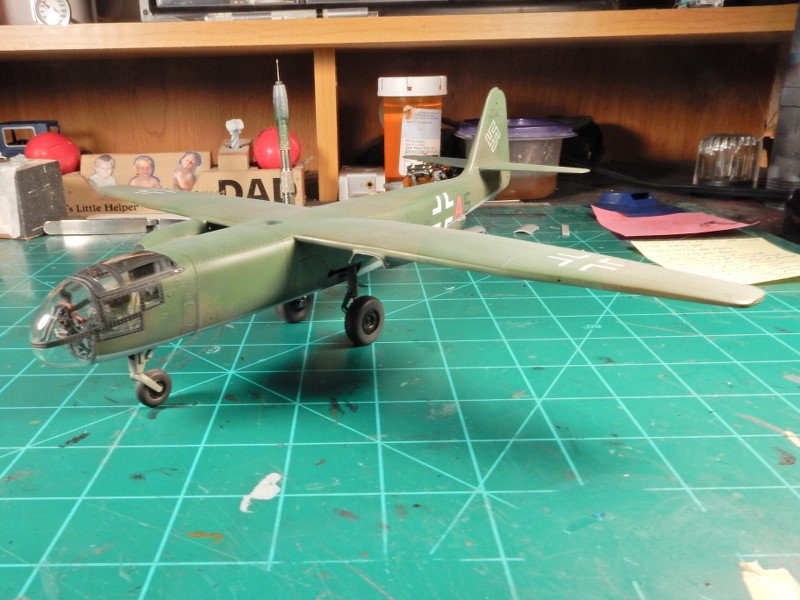
FINALLY...………...I've got this bird on wheels. One of the inherent weaknesses of this kit lies in the main landing gear. Really flimsy parts and allow excessive "wobble" when loaded with the weight of the aircraft. I fixed this by putting a hidden shim between each main landing gear strut and the fuselage opening for the gear bays. I just cut a small square piece of styrene and slipped it between the strut and the rear bay wall. Can't even see it but it worked like a charm in making the main gear ALOT more sturdy. Gear doors have to be painted and installed and some touch ups are needed on the gear after gluing into place as well as a little weathering on the tires but the wheels are now down.
Folks I never thought I'd get this far with this plane. I consider it a small milestone in getting back to aircraft building as it was really hard to break away from the automotive stuff but I'm feel like I'm finally getting back in a groove to where I can at least have an aircraft build going while working on the auto subjects.
N E wayz…..Today's update:
|
|
|
|
Post by mmthrax on Jun 21, 2019 7:59:55 GMT -7
Outstanding work.
Very cool Joe.
two-thumbs-up-smiley-emoticon
|
|
|
|
Post by stitchdup on Jun 21, 2019 9:13:30 GMT -7
Nice work Joe
|
|
|
|
Post by kpnuts on Jun 21, 2019 13:16:17 GMT -7
Great work mate, as always.
|
|
|
|
Post by mustang1989 on Jun 23, 2019 17:36:21 GMT -7
Thanks Mark, Les and Ken.
|
|
|
|
Post by leon on Jun 24, 2019 2:42:56 GMT -7
Nice work on the landing gear Joe!
|
|
|
|
Post by DeeCee on Jun 24, 2019 2:59:32 GMT -7
|
|
|
|
Post by mustang1989 on Jun 24, 2019 8:52:21 GMT -7
Thanks Leon and Dale. emotion-11
|
|
|
|
Post by mustang1989 on Jun 29, 2019 6:39:50 GMT -7
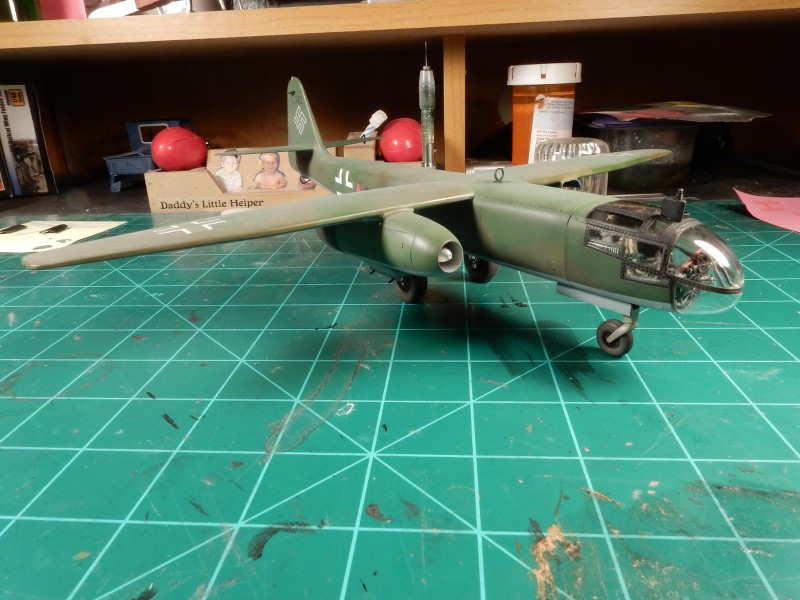
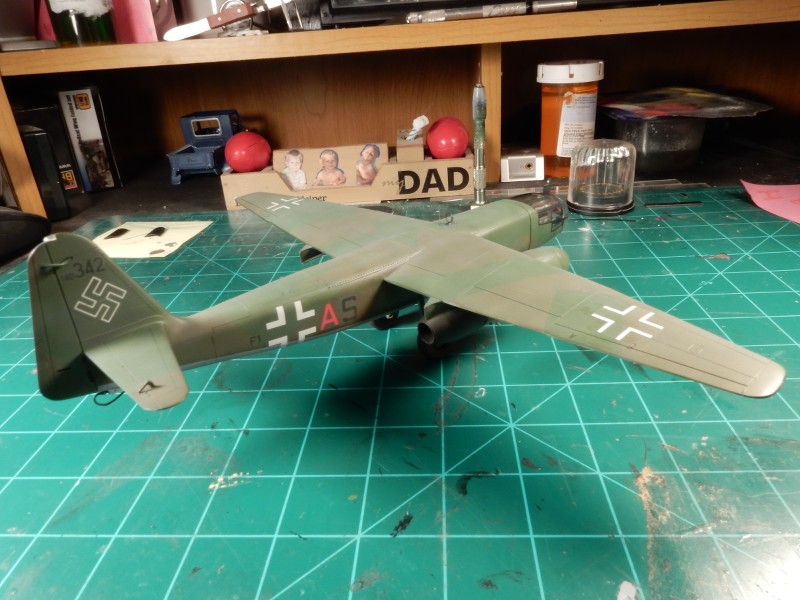
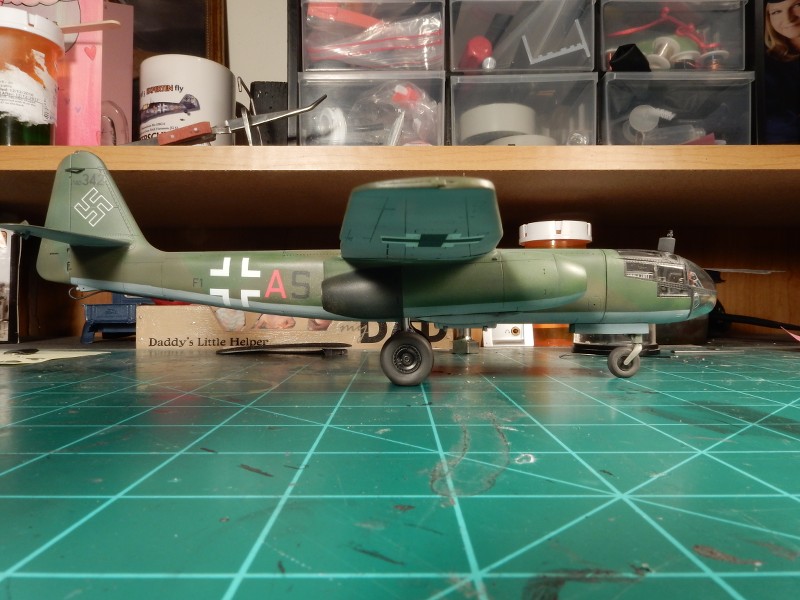
Sorry for the absence around here as of late but I've been spending ALOT of time at the bench trying to get this one finished. I'm down to the REALLY short list on getting the base aircraft finished so I can move on to the engine assembly and detailing. Only a few things left like main gear doors and struts, aerial antenna, painting the rivets on the cockpit framing and installing the pitot tube. I mean I've got a little clean up to do here and there but this part of the build is just about to a close. Really stoked about displaying the engine though.
Overall, I've got some mixed feelings about this kit here because of fit issues but mostly because it has now moved into the most difficult kit that I've ever built category. Just really don't care for it even though it's supposed to be the best 234 kit out there. No worries however, I'm saddling up and moving forward and have learned a lot from this build.
Here's where we're at now...…….close.....real close.
|
|
|
|
Post by leon on Jun 29, 2019 8:09:19 GMT -7
Looks good Joe! Nice to see your over coming the difficulties.
|
|
|
|
Post by mustang1989 on Jun 30, 2019 11:14:53 GMT -7
Looks good Joe! Nice to see your over coming the difficulties. Thanks Leon. I do appreciate the comments. Yeah, this kit is a true tuffy!! Just don't like the Hasegawa "way" of building this one. Still got the engine build and detailing to go but I'm looking forward to my next plane which you all should find very interesting to say the least. Stay tuned...……….. |
|
|
|
Post by mmthrax on Jul 1, 2019 8:00:16 GMT -7
Looking really good.
On the downhill side for sure with this one.
Nice work sir.
|
|
|
|
Post by mustang1989 on Jul 2, 2019 12:46:13 GMT -7
Looks good Joe! Nice to see your over coming the difficulties. Thanks Leon! |
|
|
|
Post by mustang1989 on Jul 2, 2019 12:48:43 GMT -7
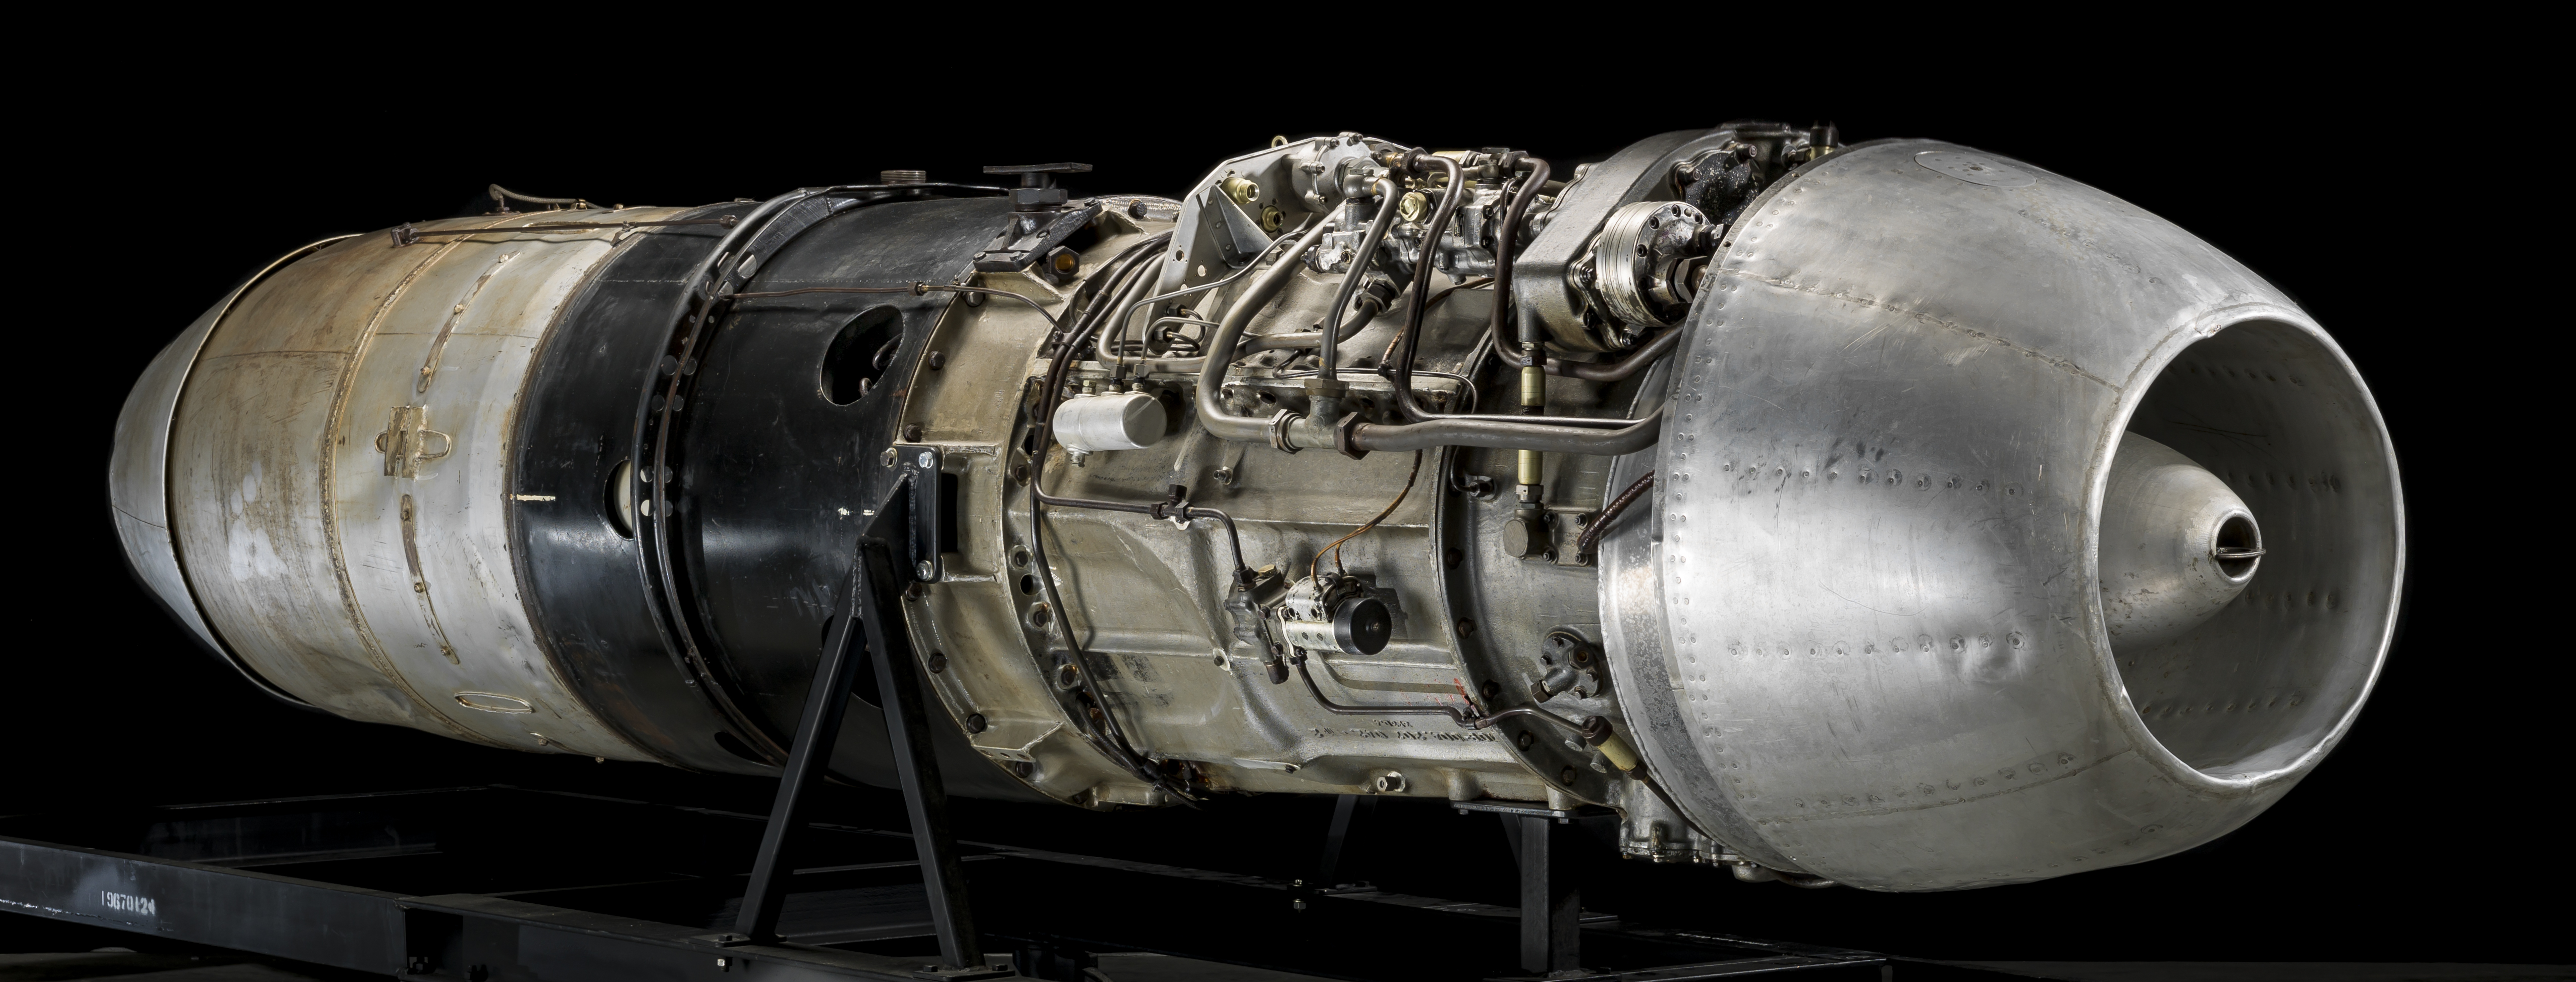
Looking really good. On the downhill side for sure with this one. Nice work sir. Thanks Mark. Just about finished with the base aircraft build and am doing research on the Junkers Jumo 004 powerplant so I can get started on it. I'm really stoked about that part of the build. 
|
|
|
|
Post by leon on Jul 2, 2019 14:13:10 GMT -7
Looks like you have your work cut out in the detail dept. Joe!  |
|
|
|
Post by Deano on Jul 2, 2019 22:13:28 GMT -7
Very crisp work here,lots to like!
|
|
|
|
Post by mmthrax on Jul 3, 2019 6:16:51 GMT -7
On the downhill side for sure with this one. YIKES! Maybe I spoke too soon. Looks like you have another "module" to tackle. With what I've seen you are capable of, I'm really looking forward to this part of the build. I'm sure I can learn a lot. Carry on sir.... |
|
|
|
Post by mustang1989 on Jul 4, 2019 8:46:54 GMT -7
LOL! Thanks you guys.
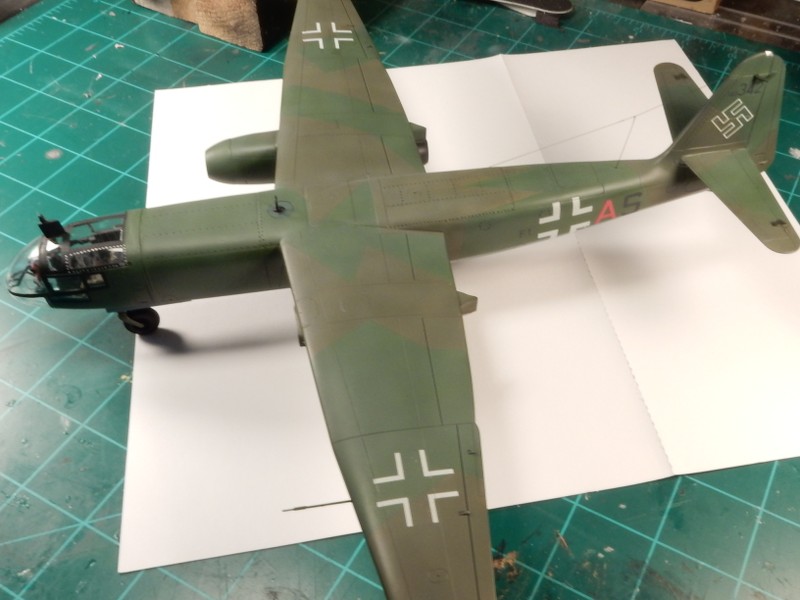
This morning saw the finish of the aerial antenna and I'm currently working on those painting those 2000 rivets on the cockpit framing.  I'm just glad the hard part of this build is now behind me. I'm just glad the hard part of this build is now behind me.
|
|