|
|
Post by Deano on Oct 17, 2019 0:12:44 GMT -7
That is gobsmackingly awesome mate, love it.
|
|
|
|
Post by DeeCee on Oct 17, 2019 0:40:42 GMT -7
More awesome work Joe. looking like a winner for sure.
|
|
|
|
Post by mmthrax on Oct 17, 2019 7:18:08 GMT -7
Fantastic Joe. Love your detailing.
I dig the Pentastar keychain and keys.
Is that a PE piece that someone sells, or did you scratch it?
|
|
|
|
Post by stitchdup on Oct 19, 2019 10:04:22 GMT -7
where's the eye popping emoji when ya need it, thats awesome Joe
|
|
|
|
Post by mustang1989 on Oct 19, 2019 14:04:08 GMT -7
Thanks guys! Mark: Those are PE items from Model Car Garage. Well I've officially completed the interior tub today. All that's left is installing the door lock knobs into the holes that I drilled in the top of each door which will happen after I've got everything installed neatly and securely up into the body as to avoid damage to the knobs during the interior install. Revell really did everything right on this kit. If you look up under the dash on the passengers side you'll see the HVAC case. AM items include the seat belts and buckles, PE foot pedals, PE steering wheel spokes, PE keys and key chains and of course the carpet/ flocking. All chrome was applied with a Molotow Chrome pen except for the chrome endcap on the rear of the console. I'm pretty pleased with this. 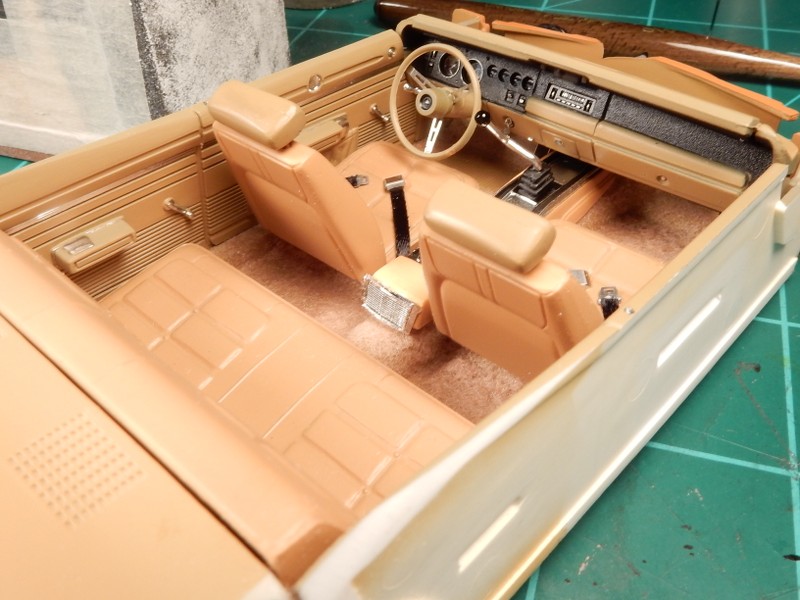 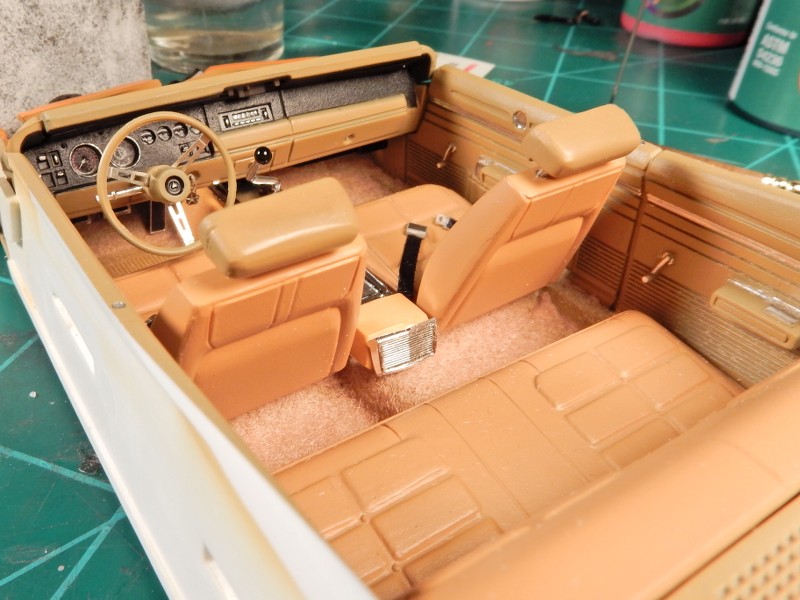 |
|
|
|
Post by leon on Oct 19, 2019 17:50:50 GMT -7
Interior looks great Joe!
|
|
|
|
Post by mmthrax on Oct 21, 2019 7:14:47 GMT -7
Looking at that just makes me happy.
You've done a super job Joe.
Really ace work.
praising-the-lord-smiley-emoticon
|
|
|
|
Post by RetroSpectKustoms on Oct 21, 2019 14:52:12 GMT -7
Stunning interior. Detail in it is perfect!
|
|
|
|
Post by mustang1989 on Oct 25, 2019 4:07:43 GMT -7
Thanks Leon, Mark and Bruce!! First off.....I worked on the battery a couple of days back and decided not to go with real cables for this one. Gonna concentrate most of my efforts on the brake lines coming off of the master cylinder and more so on the engine which I still haven't decided which way to go with yet. icon_hmm_zps07rcoppf  Secondly.....If you wanna know about stress...…I can tell you about that. I have never seen an interior that fought the whole way going into a car body before. I just knew one of the windows were gonna pop out or that there was going to be an interior side panel pop out of place or something was gonna break while installing it. I can't really turn the car body upside down to do all of this either due to all the flocking going everywhere during the popping and all from fitting this interior up into the body. I had to do all of this with the body upright which made things really hard to do. But............…I got it. Thank God-I got it.  |
|
|
|
Post by lowlife on Oct 25, 2019 5:29:09 GMT -7
Wow... big-drooling-smiley-emoticon
Love watching these super detailed builds come together, absolutely stunning details Joe !
There's always a bit somewhere that's a pain in the A$$ ! You got the interior in that's the main thing !
Look forward to more, but then I'll miss watching the build ! sSig_DOH
|
|
|
|
Post by mustang1989 on Oct 25, 2019 8:37:42 GMT -7
Thanks Martin. No worries on when this car is completed. There'll be another build right behind it. I made sure the stance was gonna be where I wanted it before I secured the chassis in place......aaaand…..it looks like we're right on! egyptian  |
|
|
|
Post by mmthrax on Oct 25, 2019 11:25:37 GMT -7
Yeah, that's lookin good Joe.
Great stuff.
|
|
|
|
Post by DeeCee on Oct 25, 2019 15:39:35 GMT -7
This is one stunningly detailed build Joe, and i LOVE that interior mate.  |
|
|
|
Post by mustang1989 on Oct 26, 2019 6:23:18 GMT -7
Thanks fellas. Yesterday was a big leap forward in progress.
|
|
|
|
Post by leon on Oct 26, 2019 6:49:15 GMT -7
I hear you on the interior fit issue! Had my share.Stance looks good.
|
|
|
|
Post by mustang1989 on Oct 26, 2019 18:10:18 GMT -7
I hear you on the interior fit issue! Had my share.Stance looks good. Thanks Leon. I will say that even though the interior fit was dicey that Revell really had their “A” game on when they made this kit. If you want to build a Charger then this is a must have kit. |
|
|
|
Post by mustang1989 on Oct 31, 2019 19:39:54 GMT -7
Got some done on the engine bay this morning. Again, the newer Revell kits seem to include more than the average bear (but then again.....this is a Pro Modeler kit) Steering columns are not usually present in auto kits. I've got the holes drilled in the shock towers to install the retaining nuts and studs for the shocks later. I may have to tinker with that steering column a little bit paint wise to break up the monotony.   |
|
|
|
Post by mmthrax on Nov 1, 2019 14:29:32 GMT -7
Looking good Joe.
I like the different shades and tones.
|
|
|
|
Post by mustang1989 on Nov 1, 2019 19:11:18 GMT -7
Looking good Joe. I like the different shades and tones. Thanks Mark. I went ahead and took the steering column/ gear box back out and painted it all semi gloss black and brought the details out with a silver lead pencil. Helped a lot. Okay......I managed to get the hair raising task of installing the wheels all done. Sounds simple but I made the wheel mounting holes on the rims an oval so I could get this one just wee tad lower. Had to get all the wheels at just the right height so I wouldn't wind up with a "3 wheeler". The stance is now locked in. I also got the back panel all painted up, detailed up and bumpered up and installed. I hit the body with a little more polish but can tell I need to do it again just to get it just right. 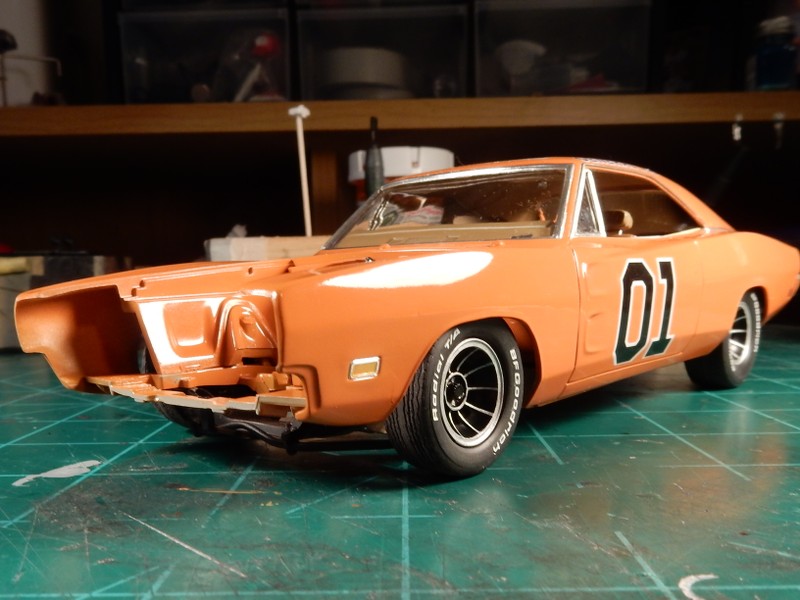 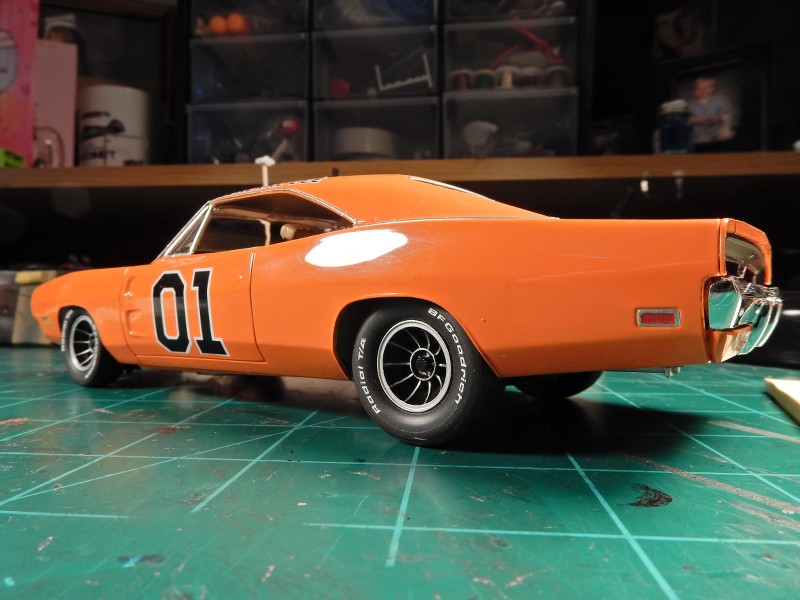 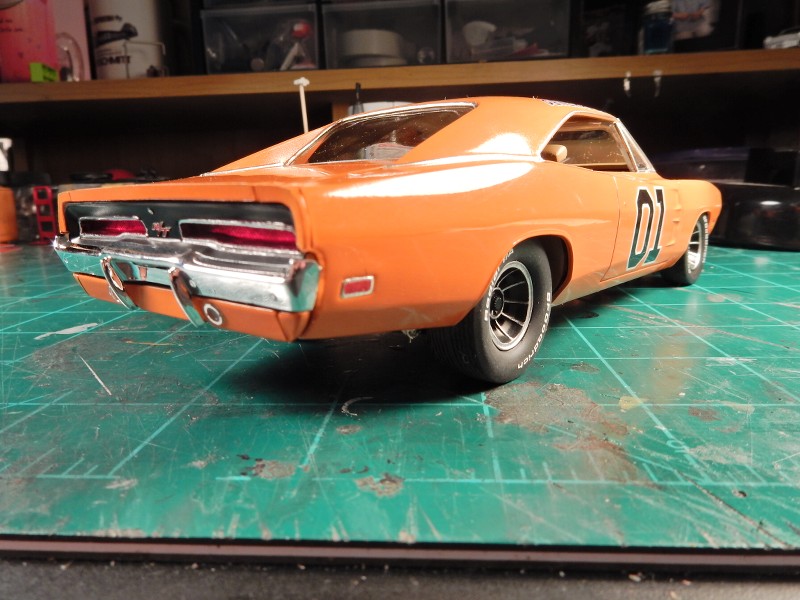 |
|
|
|
Post by leon on Nov 2, 2019 6:17:20 GMT -7
Looking good Joe!
|
|
|
|
Post by Deano on Nov 2, 2019 13:23:49 GMT -7
This is an awesome project without a doubt.
|
|
|
|
Post by mustang1989 on Nov 14, 2019 6:32:36 GMT -7
Thanks you guys!! Sorry for the lack of posting on this one. Been working on the engine pretty steady though. After painting and weathering and masking and shooting Molotow coat after Molotow coat on these rocker covers(and not succeeding at it this time around) I'm at the point where I think I can post something worth lookin' at. I must've stripped those rocker covers 3 times and tried the Molotow treatment on them. Just wasn't working out this time so I finally grabbed a set of chrome rocker covers from one of my spare Revell Hemi Dart kits that had a 440 in it and put them on. Still have some detail painting on those to do, exhaust manifolds install, carburetor & return spring & bracket and throttle linkage build and install, engine electrical harness and plug wires to put together and install but after a long couple of weeks I figured it was time to post something. I've still got a long way to go on this engine but here it is so far: 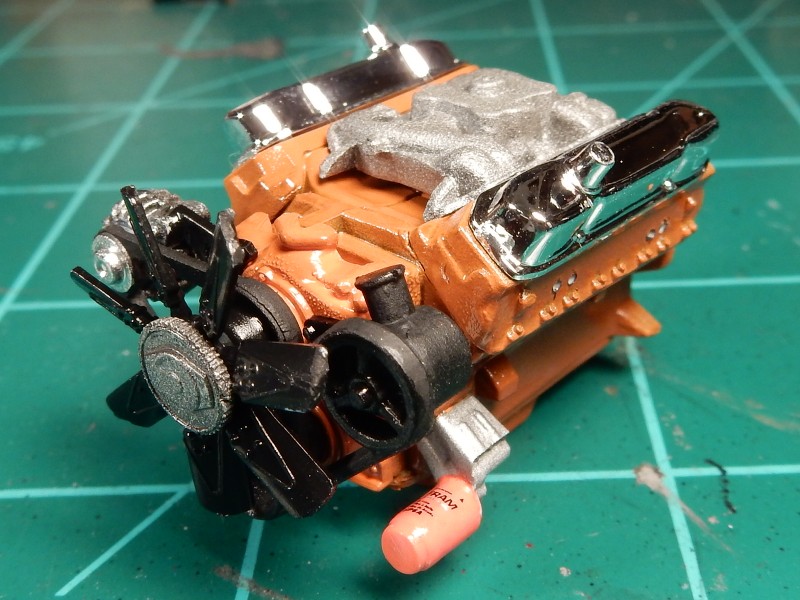 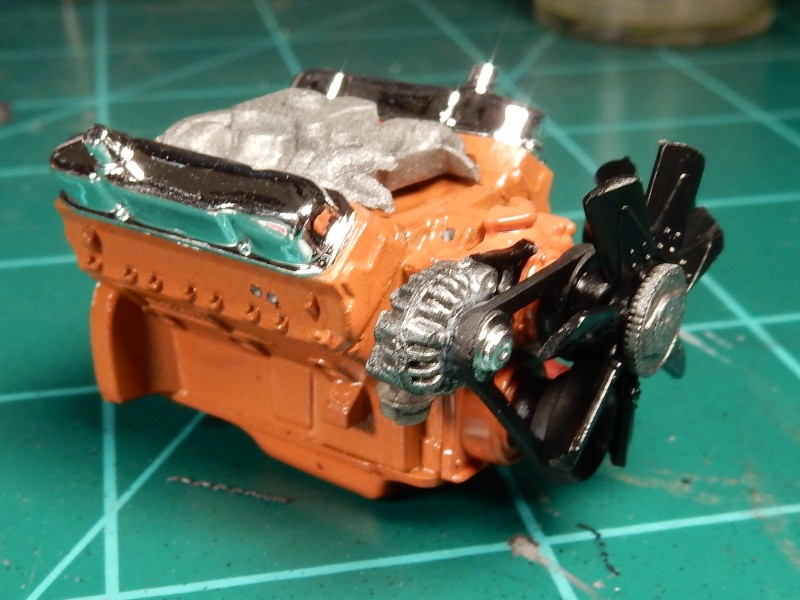 |
|
|
|
Post by mmthrax on Nov 14, 2019 8:14:08 GMT -7
Joe's doing what he does again! Outstanding as always sir. Reminds me of my 69 Roadrunner. Sold it to my buddy Ace. I always forward your progress to him. He is always blown away. He always says something along the lines of "Awesome! That's exactly what I remember it looking like, etc etc." You have a fan. My only suggestion would be to use a WIX oil filter instead of a FRAM. More filter media inside. Got to protect that big block.  emotion-11 |
|
|
|
Post by mustang1989 on Nov 14, 2019 13:59:32 GMT -7
LOL!!! Thanks Mark! I do appreciate the good word brother.
|
|
|
|
Post by leon on Nov 14, 2019 14:06:11 GMT -7
Engine is looking good Joe!
|
|
|
|
Post by RetroSpectKustoms on Nov 14, 2019 23:09:15 GMT -7
Looks great. I really am digging this build.
|
|
|
|
Post by mustang1989 on Nov 15, 2019 14:53:16 GMT -7
Thanks fellas. Today saw the completion of the engine bay prep. The one thing I couldn't get over was the clear windshield washer bottle out of the box. I%20dunno_zpsgjbxiscc A little weird but I guess they were trying to appeal to the average modeler. 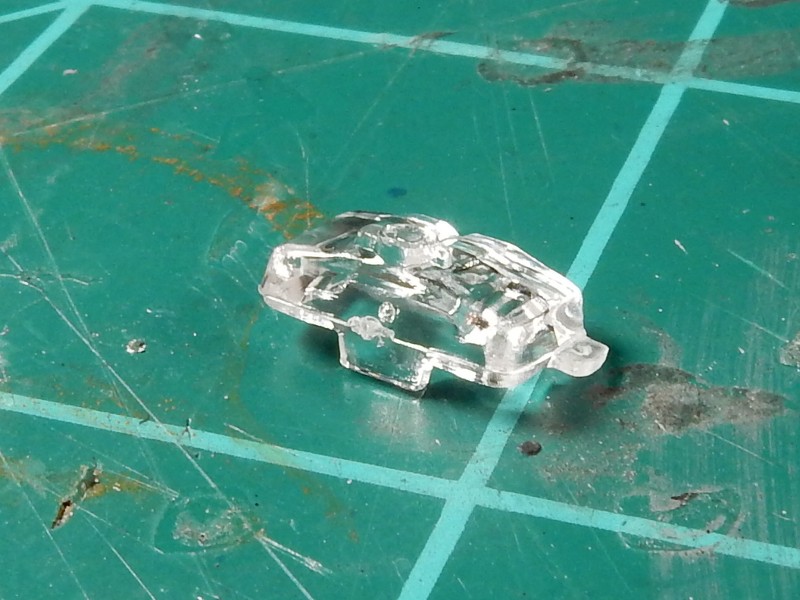 I made the necessary corrections to it and managed to finish up the engine bay today. Shock studs and retaining nuts were added to the shock towers, brake lines were fabricated and added and I brought out the highlights of the steering column with a silver lead pencil. Anyhow ....here's the engine bay all prepped for that 440 engine to be installed hopefully shortly.... 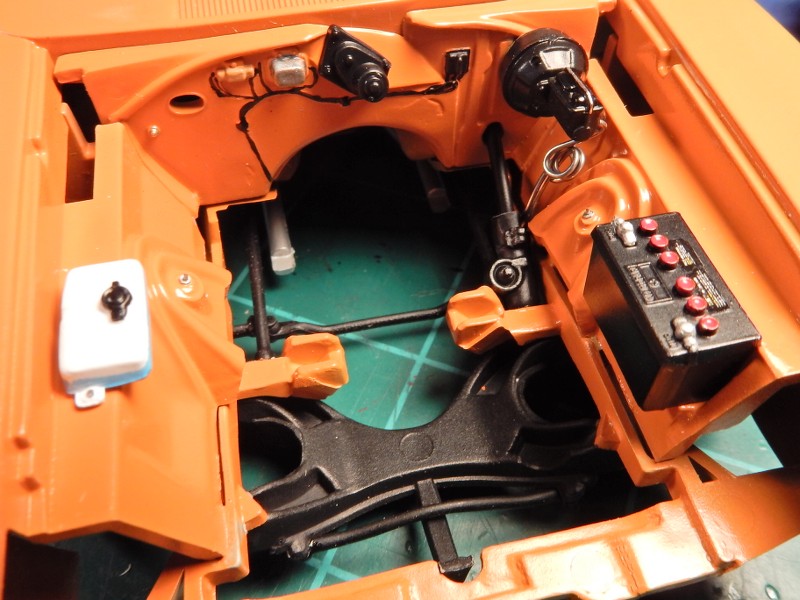 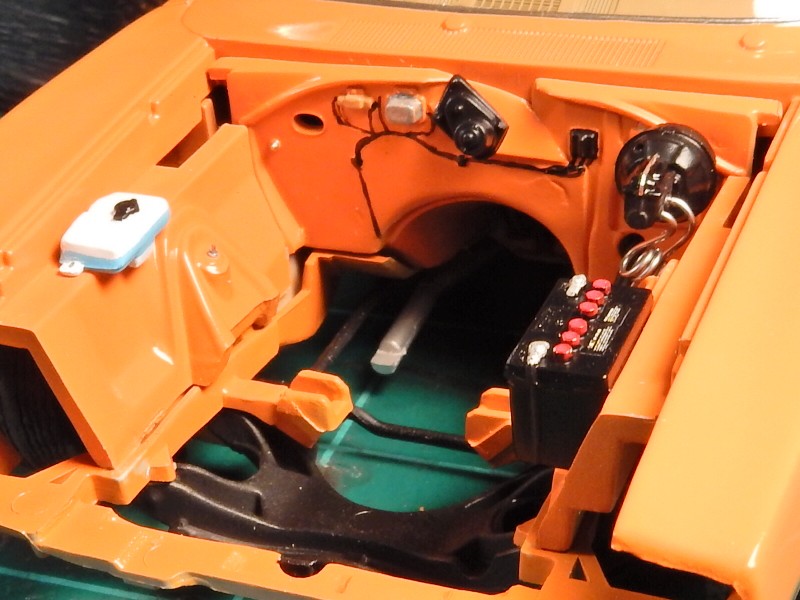 |
|
|
|
Post by leon on Nov 15, 2019 15:39:13 GMT -7
Engine bay looks great Joe! two-thumbs-up-smiley-emoticon
|
|
|
|
Post by mustang1989 on Nov 15, 2019 22:25:24 GMT -7
Engine bay looks great Joe!  Thanks Leon!! |
|
|
|
Post by mmthrax on Nov 16, 2019 21:28:21 GMT -7
Excellent work sir. I see the shock tops are in place.  |
|