|
|
Post by vcv8273 on Jan 23, 2017 6:29:59 GMT -7
Know what you mean Dennis just got my goat putting all the time into the body and paint only to have the interior let the whole thing down. Still there is a few days left and I'm up for the challenge already rectifying some of the faults. Have now glued half round styrene along the top of the door trims for a more defined chrome trim and have super glued some bmf to the door handles and has seemed to do the trick. Have also super glued bmf to the trim molding on the bottom of the console. Will post some pics latter tonight with a bit of luck. Cheers Steve
|
|
|
|
Post by Big D on Jan 23, 2017 6:44:41 GMT -7
Looking forward to it Steve.
|
|
|
|
Post by mustang1989 on Jan 23, 2017 17:40:15 GMT -7
That's some good BMF work there Steve. Don't give up on the AMT kits too quick Steve. Every brand has their good and bad kits. I don't usually have bad results with Revell kits but I bought a Revell Blue Max kit and it was the worst kit I have put together. I hated that kit. It's the same with AMT and all the others. He's got an excellent point with that one Steve. First off you're doing a terrific job on this bad boy with that paint, decal and BMF work. Secondly, like Dennis said, they all have their good ones, and bad ones. You're a good modeler and with that you can overcome a lot of kit shortcomings. Just take it all in stride and learn and grow in the hobby.  |
|
|
|
Post by vcv8273 on Jan 23, 2017 19:46:27 GMT -7
Thanks Joe hope to have the interior finished off today and will post some pics. It's actually turned out better than I expected so hopefully will get this build finished in time.Cheers Steve
|
|
|
|
Post by vcv8273 on Jan 24, 2017 19:33:55 GMT -7
|
|
|
|
Post by vcv8273 on Jan 24, 2017 20:02:52 GMT -7
|
|
|
|
Post by Big D on Jan 25, 2017 1:30:43 GMT -7
This is really going to be pretty Steve. I love the showroom floor look. Chassis just looks great and the interior and trim work fits this so well. As for shocks and sway bar silver would be my choice. Just seems like it would match the silver on the back part of the chassis and all well. Kind of balance it out.
|
|
|
|
Post by DeeCee on Jan 25, 2017 2:08:50 GMT -7
I agree with Dennis, it don't matter what color they SHOULD be, but they will look great in silver, or even red.
That interior looks sweet, and so does that paint job.. two-thumbs-up-smiley-emoticon
|
|
|
|
Post by vcv8273 on Jan 25, 2017 2:27:43 GMT -7
Thanks Dennis and Dale for the comments. Think I may do the shocks in silver and the bar in red for a bit of contrast. Cut back the front guard with meguires fine scratch remover and paint is looking real nice. One I cut back the whole body will polish with some meguires carrabana wax. Cheers and thanks for looking Steve 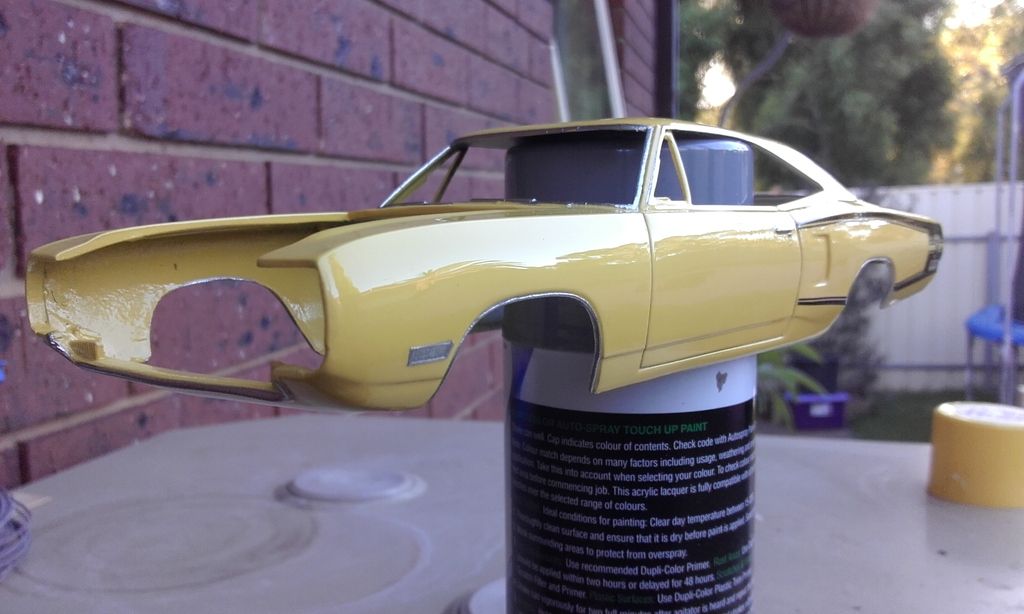 |
|
|
|
Post by DeeCee on Jan 25, 2017 2:38:45 GMT -7
Like glass mate... icon_shoutout_zpsg7nrfmdc
|
|
|
|
Post by stitchdup on Jan 25, 2017 2:50:33 GMT -7
The paint looks great and thats a big improvement on the interior from what it was
|
|
|
|
Post by coyotecrunch on Jan 25, 2017 7:49:59 GMT -7
Awesome work man!!! That paint sure has turned out sweet!!
|
|
|
|
Post by jmccann630 on Jan 25, 2017 7:57:25 GMT -7
Nice paint job Steve!
|
|
|
|
Post by vcv8273 on Jan 25, 2017 8:35:59 GMT -7
Thanks everyone for your comments have completed buffing and polishing the body, and also have painted the roof lining. Was a bit worried as I normally give the paint a couple of weeks to cure before buffing it but with the time frame had to chance it and I am pretty happy with the way it turned out. Hope to have the chassis finished tomorrow and then onto the motor which will be a basic detail of plug wires and fuel line. Cheers Steve
|
|
|
|
Post by vcv8273 on Jan 27, 2017 4:26:31 GMT -7
|
|
|
|
Post by DeeCee on Jan 27, 2017 4:32:57 GMT -7
Rims look good, engine is getting there mate, as for paint, i let my paint cure for 24 hours before polish.... bugger waiting, got models to build ..  |
|
|
|
Post by midnightprowler on Jan 27, 2017 5:03:49 GMT -7
Looking great. Might I suggest semi gloss or dullcote on the seats, they seem a tad shiny.
|
|
|
|
Post by vcv8273 on Jan 27, 2017 5:23:30 GMT -7
Thanks Dale and Lee as for the seats I was also thinking the same. Hopefully will have time to correct it cheers Steve
|
|
|
|
Post by mustang1989 on Jan 27, 2017 5:25:55 GMT -7
Man you've got this puppy looking fantastic so far Steve!!      On my engines I start off by black basing the whole long block this way when I apply paint I'm coating from dark to light rather than light to dark with each coat. This will accentuate the shadow effect better in the cracks and crevices of the engine. Then I mix up an ever so slight dark wash and apply over the base cover of the completed long block. Between the two techniques I've found that it brings out the base detail better. I'm no rivet counter and I hope you'll take this in the constructive and helpful way that it's intended. On my engines I start off by black basing the whole long block this way when I apply paint I'm coating from dark to light rather than light to dark with each coat. This will accentuate the shadow effect better in the cracks and crevices of the engine. Then I mix up an ever so slight dark wash and apply over the base cover of the completed long block. Between the two techniques I've found that it brings out the base detail better. I'm no rivet counter and I hope you'll take this in the constructive and helpful way that it's intended.
Here's the 340 that I built for my 1970 Dodge Challenger using these techniques along with some extra details to illustrate what I'm talking about. The effect is subtle but helps to bring out the detail for a more realistic look:
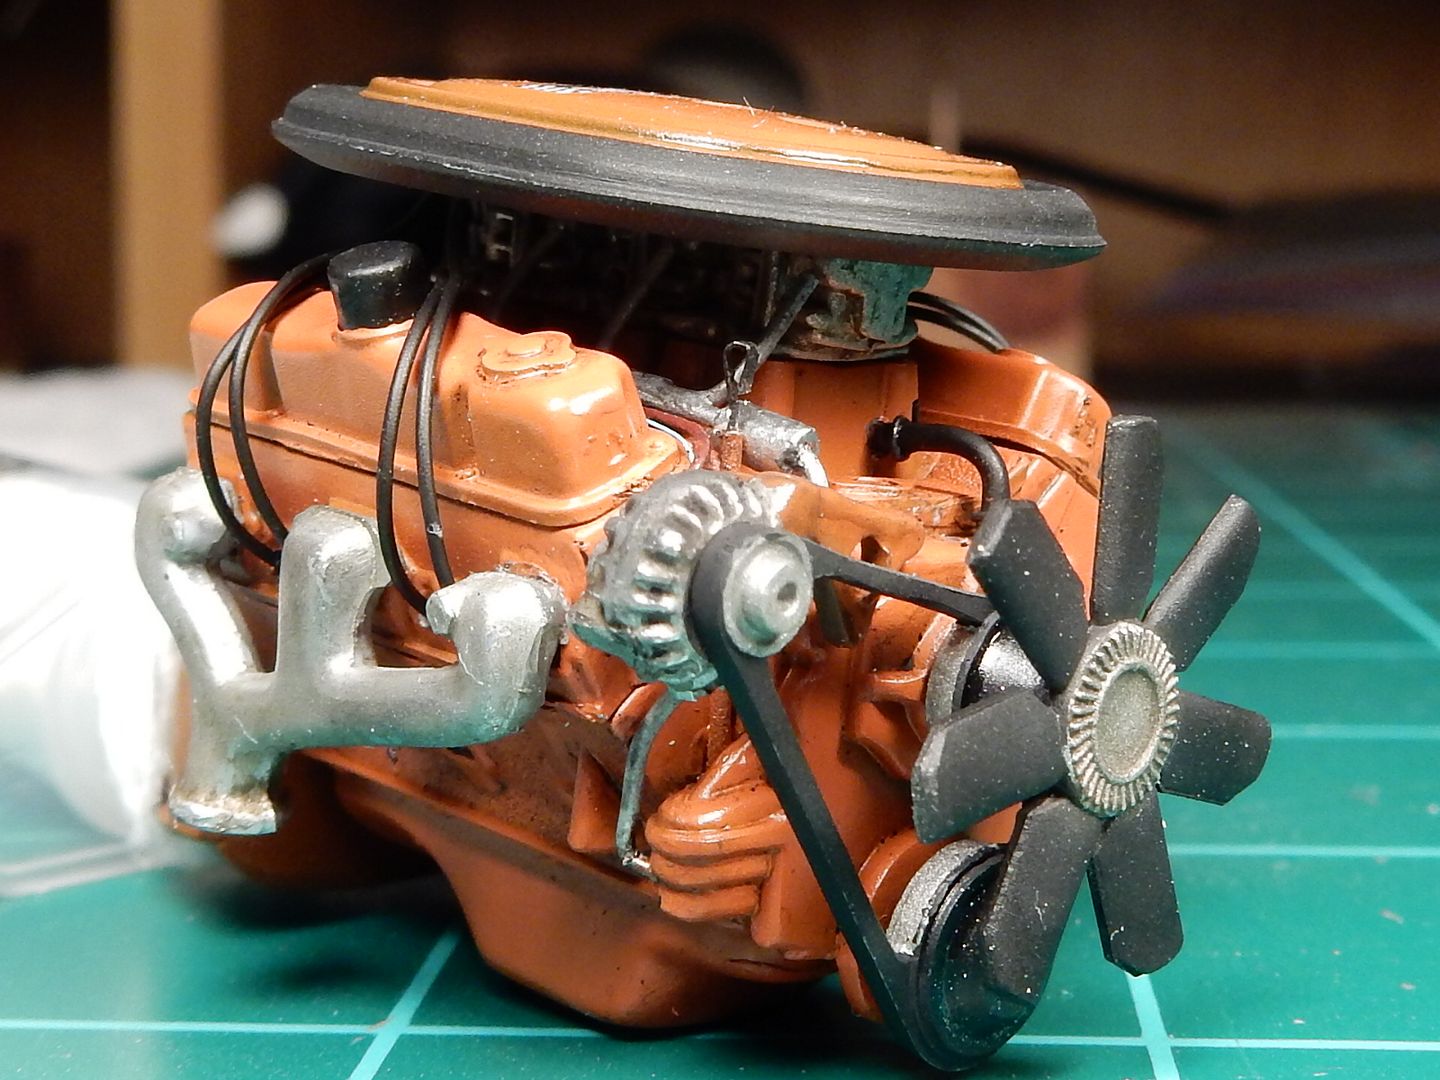
|
|
|
|
Post by mustang1989 on Jan 27, 2017 5:36:51 GMT -7
Thanks Dale and Lee as for the seats I was also thinking the same. Hopefully will have time to correct it cheers Steve Note that all of this is for the future builds. You're to the point now that I wouldn't apply any of that to this beautiful build.
So you'll see what I mean with the base process , here we are black based:
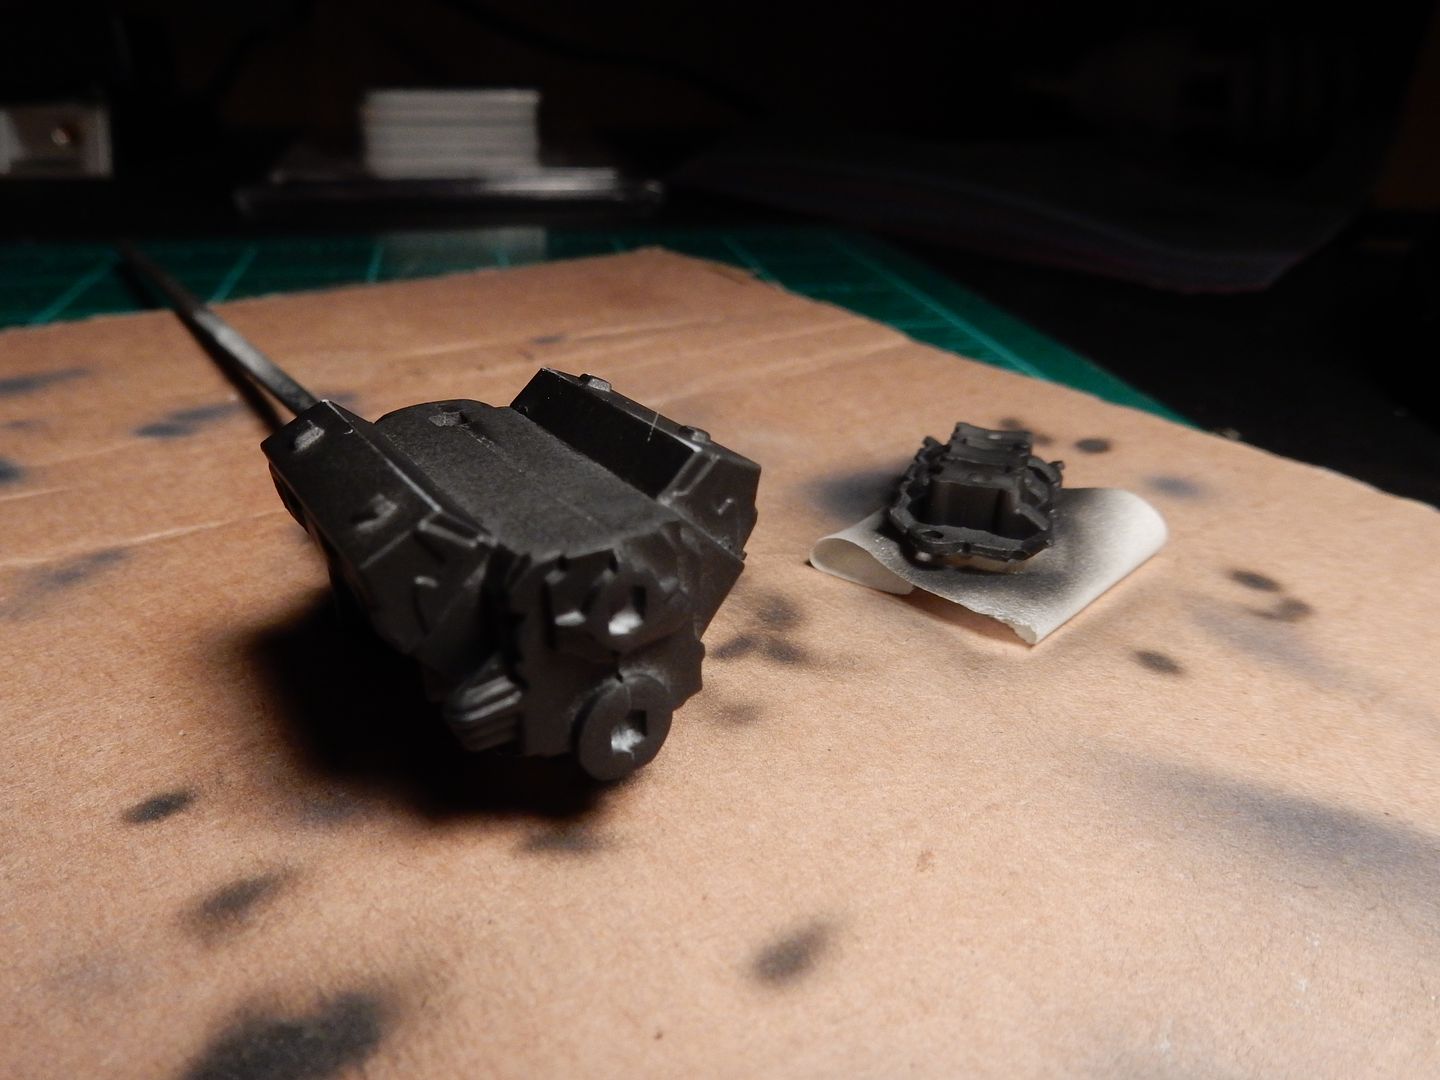
Building color:
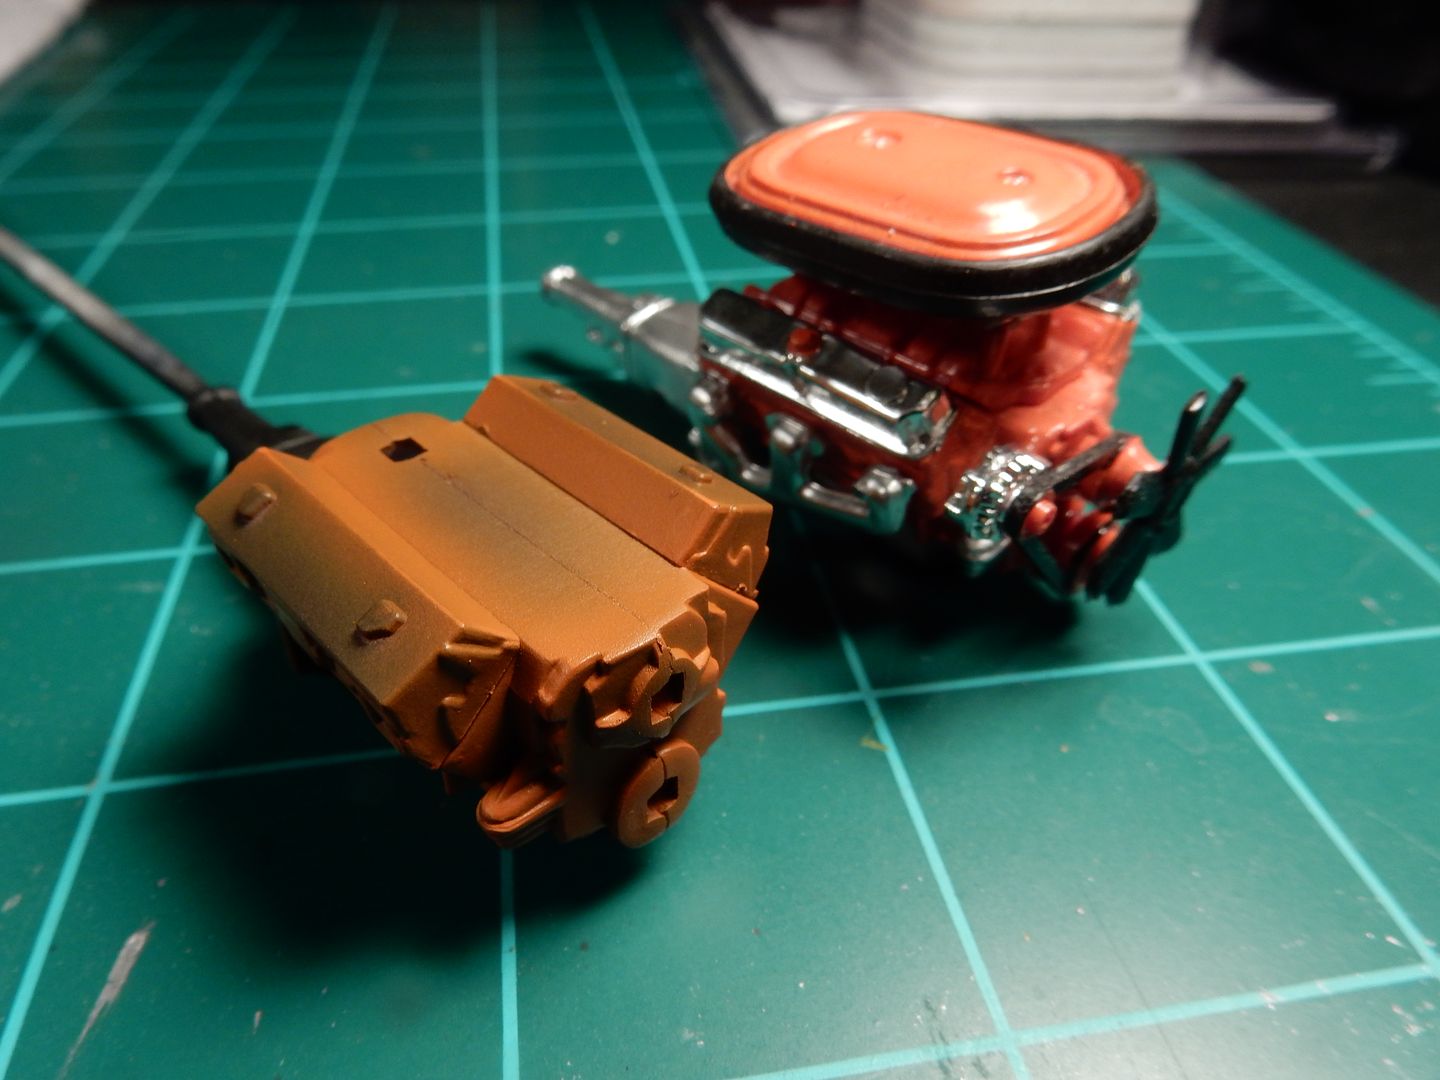
and completed long block after light wash: (I used a thinned down mix of Tamiya X-19 Smoke and Tamiya lacquer thinner for the wash)
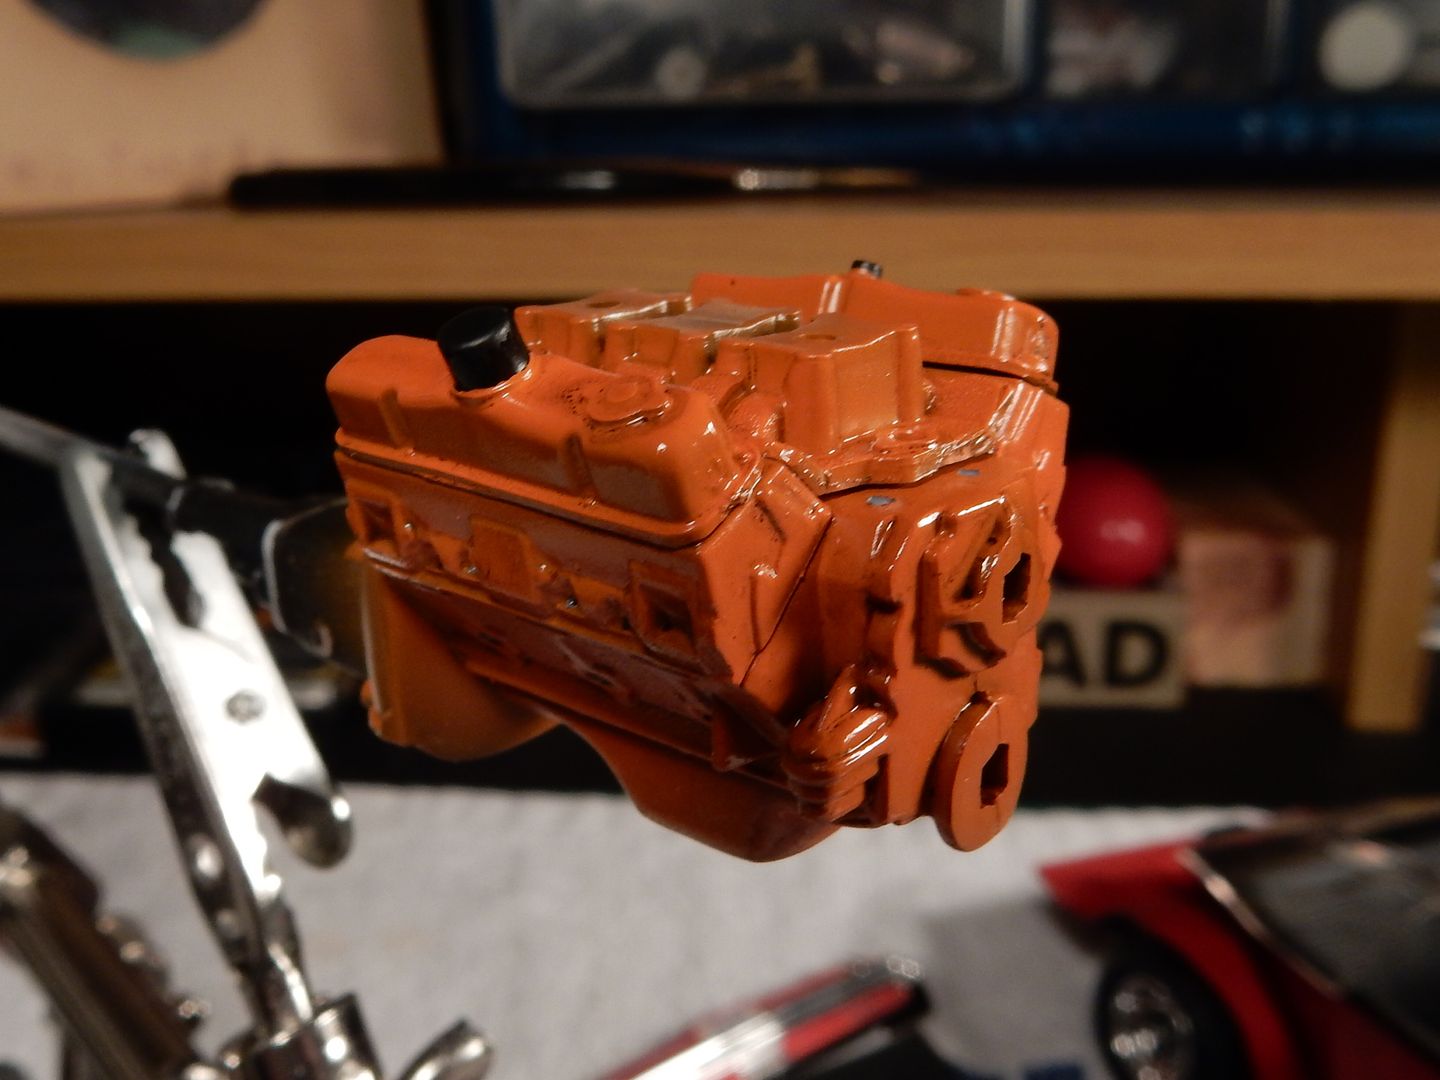
Again, I hope this helps out.
|
|
|
|
Post by vcv8273 on Jan 27, 2017 6:35:01 GMT -7
Thanks Joe for the tips and by no way have I taken it the wrong way as any tip to improve is most helpful, thats why I enjoy being on this forum so much, everyone seems to help and encourage everyone unlike some of the other forums I have been a part of. Cheers Steve
|
|
|
|
Post by mustang1989 on Jan 27, 2017 6:44:50 GMT -7
Thanks Joe for the tips and by no way have I taken it the wrong way as any tip to improve is most helpful, thats why I enjoy being on this forum so much, everyone seems to help and encourage everyone unlike some of the other forums I have been a part of. Cheers Steve Cool. I always approach on the side of caution when I don't know somebody very well. I've had it blow up in my face before. There are, as you know, nitpickers out there who just wanna be "right" and have the first and final say in the way things are "supposed" to be. I've noticed it to be particularly bad in with some of the armor guys. Aviation can be a close second to that but in any case I just try to be what I would want people to be to me...................... helpful. Looking forward to seeing more of this build. |
|
|
|
Post by vcv8273 on Jan 27, 2017 7:36:13 GMT -7
No problem Joe always open to tips and new techniques that can help.
|
|
|
|
Post by vcv8273 on Jan 29, 2017 15:21:08 GMT -7
Hi have the motor nearly complete now apart from a bit of touch up and then onto final assembly. Not really happy with the air filter assembly so its mounted loose so I can replace it latter when I have a good assembly and decal. Cheers Steve 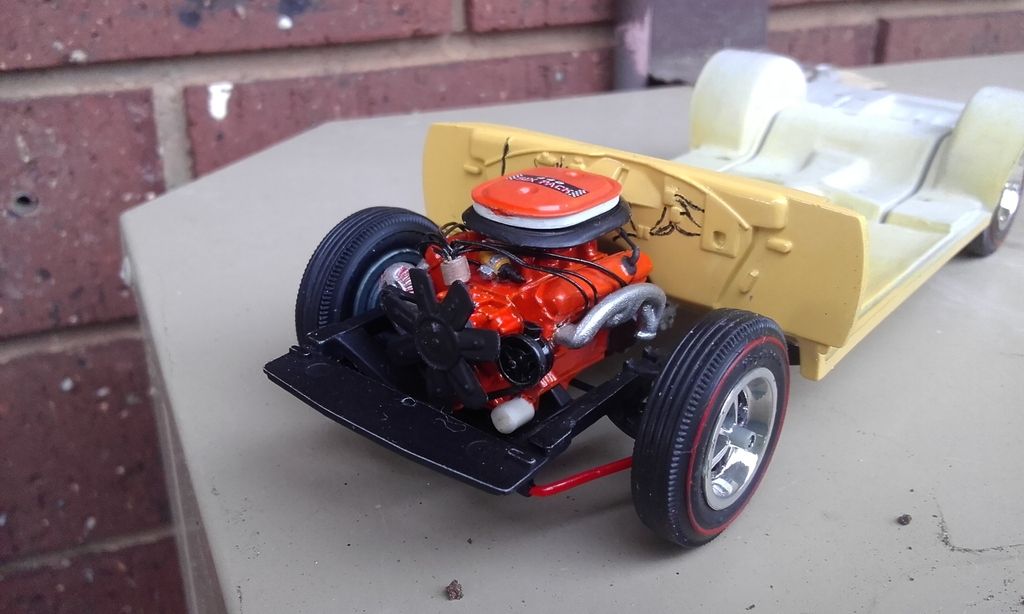 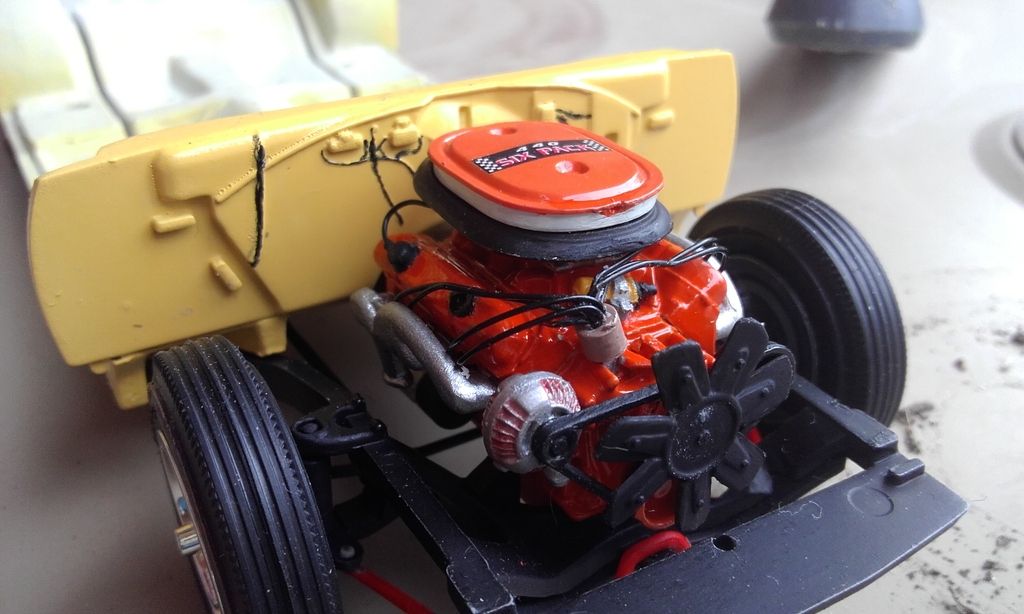 |
|
|
|
Post by Big D on Jan 29, 2017 15:31:07 GMT -7
Motor looks real good Steve. Nice detail work.
|
|
|
|
Post by coyotecrunch on Jan 29, 2017 16:58:00 GMT -7
Looking great!!!
|
|
|
|
Post by poet on Jan 29, 2017 17:06:03 GMT -7
Very nice!
|
|
|
|
Post by vcv8273 on Jan 29, 2017 17:36:20 GMT -7
Thanks everyone for the comments. Not 100% happy with the motor as now I realized I should have run the plug wires differently but overall with the time I have just want to get it done before closing time. Hope to have more updates later today. Cheers Steve
|
|
|
|
Post by stitchdup on Jan 29, 2017 19:03:40 GMT -7
Nice work, I dont see anything wrong with how you've run the wires either
|
|
|
|
Post by vcv8273 on Jan 30, 2017 22:16:10 GMT -7
|
|