|
|
Post by mustang1989 on Aug 22, 2024 2:28:04 GMT -7
It's a shame that kits come out with fit issues like this but, I guess better than no kit at all. Awesome stuff Joe! Right??!! I've heard that the Revell kit is worse in terms of fit. Thank you Tim!! |
|
|
|
Post by poet on Aug 22, 2024 2:41:32 GMT -7
Coming along quite nicely!
|
|
|
|
Post by mustang1989 on Aug 22, 2024 2:54:40 GMT -7
Coming along quite nicely! This is a pretty fun kit to build. Takes a LOT of extra work but it's sooooo worth it. Thanks buddy!!  |
|
|
|
Post by mustang1989 on Aug 24, 2024 5:51:43 GMT -7
I keep on inching closer and closer to the finish line with this build folks. I managed to get up and scuff the tire tread and apply the BF Goodrich decals. The sidewalls look a little wonky but straighten out when I install the wheels. Still gotta paint and detail the wheels and then shoot a dull coat over the tires after the cals are dry but here we are as of today: 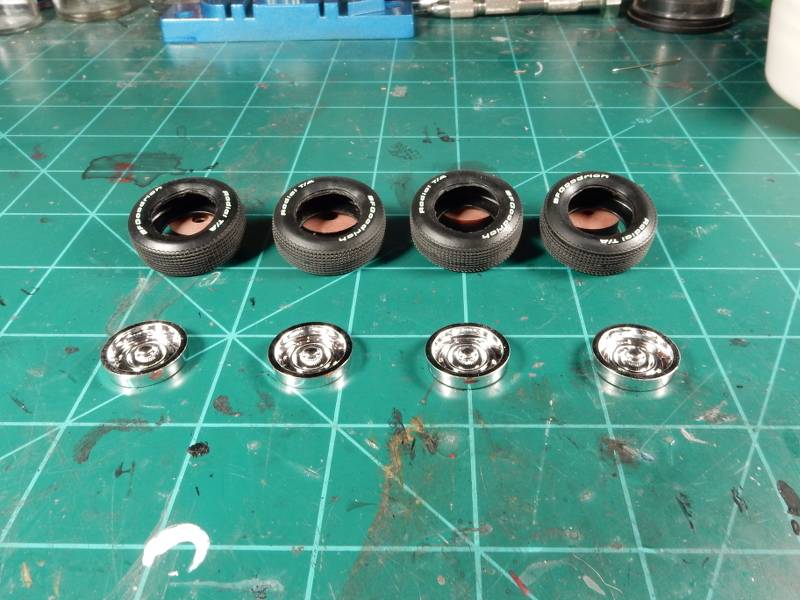 For the past few weeks, I've been looking for a ratchet & socket set to go along with that open battery compartment door in the interior. I just knew I had one in my parts stash somewhere and ended up finding it just a few days ago. A little clean up and then drilling the sockets out to add to the realism and we're about set. For good measure there'll also be a combination wrench laying in the lid when it's all said and done. Just gotta paint and detail it all up and the ideas will be brought to life. I've also been working on the "red rag" idea that's been rolling around in my head. I'll have to make it have a natural "lay" next to the socket set in the interior, but you get the idea here. 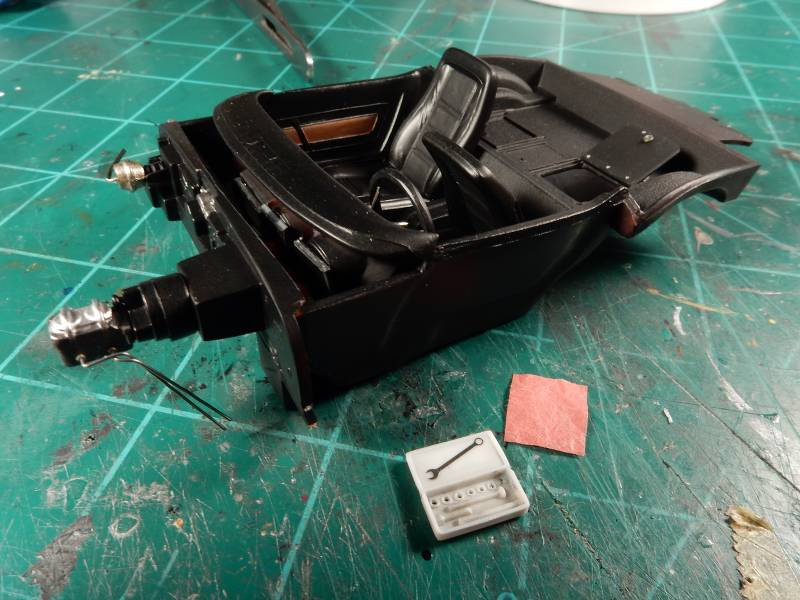 |
|
|
|
Post by RetroSpectKustoms on Aug 25, 2024 17:24:55 GMT -7
That interior looks fantastic!
|
|
|
|
Post by mustang1989 on Aug 26, 2024 11:42:57 GMT -7
That interior looks fantastic! Thanks a ton Bruce. This kit, although a LOT of work to whip into shape, is turning out to be one of my favorite builds. Well, I got the tool set all painted up and detailed and also got the wrench added to the lid on the toolset to fill a bit of a blank space on it and made a red rag and weathered that up a little bit to give it a bit of a used look. This is an important step for me because NOW I can move forward with assembling the body over the chassis. Here's the shot of that: 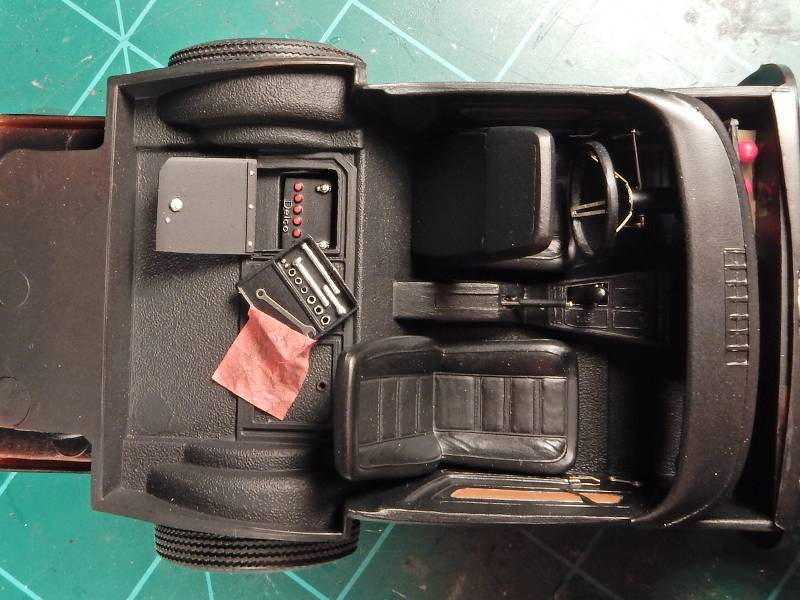 Wheels and tires are finished and I've got everything test fitted on the chassis as a sort of dry run I guess:  |
|
|
|
Post by mustang1989 on Aug 27, 2024 10:31:24 GMT -7
Moving right along on the mirrors and managed to get the nasty injector pin marks taken care of. Today saw the fitting of the interior tub into the body and then the chassis into the body for a real live test run on the fit in regard to where I'm going to be from a stance standpoint. Looks like the dash hit the windshield which....while a bummer....can be fixed. I'll have to trim some off of the lower portion of the windshield and trim the dash some to make everything work out right like I did on my AMT Camaro. This is going to allow the interior tub to slide forward a bit and up into the body a tad bit more. I think I've still got around 1/8" lower to go to get everything to drop into the proper stance but the wheels and tire positions are right on in regard to being just right as far as in/out positioning goes relative to the wheel openings. I'm currently mocking up my other unpainted Corvette to see exactly where I'm going to have to trim the windshield at to make this all happen. Here's where we are currently: 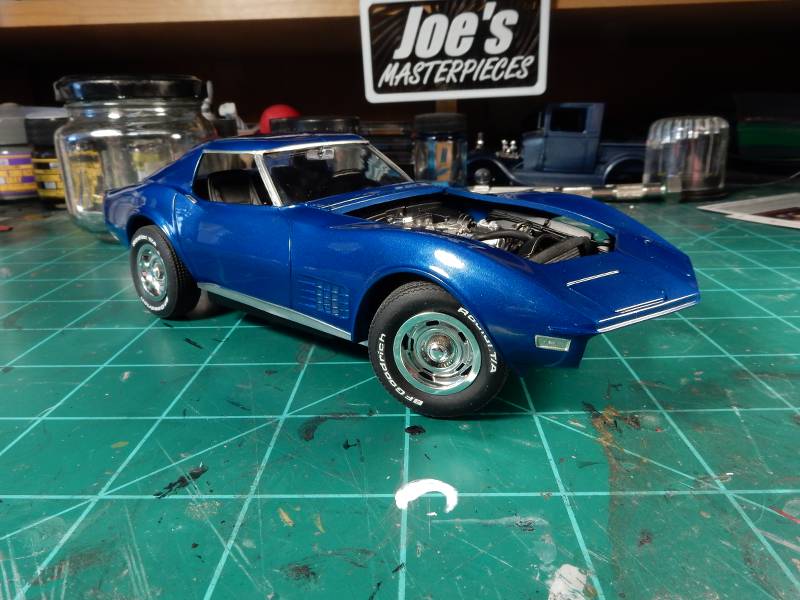 |
|
|
|
Post by mustang1989 on Aug 28, 2024 8:07:51 GMT -7
We're gettin' there. I've got the short list goin' on now. 1. Decal and Clear the hood
2. Paint bottom of hood 3. Chrome front and rear bumpers and detail out the front one. 4. Paint all side marker lenses
5. Install the outside rearview mirror 6. Detail and install all emblems and badging I now have the stance exactly where I want it. Lemme tell ya.....it took some fancy foot work to pull this off because despite all of my test fitting along the way, things did NOT want to go according to plan. 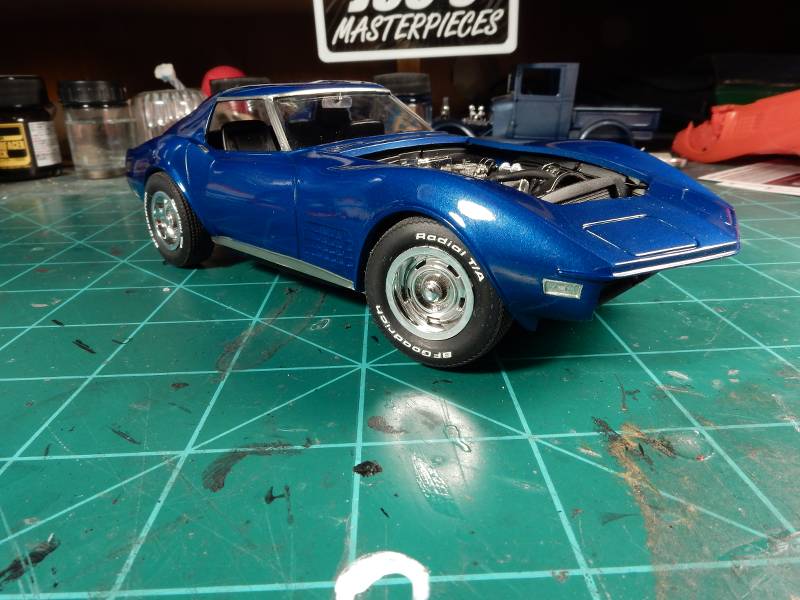 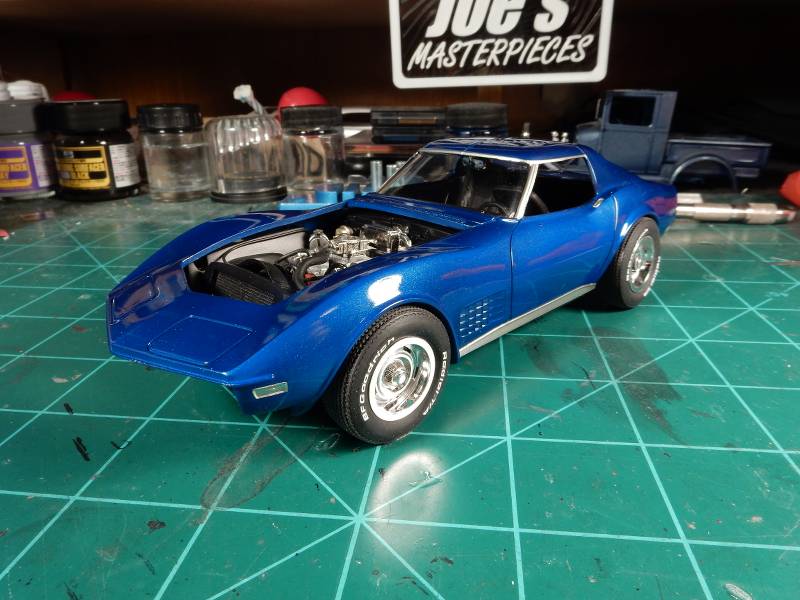 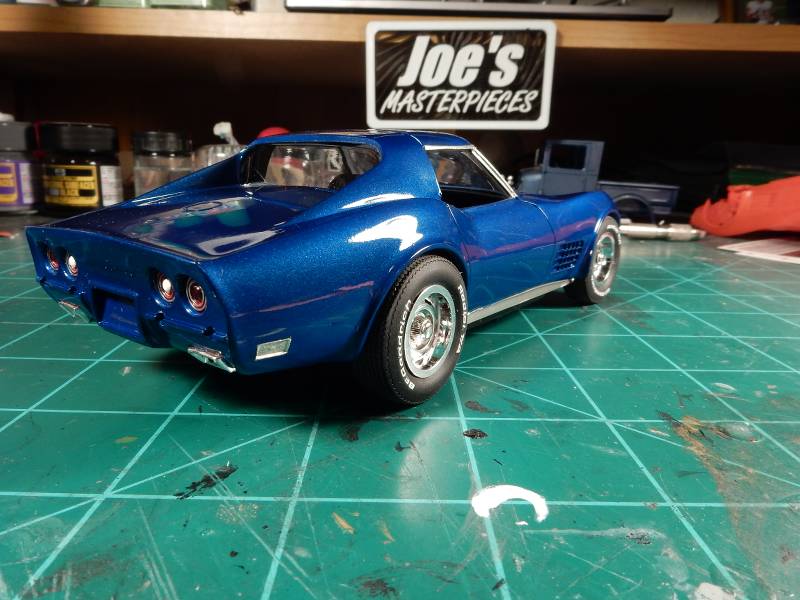 |
|
|
|
Post by Deano on Aug 29, 2024 0:30:16 GMT -7
Joe, this is outstanding my friend, exceptional work!
|
|
|
|
Post by mustang1989 on Aug 29, 2024 2:48:58 GMT -7
Joe, this is outstanding my friend, exceptional work! Thank you Tim. Getting ready to wrap this puppy up.  |
|
|
|
Post by RetroSpectKustoms on Aug 29, 2024 19:13:27 GMT -7
This is fantastic! Looks amazing, sits perfectly. Well done Joe.
|
|
|
|
Post by mustang1989 on Aug 29, 2024 19:30:12 GMT -7
This is fantastic! Looks amazing, sits perfectly. Well done Joe. Thank you Bruce. To say that this car has been a "labor of love" would simply be an understatement. There has been an incredible amount of planning that has gone into this as well as a TON of modifications to get it to where it is now. I'm definitely looking forward to wrapping this one up in a "can't wait to see this all finished" standpoint as well as a "Thank God it's off my bench" standpoint. lol |
|
|
|
Post by mustang1989 on Aug 30, 2024 3:50:15 GMT -7
Okeedokee folks. After a LONG time of working on this bad boy, I finally put the finishing touches on her and managed to get drug this one across the finish line. There was a lot of planning and forethought involved in this build primarily in the areas of overall stance and wheel/ tire position relative to wheel openings that had to be dealt with but I stuck with it. I had to build a complete unpainted kit to help me out with what to do in regard to stance and the dashboard to windshield fit issues that I had so thankfully I had that. I'm pretty happy with the outcome but the front bumper fought me the whole way and after two attempts and applying Alclad I gave up and used the OOB bumper treated with a coat of Tamiya Smoke to tone down the toy chrome look some. Sneak Peek Shot: The completed thread can be viewed here: AMT 1970 Corvette LT-1 |
|
|
|
Post by poet on Sept 1, 2024 7:40:54 GMT -7
Okeedokee folks. After a LONG time of working on this bad boy, I finally put the finishing touches on her and managed to get drug this one across the finish line. There was a lot of planning and forethought involved in this build primarily in the areas of overall stance and wheel/ tire position relative to wheel openings that had to be dealt with but I stuck with it. I had to build a complete unpainted kit to help me out with what to do in regard to stance and the dashboard to windshield fit issues that I had so thankfully I had that. I'm pretty happy with the outcome but the front bumper fought me the whole way and after two attempts and applying Alclad I gave up and used the OOB bumper treated with a coat of Tamiya Smoke to tone down the toy chrome look some. Sneak Peek Shot: The completed thread can be viewed here: AMT 1970 Corvette LT-1 And it is beautiful! |
|
|
|
Post by mustang1989 on Sept 1, 2024 15:55:06 GMT -7
Okeedokee folks. After a LONG time of working on this bad boy, I finally put the finishing touches on her and managed to get drug this one across the finish line. There was a lot of planning and forethought involved in this build primarily in the areas of overall stance and wheel/ tire position relative to wheel openings that had to be dealt with but I stuck with it. I had to build a complete unpainted kit to help me out with what to do in regard to stance and the dashboard to windshield fit issues that I had so thankfully I had that. I'm pretty happy with the outcome but the front bumper fought me the whole way and after two attempts and applying Alclad I gave up and used the OOB bumper treated with a coat of Tamiya Smoke to tone down the toy chrome look some. Sneak Peek Shot: The completed thread can be viewed here: AMT 1970 Corvette LT-1And it is beautiful! Thanks a lot Dennis!! 'Preciate the good word brother. |
|
|
|
Post by sharp on Sept 1, 2024 21:08:59 GMT -7
This turned out great Joe. Great looking paint and detail. Love the interior with the socket set and battery hatch. Nice work bud!
|
|
|
|
Post by mustang1989 on Sept 2, 2024 5:53:54 GMT -7
This turned out great Joe. Great looking paint and detail. Love the interior with the socket set and battery hatch. Nice work bud! Thanks Mike. When I first started this I wasn't going to do anything with the interior but then.......I got to thinkin'  ......and the possibilities became endless. |
|