|
|
Post by mustang1989 on Oct 14, 2023 5:30:01 GMT -7
This is the current build that I've got going on at the bench nowadays. This kit has a few pitfalls that affect the stance and wheel/ tire position but there are corrections that can be made and I'll be pointing those out. I'll be painting this one Brockhampton Blue and we'll be retaining the LT-1 350 small block for the car. The only external changes that'll be made are to the stance and wheel locations and I'll be going with BF-Goodrich T/A radials. I'll be going with Bridgehampton Blue for the color on this ride. 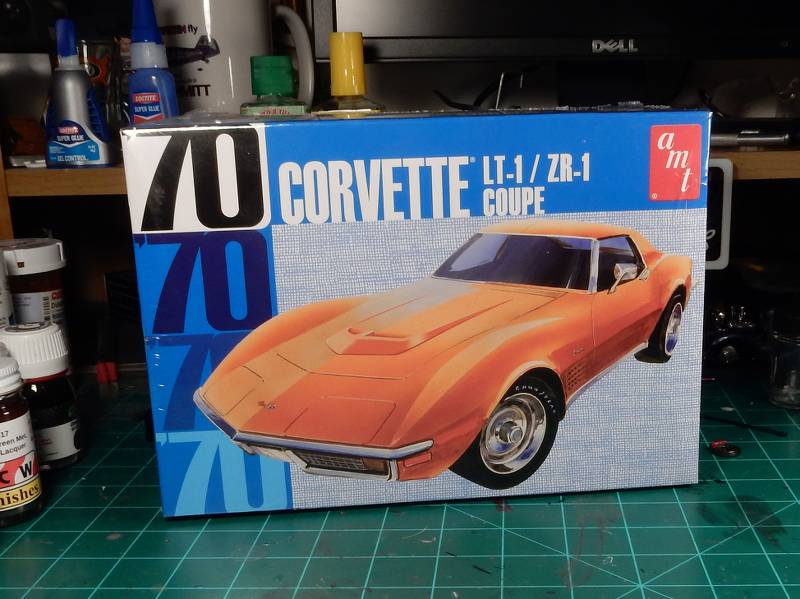 I started by black basing the engine...... 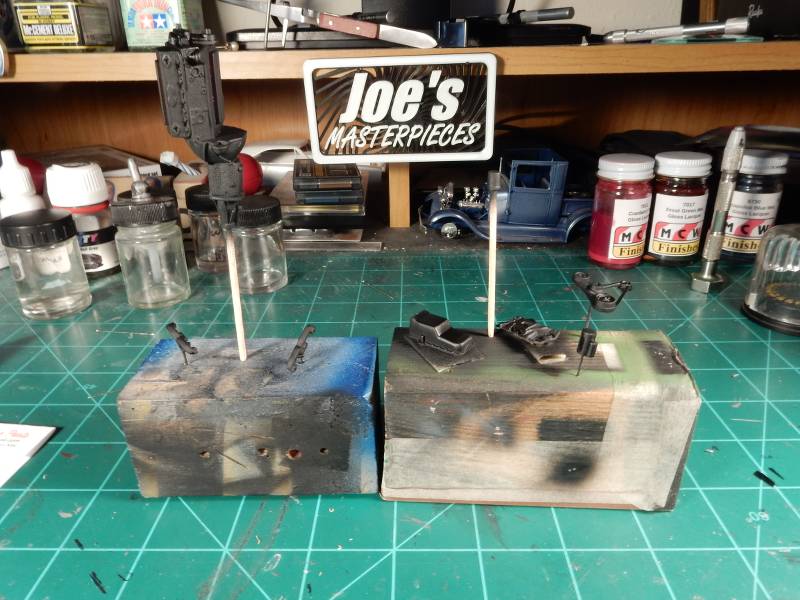 I also used a double pumper Holley from Shapeways and I had an AC Delco decal in stock for the oil filter. Here's the block in base build form with the color applied. 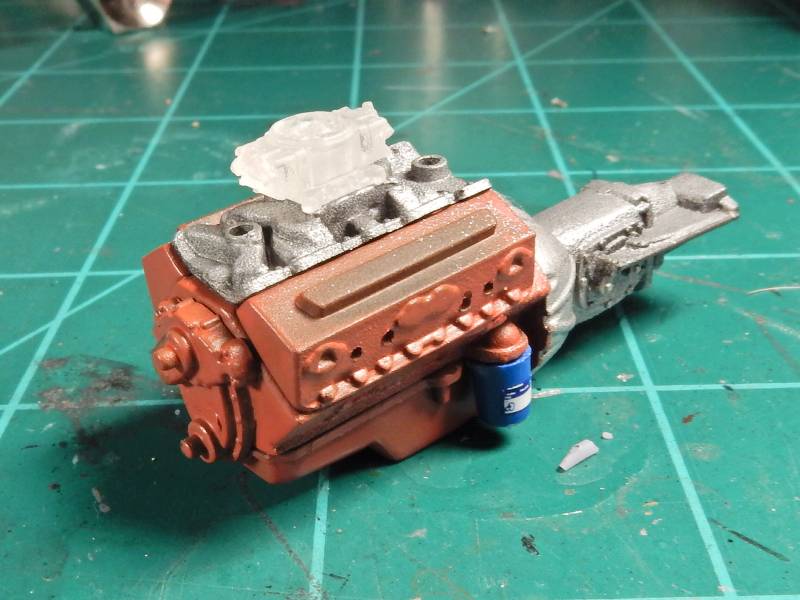 I bought a spare kit so I could build one up and make modifications to the suspension and stance. I always tend to screw something up along the way so I use two kits for almost every build. Its come in handy more than one time. Stance and wheel/tire location relative to wheel openings before: 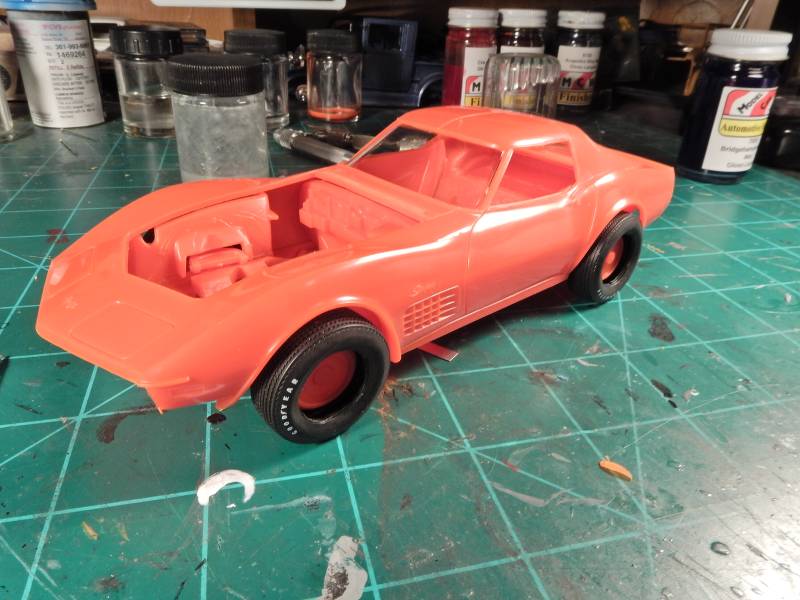 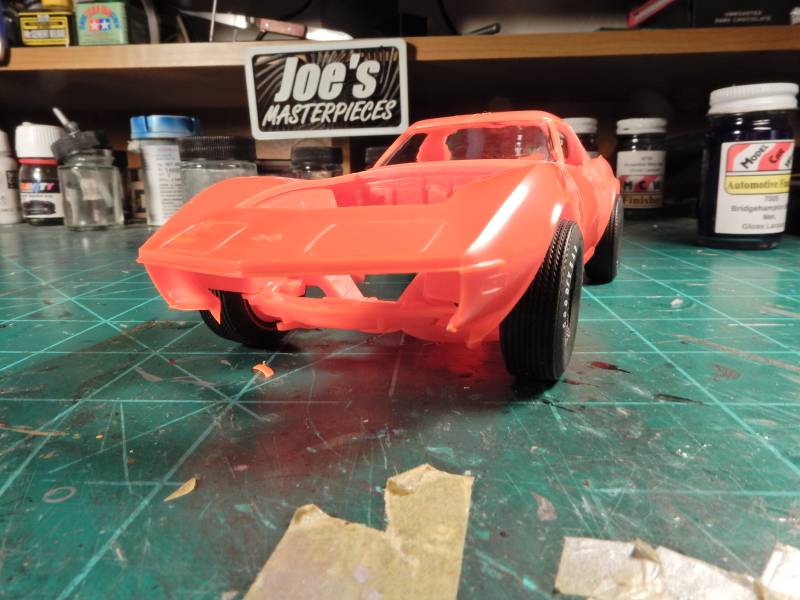 and after the mods. 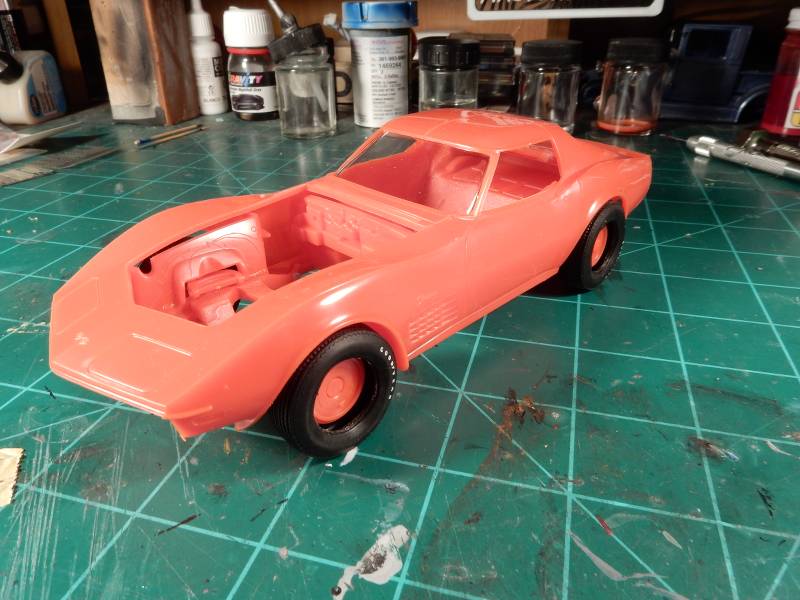 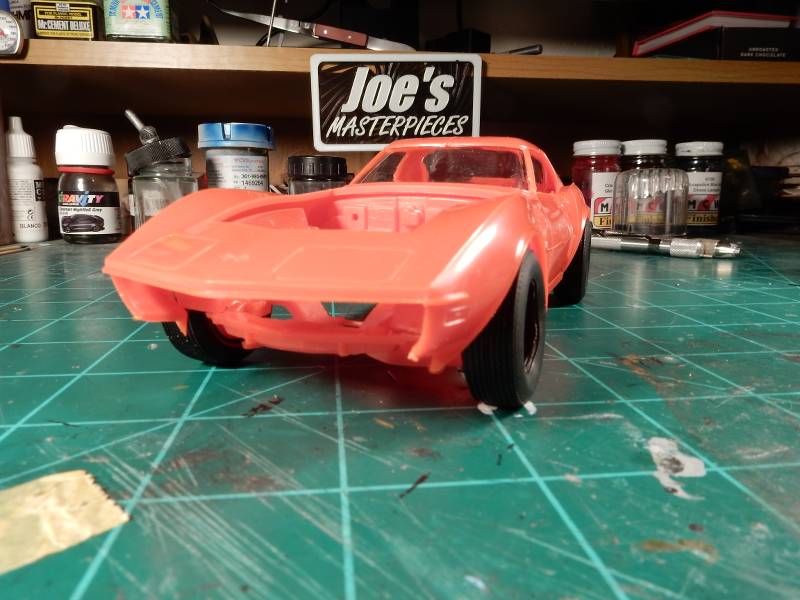 After the suspension mods I turned my attention back to the engine: Here's after the addition of the distributor housing, spark plug wires, rocker covers and exhaust manifolds: 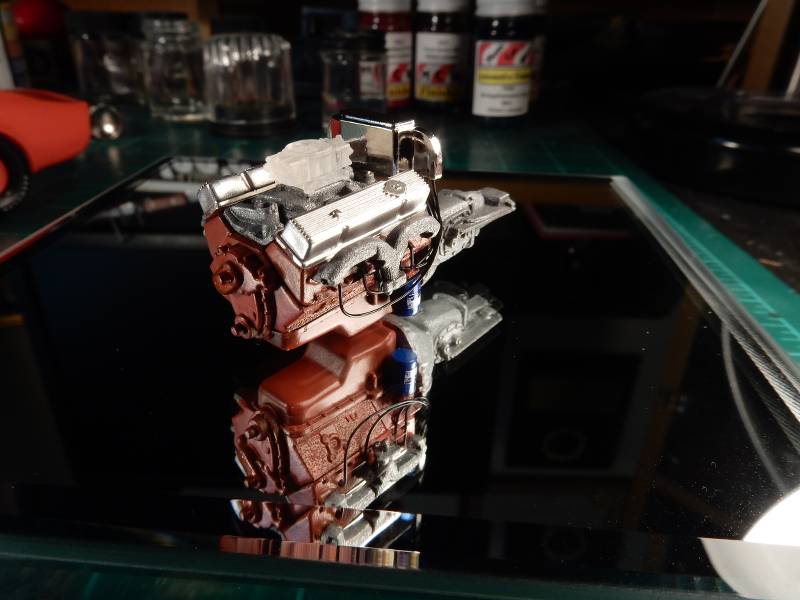 |
|
|
|
Post by Deano on Oct 14, 2023 12:27:25 GMT -7
Stance definitely looks better, what did you do to achieve it?
|
|
|
|
Post by mustang1989 on Oct 15, 2023 13:10:48 GMT -7
Stance definitely looks better, what did you do to achieve it? I'll show what I did on the instruction page on the next update Dean. Thanks buddy. |
|
|
|
Post by RetroSpectKustoms on Oct 15, 2023 20:41:23 GMT -7
Great start! That engine looks real nice.
|
|
|
|
Post by mustang1989 on Oct 16, 2023 8:48:54 GMT -7
Great start! That engine looks real nice. Thanks Bruce. I've got the carburetor painted and the details picked out with a light wash, got the fuel lines added, installed the starter with the postive battery cable connected, modified drive belt without the air pump and painted up and installed the alternator bracket. So far I'm decently pleased with these results: 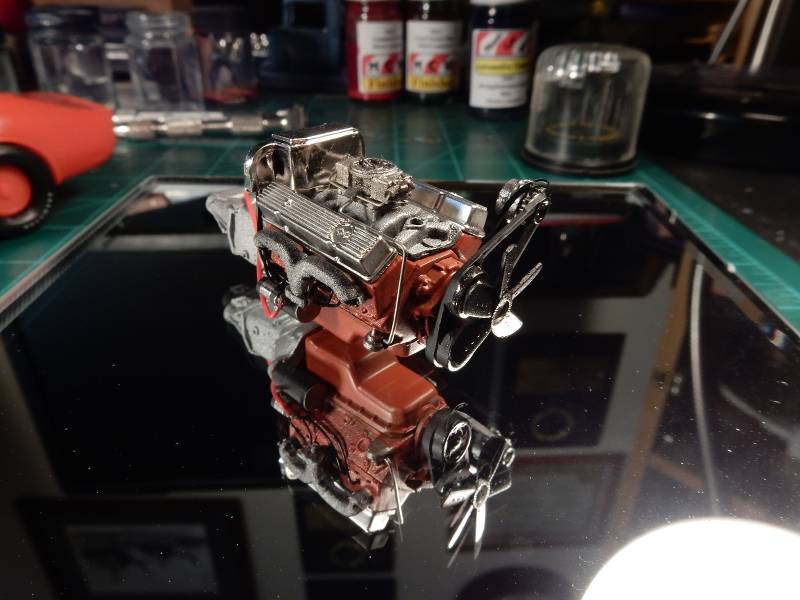 |
|
|
|
Post by mustang1989 on Oct 17, 2023 15:56:26 GMT -7
I topped this one off with a new technique on the air cleaner. I printed off a picture of faded vertical lines from a product bar code that fits the look PERFECTLY. 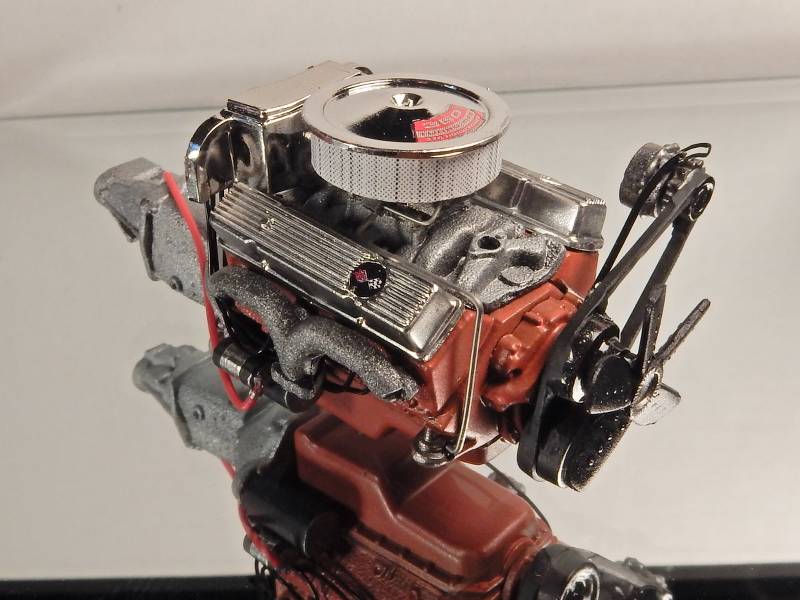 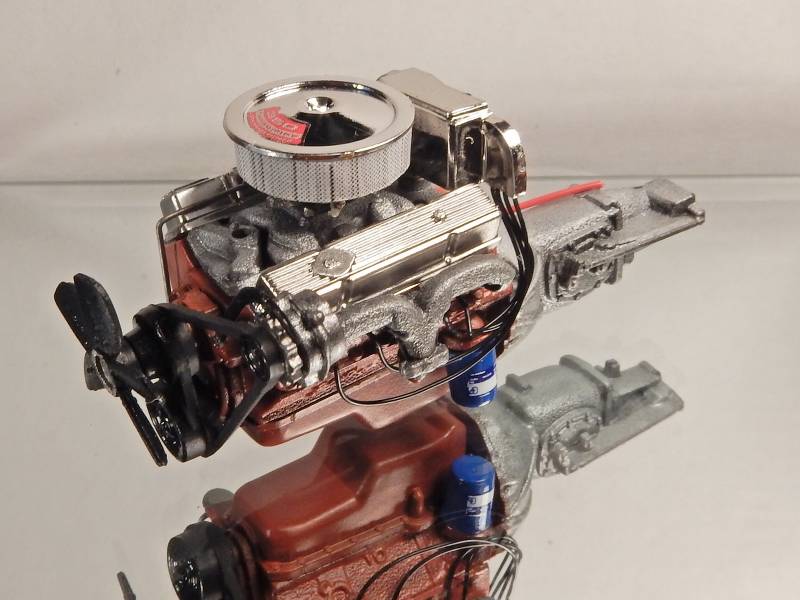 |
|
|
|
Post by RetroSpectKustoms on Oct 19, 2023 15:58:11 GMT -7
That works fantastically! Well done.
|
|
|
|
Post by mustang1989 on Oct 20, 2023 10:29:22 GMT -7
That works fantastically! Well done. Thanks Bruce!! |
|
|
|
Post by sharp on Oct 20, 2023 11:29:25 GMT -7
Great lookin' engine Joe!!
|
|
|
|
Post by mustang1989 on Nov 30, 2023 8:48:36 GMT -7
Great lookin' engine Joe!! Thank you Mike! Corrected stance and wheel/ tire location repositioned inward towards the center of the car from this:  To this:  and a little progress on the interior. My OTHER favorite part of auto building. If there's one thing I cannot STAND it's molded in foot pedals. They just look so dang fake!! The fix......is to remove the toe board on the driver's side. 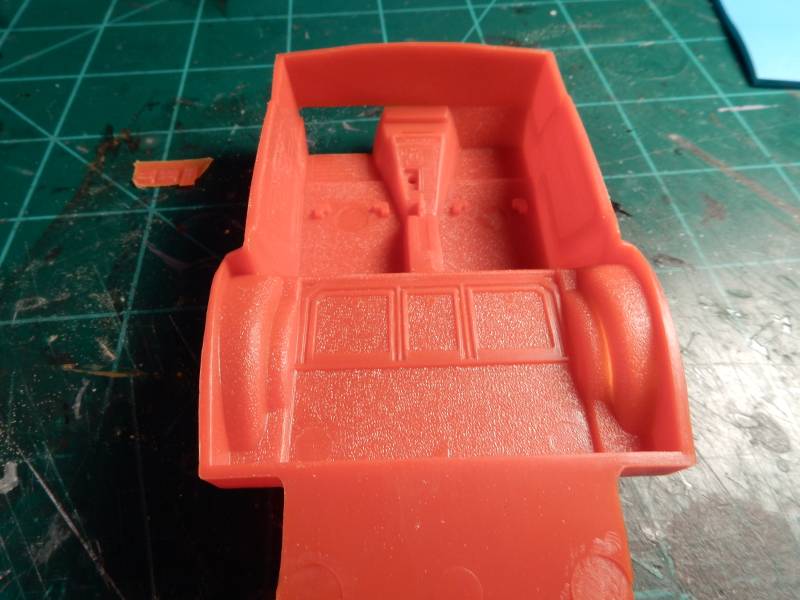 What'll happen is that I'll use either PE foot pedals or pedals from another kit and use needles as the swing levers and mount them on the back side of the dash. The following photos show this process when I built my Dyno Don Ford Maverick. The results speak for themselves.......  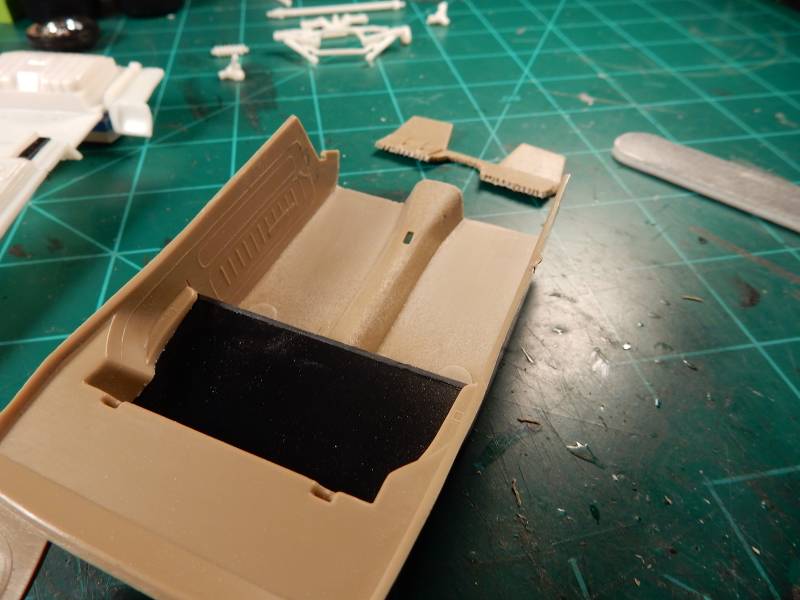 In the case for my Maverick, I used the foot pedal set up from the AMT 67 Mustang kit.  And cut the levers off leaving the pedals and using the needles pictured above for the levers. 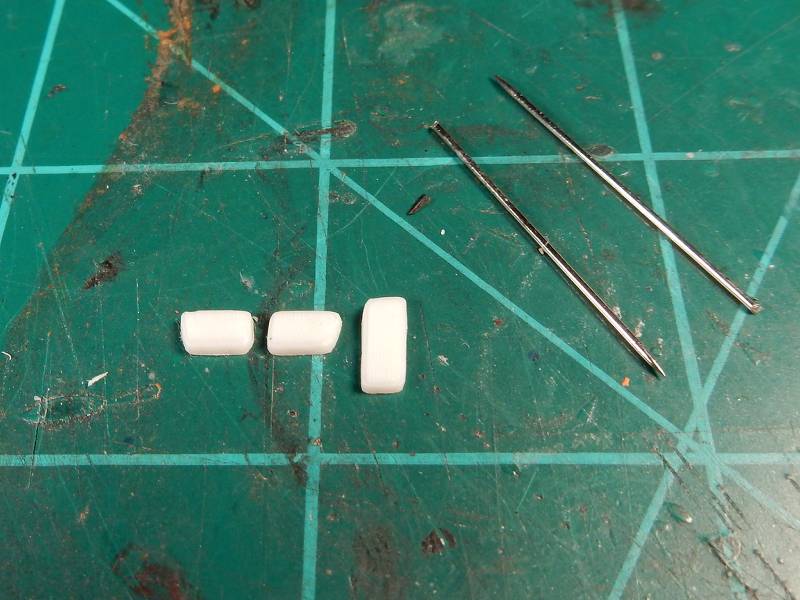 Mounted to the rear of the Maverick dash in the following shot. 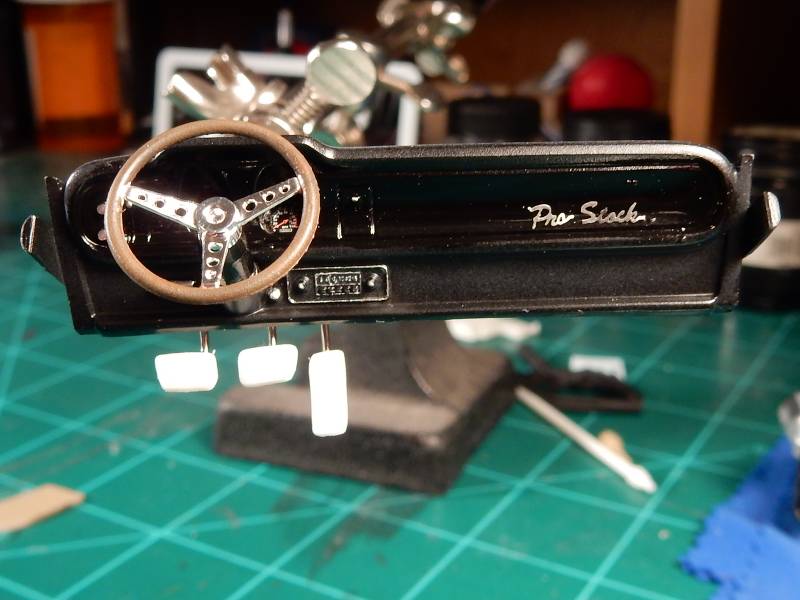 |
|
|
|
Post by stitchdup on Nov 30, 2023 9:33:07 GMT -7
Well theres the difference between us, I'd have fitted wider arches, lol. Nice work mate
|
|
|
|
Post by mustang1989 on Nov 30, 2023 13:41:07 GMT -7
Well theres the difference between us, I'd have fitted wider arches, lol. Nice work mate LOL!! Just couldn't bring myself to do fender flares on a factory stock build brother. Thanks Les.  |
|
|
|
Post by Deano on Dec 19, 2023 13:20:54 GMT -7
The work on the pedals makes a huge difference. Now you need to open a door so they can be seen!
|
|
|
|
Post by kpnuts on Feb 7, 2024 12:43:23 GMT -7
Looks great mate, love what you've done with the motor.
|
|
|
|
Post by mustang1989 on Jul 5, 2024 12:53:13 GMT -7
The work on the pedals makes a huge difference. Now you need to open a door so they can be seen! Thanks Tim.  I dunno if I'll be opening a door but I will say that there's a lot of visibility into this interior. Looks great mate, love what you've done with the motor. 'Preciate that Ken!! |
|
|
|
Post by mustang1989 on Jul 5, 2024 12:57:21 GMT -7
I cut a thin piece of clear Evergreen plastic and glued it into place. After that I cut the same shape from some sandpaper so the floor carpeting wouldn't be lost and adhered that on top of the clear panel. I'll be hitting the sandpaper with some gloss to give everything a uniform base to start with and then we'll be going with the color. I'll be going with a black interior, but it won't be boring. 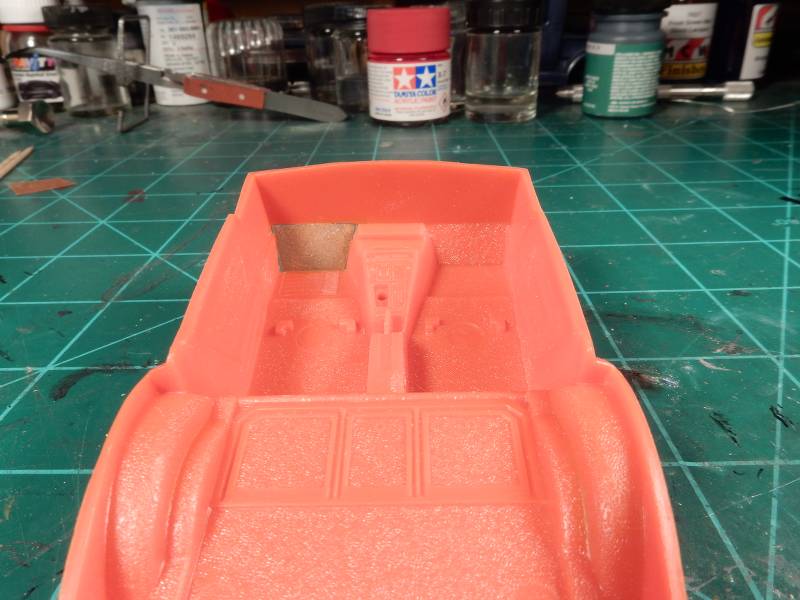 Something else that caught my attention was the molded in park brake handle. This........will change.  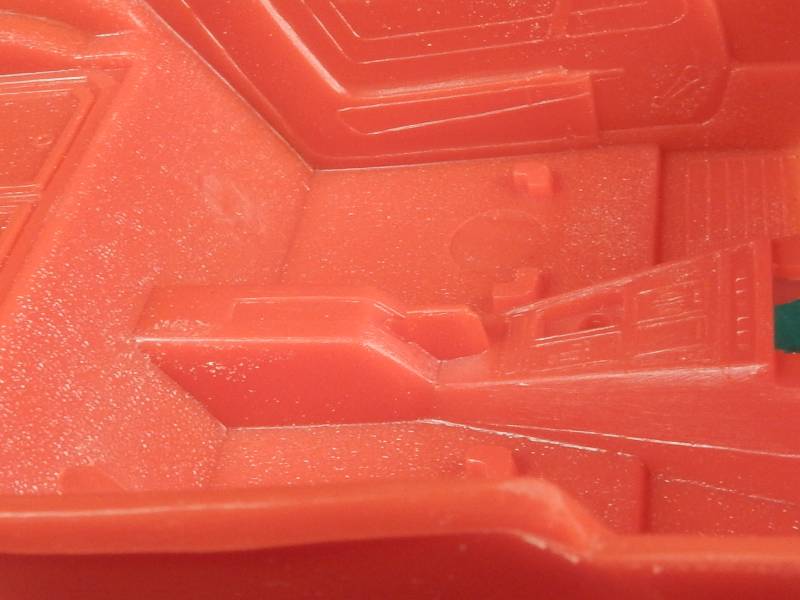 And lastly....there'll be a few items from this sheet ending up in the interior. Thank God for The Model Car Garage..... 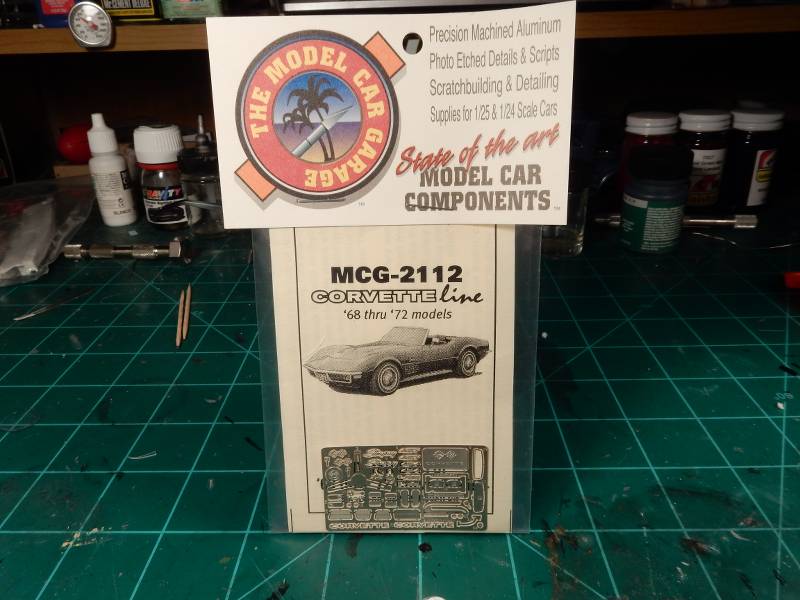 |
|
|
|
Post by Deano on Jul 7, 2024 3:02:40 GMT -7
|
|
|
|
Post by mustang1989 on Jul 9, 2024 10:07:38 GMT -7
Here's with the interior tub painted with a base coat of black primer and painted the door panels and console in a semi-gloss black. Driver's toe board where the swing pedals were is pretty much blended in at this point in the build. Since I've painted it, I've re-thought the situation some and have decided to open up a panel for displaying a little more detail. 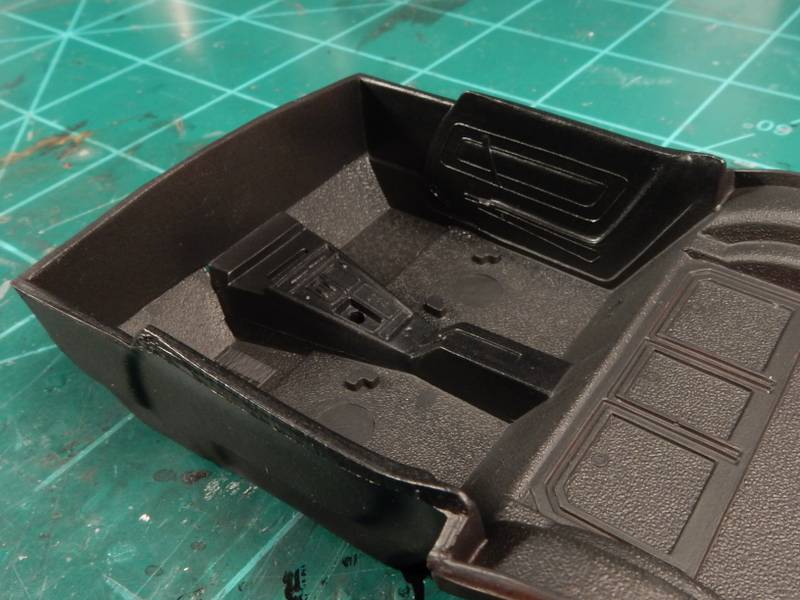 I decided to open the battery compartment up behind the drivers seat and have painted a battery all up and detailed it already. I'll be cutting the drivers seat to display it in the forward position to allow visibility back to the battery compartment in the coming updates. I've started on both door panels by painting the wood grain paneling & outlining the chrome strips on the panel as well as installing PE window crank handles. I've also begun the center console detailing process. 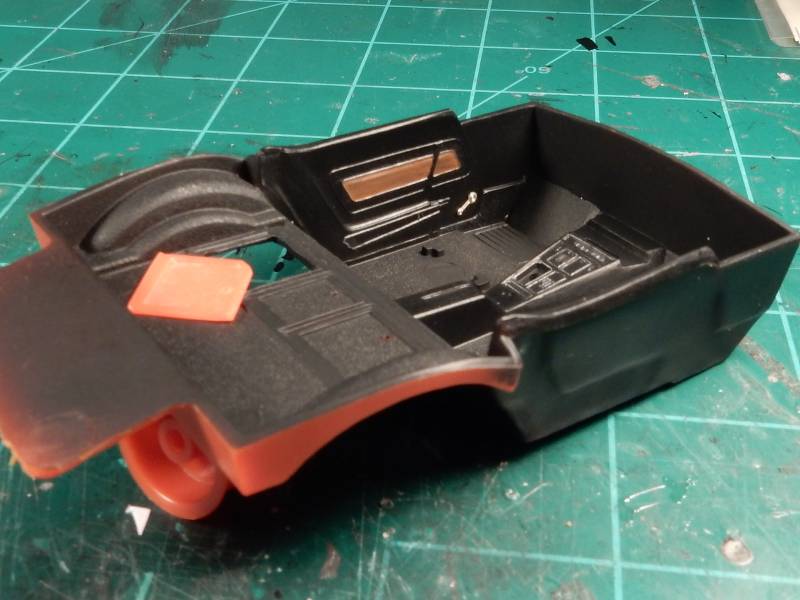 |
|
|
|
Post by mustang1989 on Jul 13, 2024 6:44:10 GMT -7
The comfort weave pattern in the center of the seats is actually matte in appearance so I masked off and replicated the look. I also cut the drivers seat in half and put it back together like it is now to display it folded forward as to give a better view to the battery box behind the seat. OOB shifter is now installed after reworking and trimming it up to keep it from looking like a blob sticking out of the console and making it a bit more defined. I also installed the PE door handles and picked out the details on the center console around the shifter as well. Battery is all painted up and detailed and this mock up shows what I've been building towards for the past few weeks. I may go back and paint the interior of the battery box area semi gloss black to add contrast between the interior and the compartment for added interest. 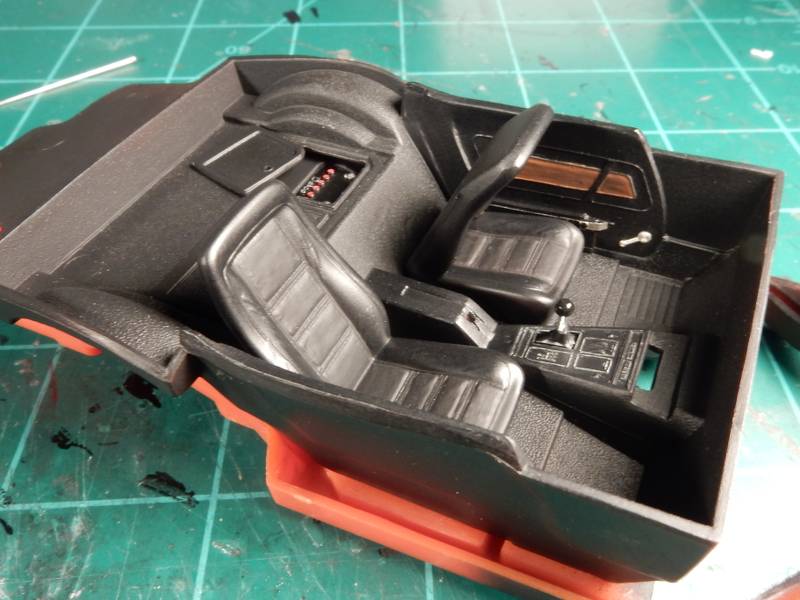 |
|
|
|
Post by sharp on Jul 13, 2024 11:47:20 GMT -7
Looks great Joe! The detail work you did on the interior looks awesome!
|
|
|
|
Post by Deano on Jul 17, 2024 0:28:23 GMT -7
This is great work Joe. I think the decision to open up the battery and fold the seat forward is a great idea. Keen to see this progress!
|
|
|
|
Post by mustang1989 on Jul 20, 2024 7:38:37 GMT -7
Looks great Joe! The detail work you did on the interior looks awesome! Thanks Mike. This is great work Joe. I think the decision to open up the battery and fold the seat forward is a great idea. Keen to see this progress! 'Preciate the good word Tim. This build is definitely some good fun. I've got all the parts cut laid out here for the steering column build up ready for the clean up process. Looks like it's all there.....turn signal lever (needle), keys, key ring, ignition switch bezel (that I'll be adding finger tabs onto), spokes and horn button. Holes are drilled in the column for the turn signal lever and for the ignition key to go into once the bezel is in place.  |
|
|
|
Post by poet on Jul 20, 2024 7:54:24 GMT -7
Nice fabrication work!
|
|
|
|
Post by mustang1989 on Jul 20, 2024 13:26:45 GMT -7
Thank you Dennis. I've had loads of fun with this one. |
|
|
|
Post by mustang1989 on Jul 23, 2024 10:17:34 GMT -7
Primed and painted the steering column and installed the ignition switch and keys. I also installed the turn signal lever on the L/H side of the column. 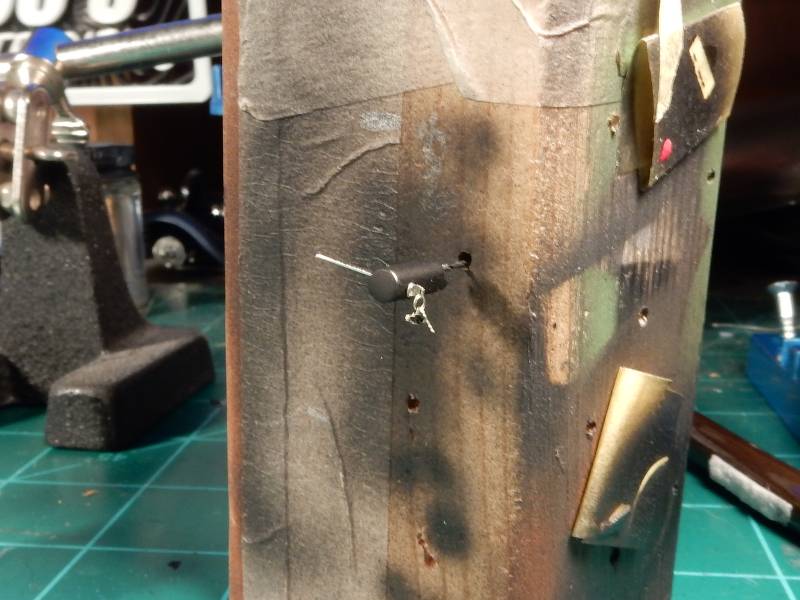 |
|
|
|
Post by transammike on Jul 24, 2024 11:41:34 GMT -7
This such a cool build Joe and of course, you're nailing it!!
|
|
|
|
Post by Deano on Jul 25, 2024 0:39:49 GMT -7
This is seriously nice Joe!
|
|
|
|
Post by mustang1989 on Jul 25, 2024 14:37:49 GMT -7
This such a cool build Joe and of course, you're nailing it!! Thanks a million Mike!! It's been a long time since I've talked with you bud. How've you been doing? This is seriously nice Joe! 'Preicate it Tim!! The dash is pretty much finished up. Couldn't help upgrading to at least a CD player. I'm gonna have to order a set of floor mats to top everything off for the interior but aside from that......we'll be moving on to the chassis as far as build up and proper set up goes now..... 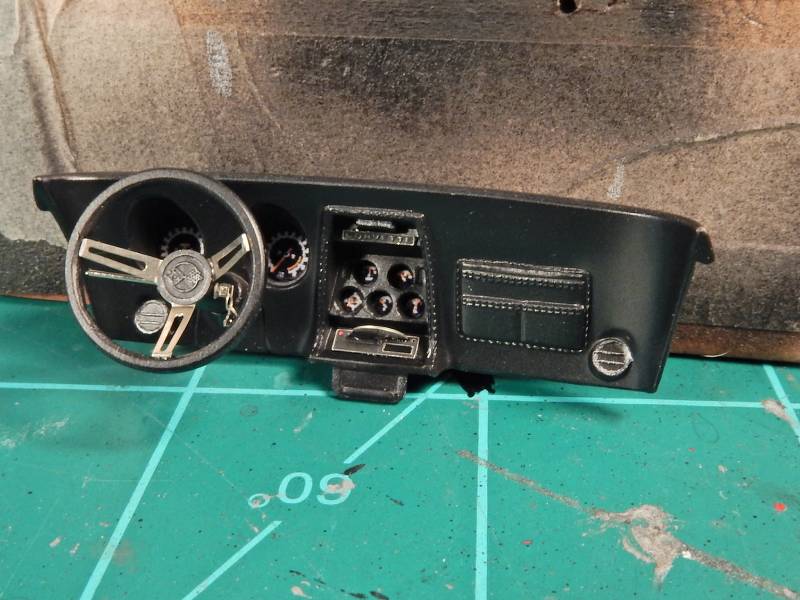 |
|
|
|
Post by transammike on Jul 26, 2024 14:58:59 GMT -7
Hey there Joe...'Vette is really taking shape Buddy!!
|
|
|
|
Post by mustang1989 on Jul 28, 2024 16:57:29 GMT -7
Hey there Joe...'Vette is really taking shape Buddy!! 'Preciate the good word Mike. Almost forgot one of the most important things in this interior and something that I was preparing for when I first started this part of the build........the foot pedals. I fabbed up a swing pedal base and drilled three holes through the base to insert the three needles necessary for the pedal levers. Then I painted the levers a semi gloss black and installed the painted and detailed foot pedals to the levers. The results turned out A LOT better than the pedals that were molded into the floor to start with. 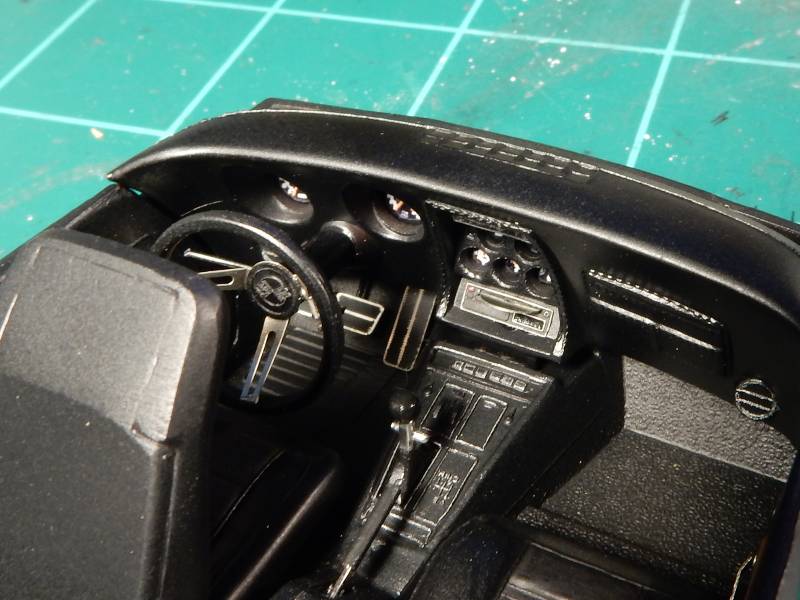 |
|