|
|
Post by mustang1989 on Nov 11, 2016 5:04:14 GMT -7
Ok gang. I'll summate / condense this thread with a beginning post and then one as to where I'm at right now.
I picked this kit up a couple of weeks ago because it was IMO just too dang cool. This one will be a sideline build when I either get stumped on or waiting for paint to dry for my current aircraft project, in which right now I'm waiting on paint to dry and trying to figure out some fit issues with it so I figured I'd start this thread. I'm not going to get as crazy as I did with my '54 Chevy just because I don't want something that in depth. But I do want to have some fun with this one so here goes.
Der Beetle Bus:

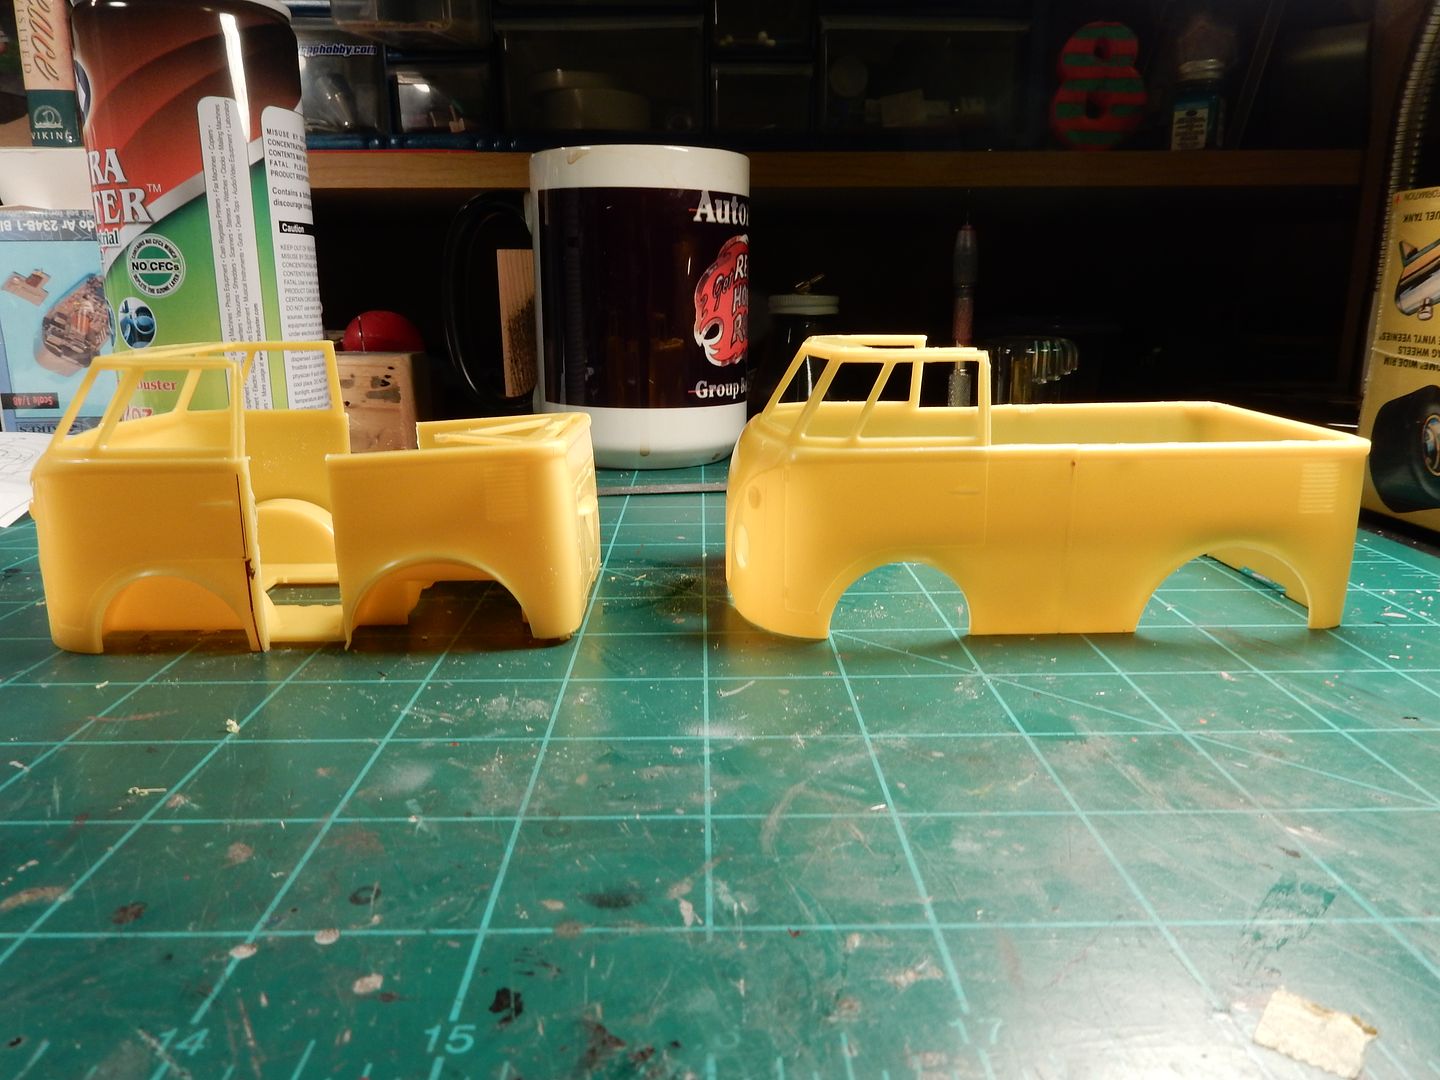
Now when I opened up the box I looked at the body and knew right away that this body was not going to fly at all. The wheel base is ridiculously short for my tastes and it would look more like a cartoon van than an actual vehicle. Here's where we start:
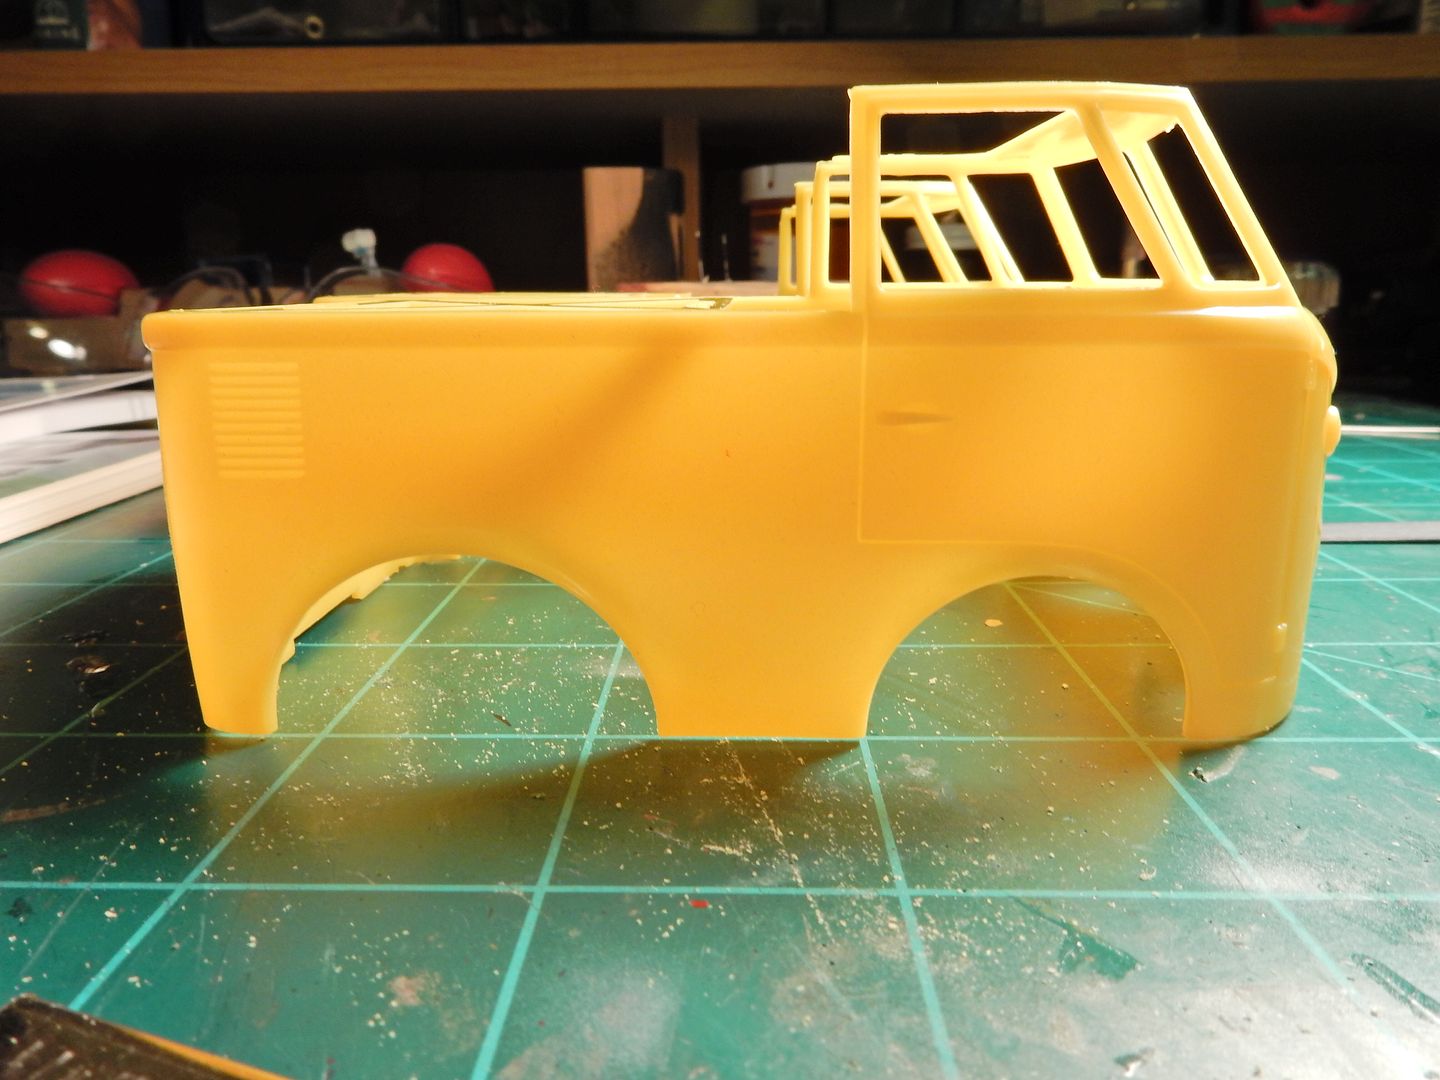
and I just couldn't leave it like that so I bought another kit and went to work:
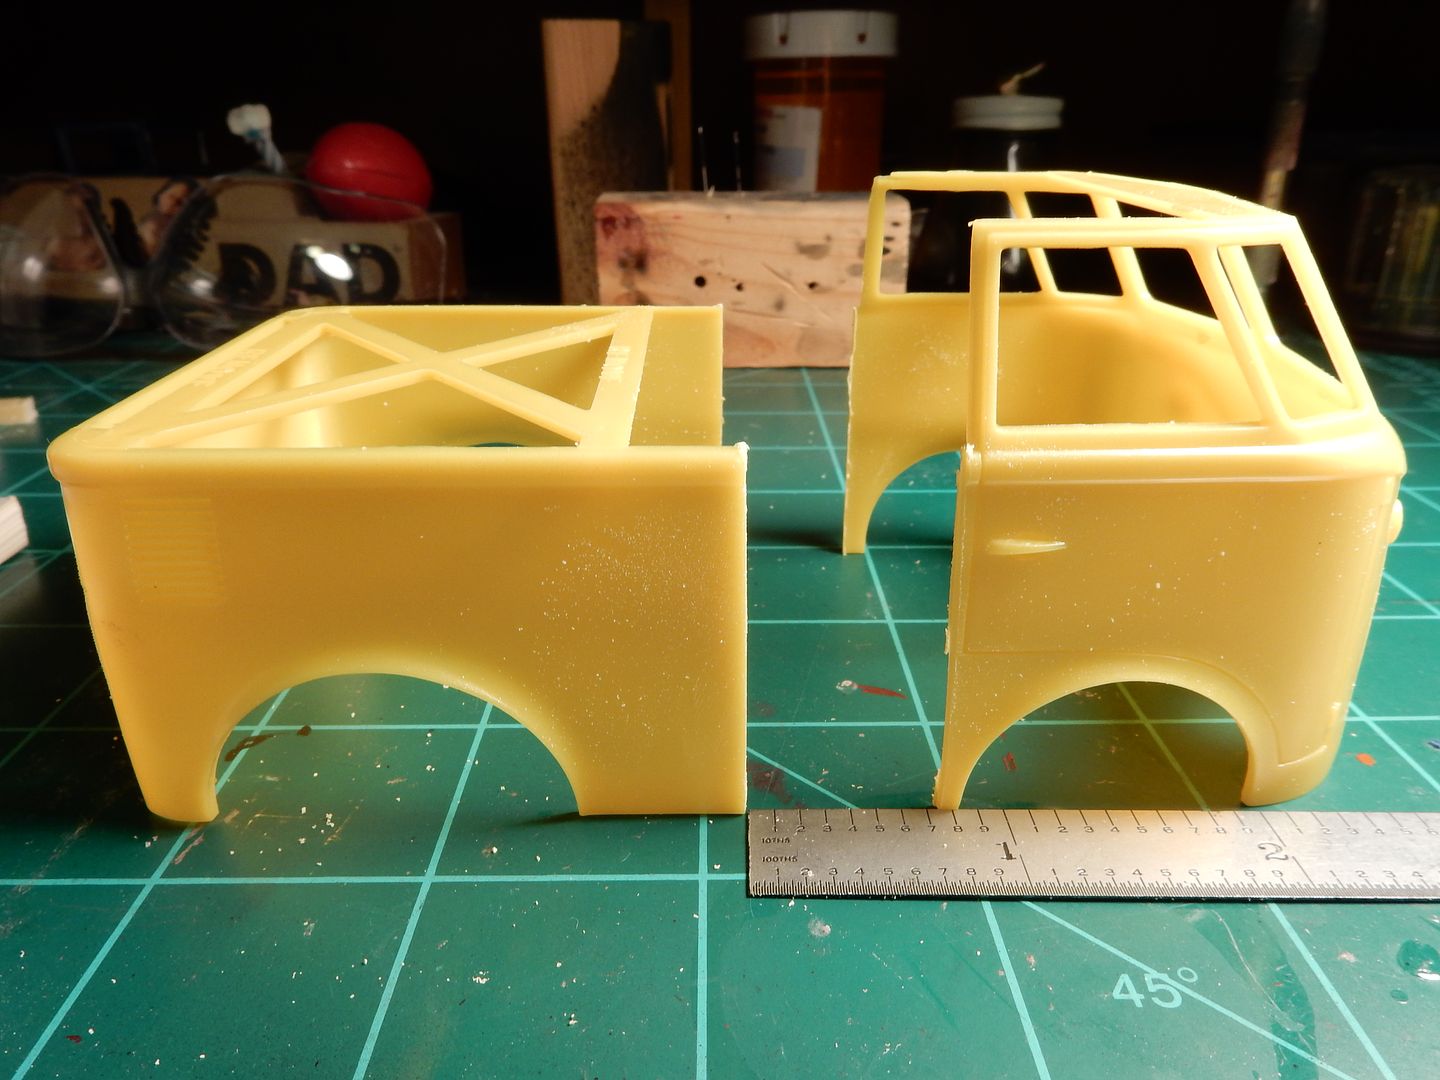
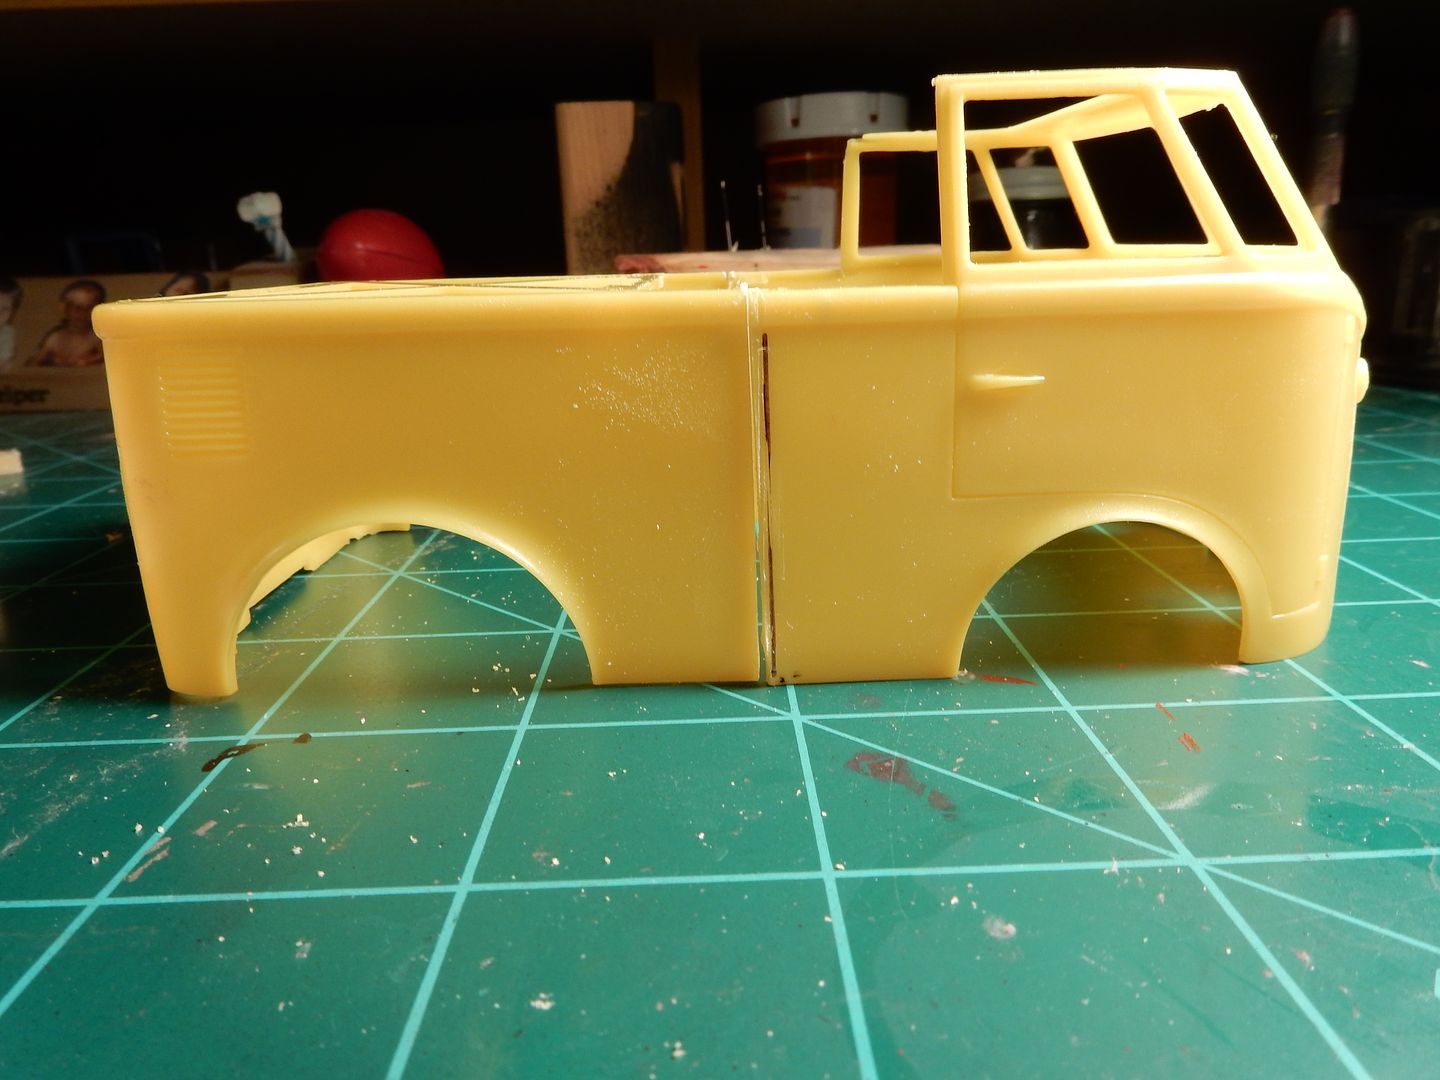
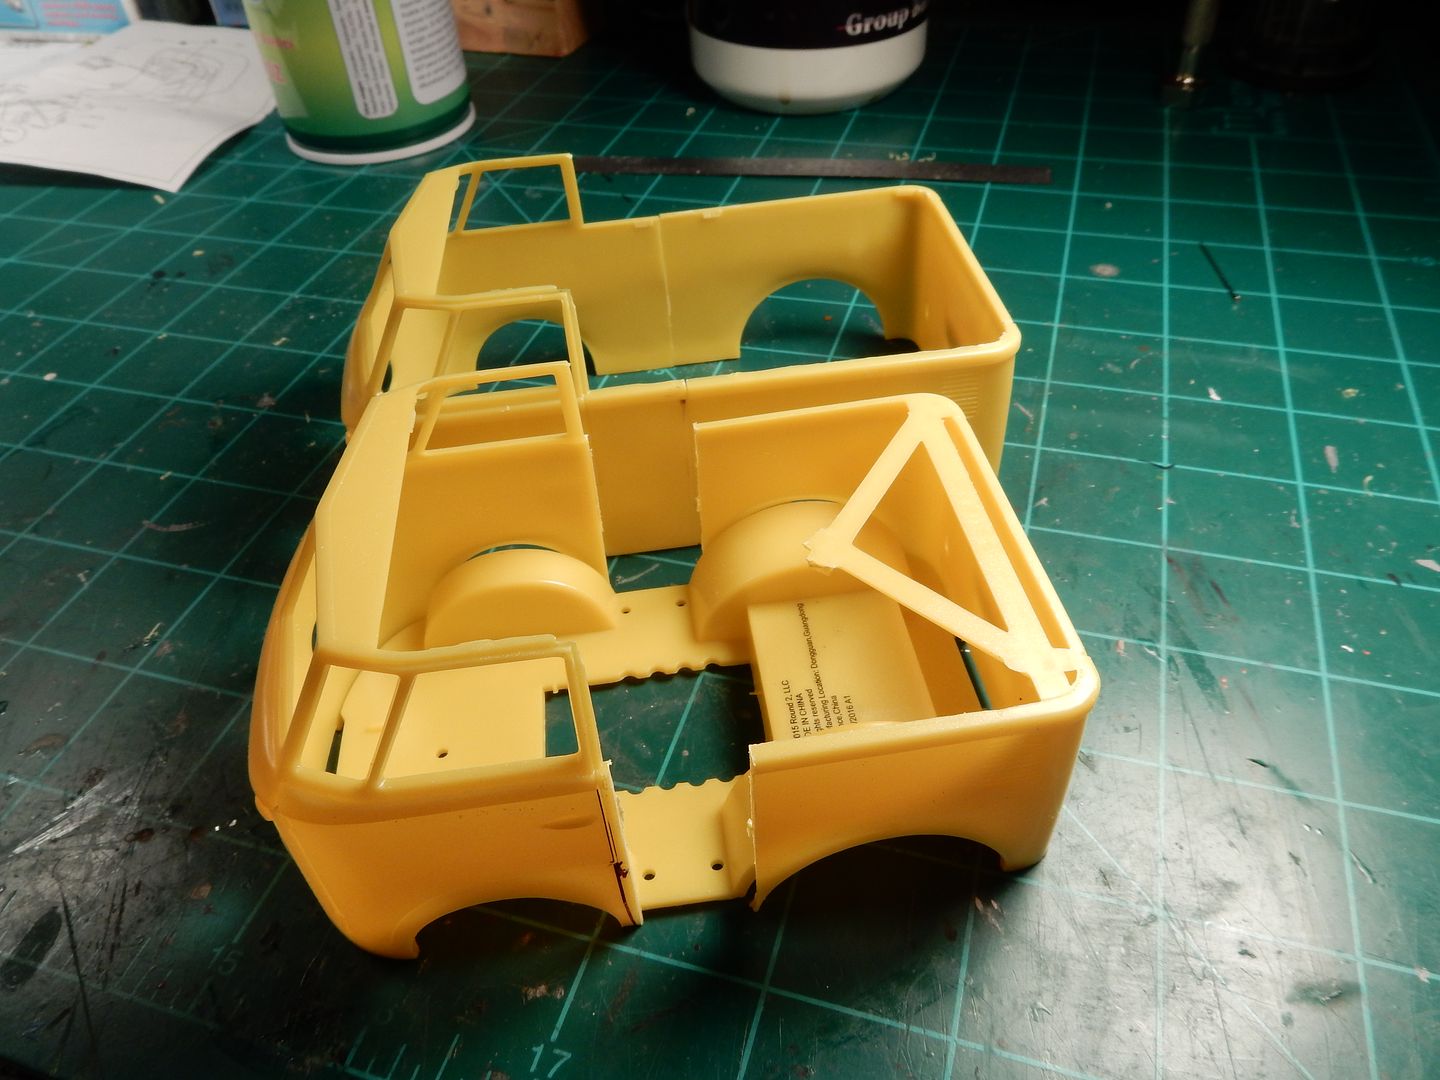
Cutting the bodies at just the right points yielded a wheel base that I could live with
Top view of the difference it made:
and the side view:
I did have this look at first................
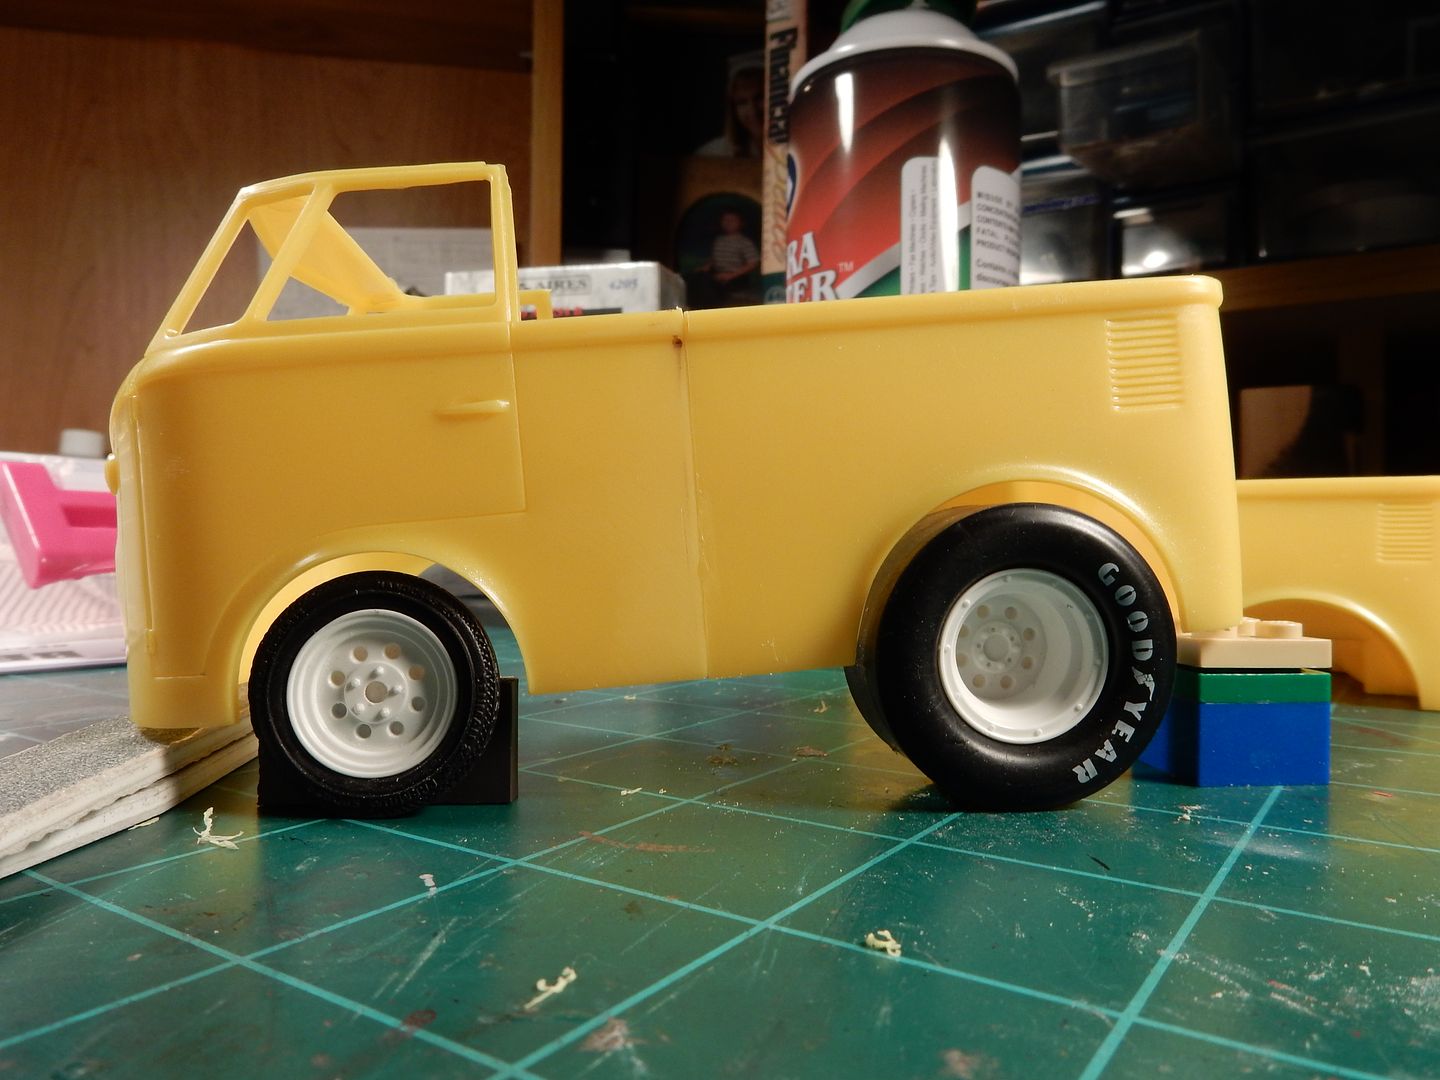
and thought to myself..........NAAAAAH.
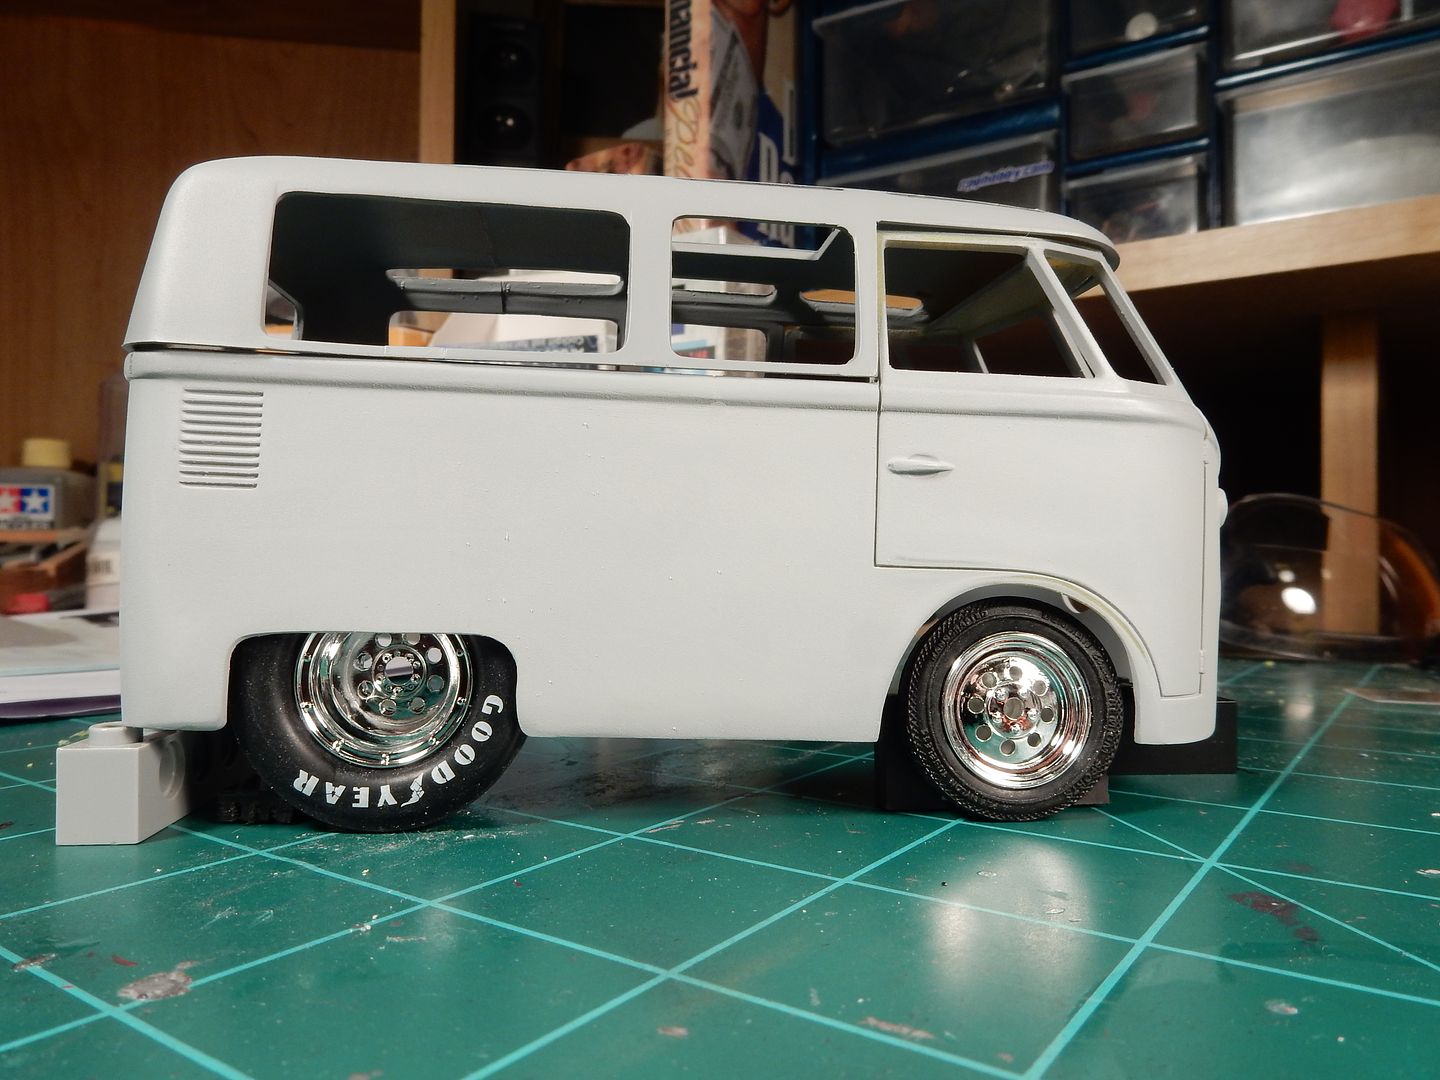
and went with this one instead after graphing in rear wheel openings from my spare Revell '54 Chevy Panel Wagon kit. Here it is to date with all the graphing completed and primed:
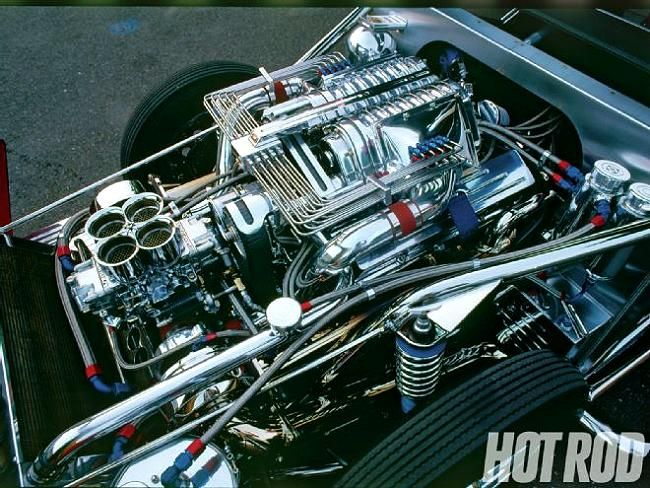
Power plant will consist of a SBC from Rick Dobbertin's Radical J2000 kit:
|
|
|
|
Post by DeeCee on Nov 11, 2016 5:14:34 GMT -7
YEP !! That should get most people excited mate, keep em' coming..
|
|
|
|
Post by mustang1989 on Nov 11, 2016 6:11:51 GMT -7
Thanks Dale. I'm so immersed in theory and planning right now I don't know when this thing'll ever start to progress. I'm hanging in there and taking it one day at a time and sooner or later I'll end up making a bus out of it one way or another.
Here we are right now with the engine/ transmission with the cylinder heads installed, seating and center cluster pod test fit into place so I've got an idea of how this is all going to turn out and what I still need to do to get things to "behave".
As you can see, there's a lot of work and "repositioning" left to do concerning the seating arrangement :
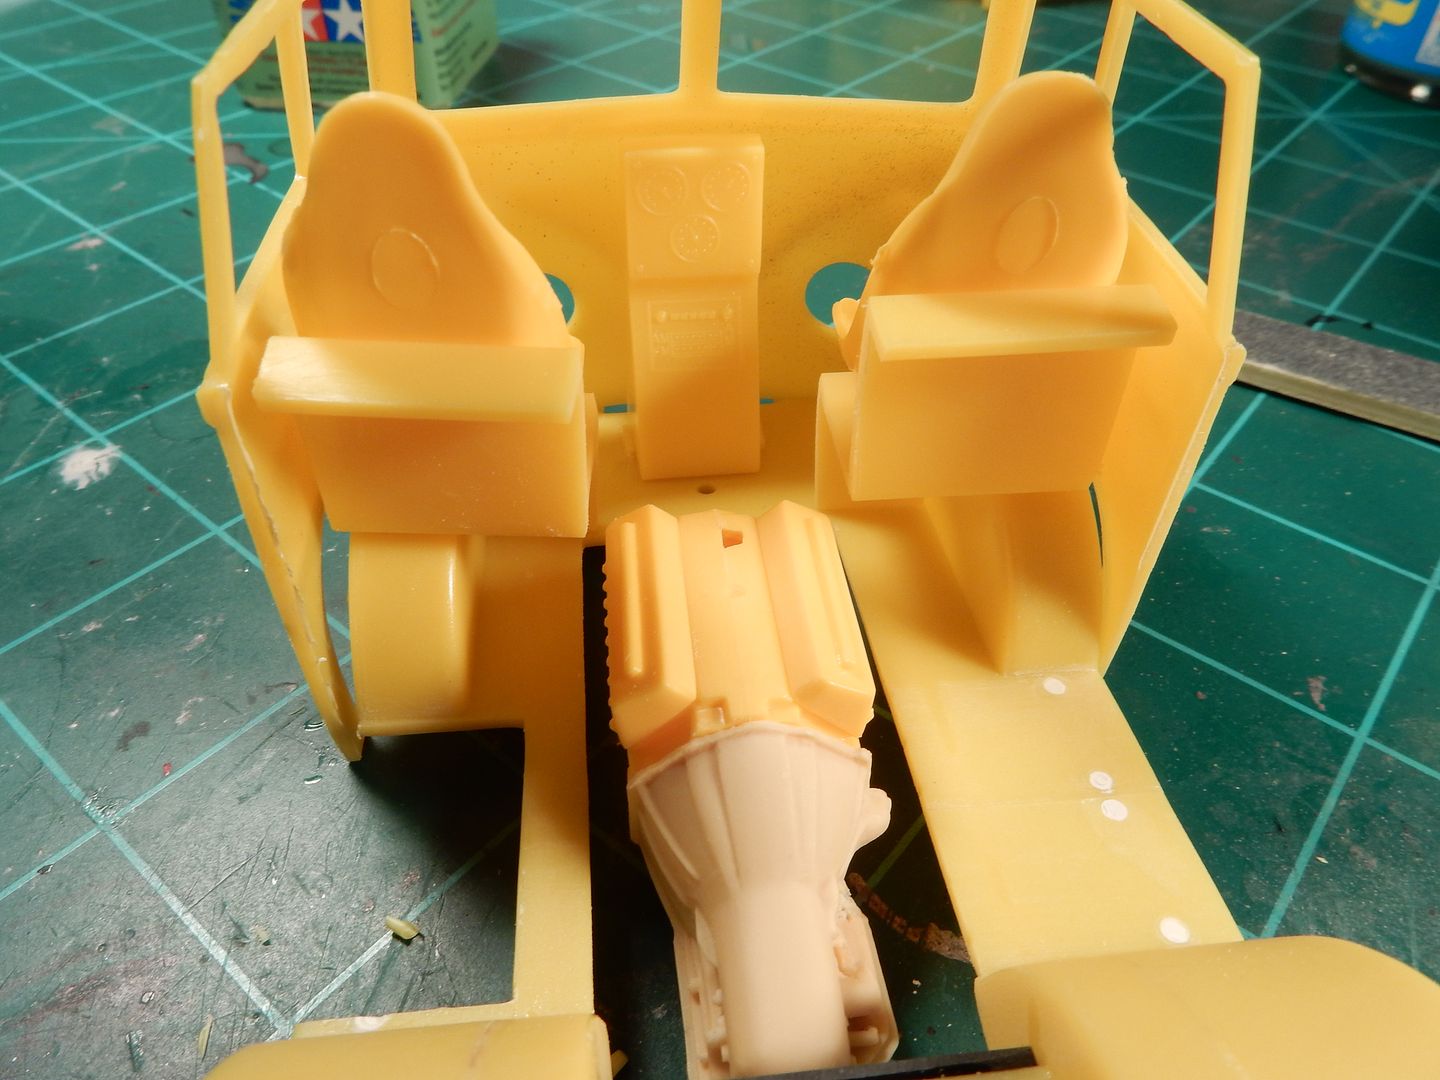
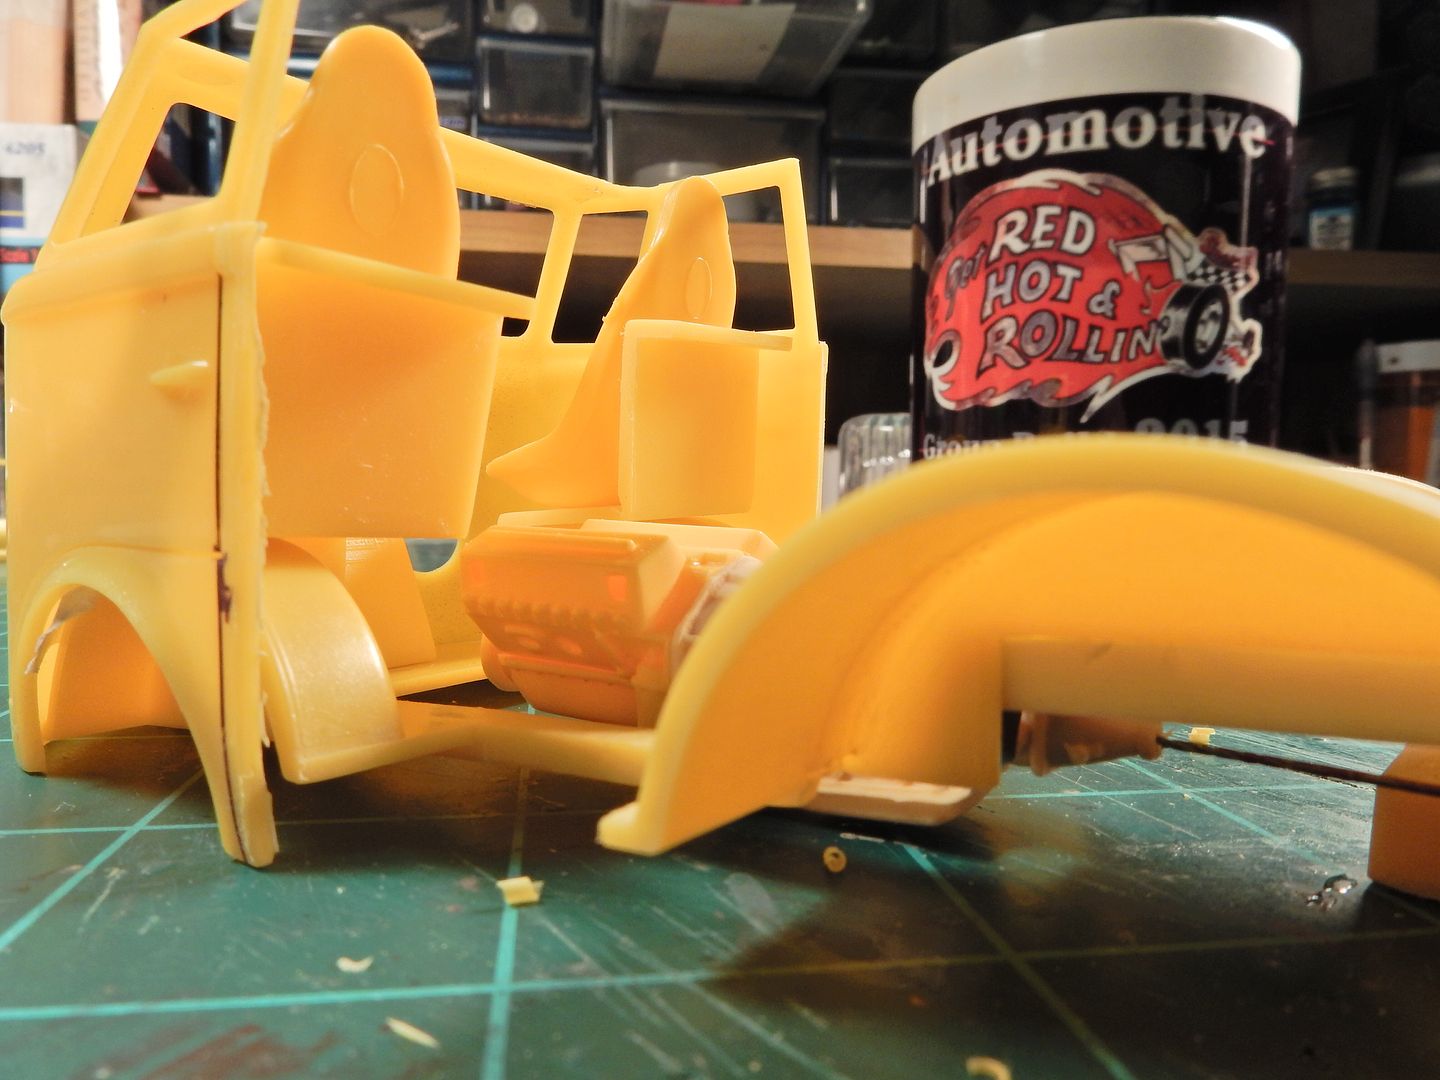
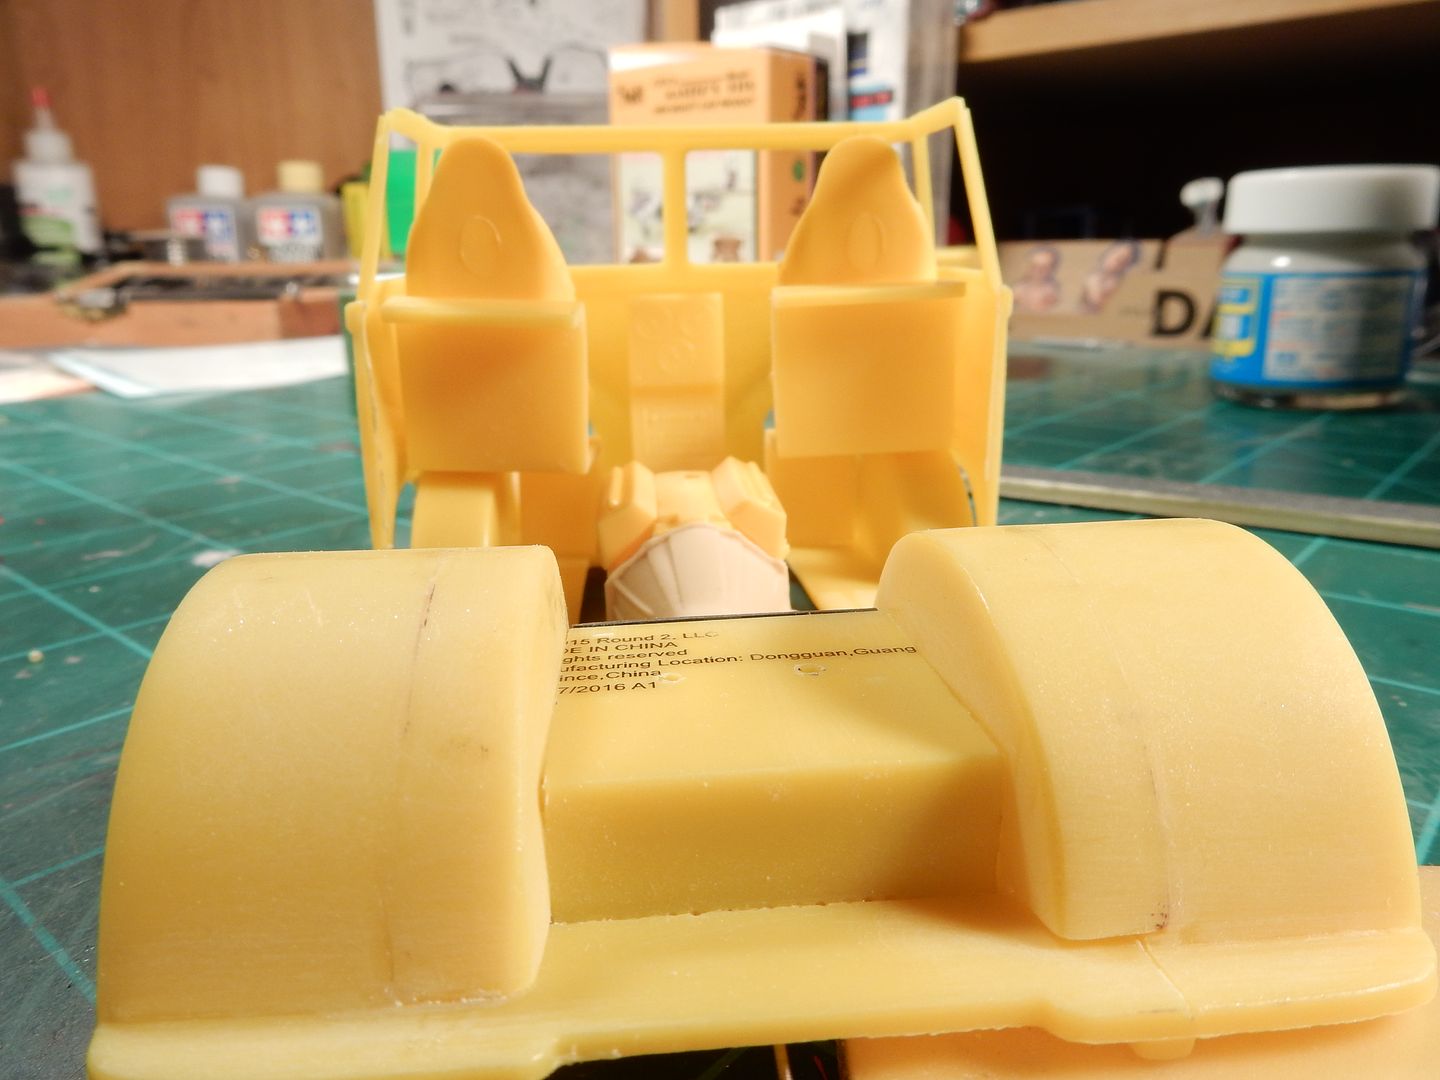
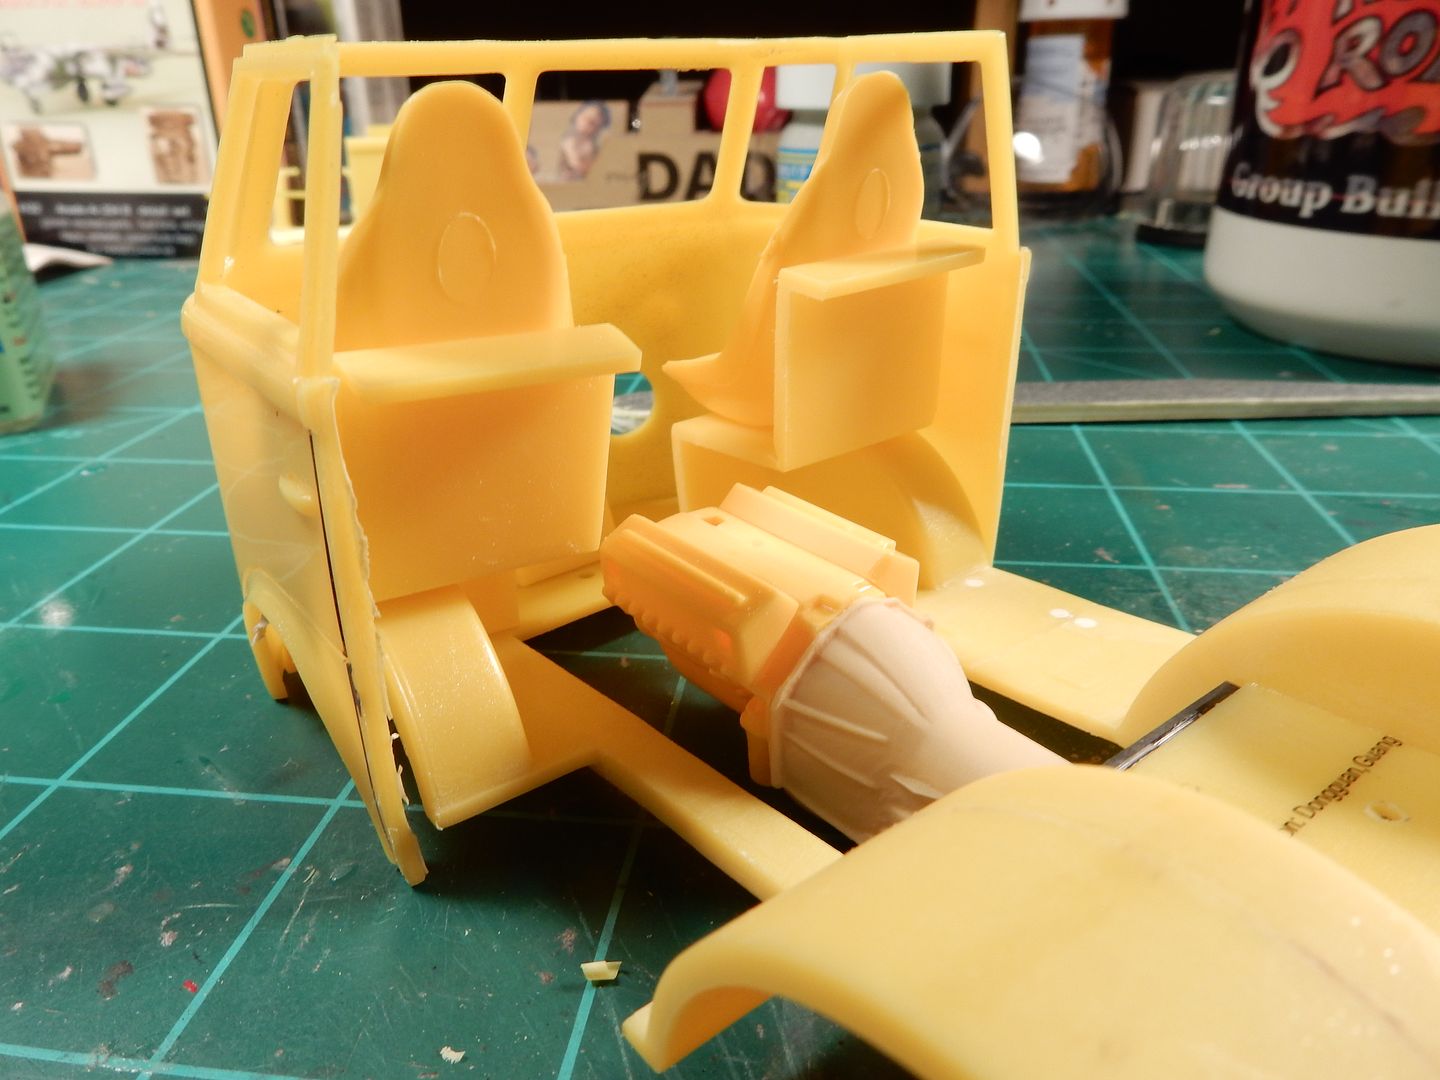
This is about where the transmission tail housing is going to wind up. Hopefully I can scoot it all to the rear another 1-2mm but this is a good spot for now.
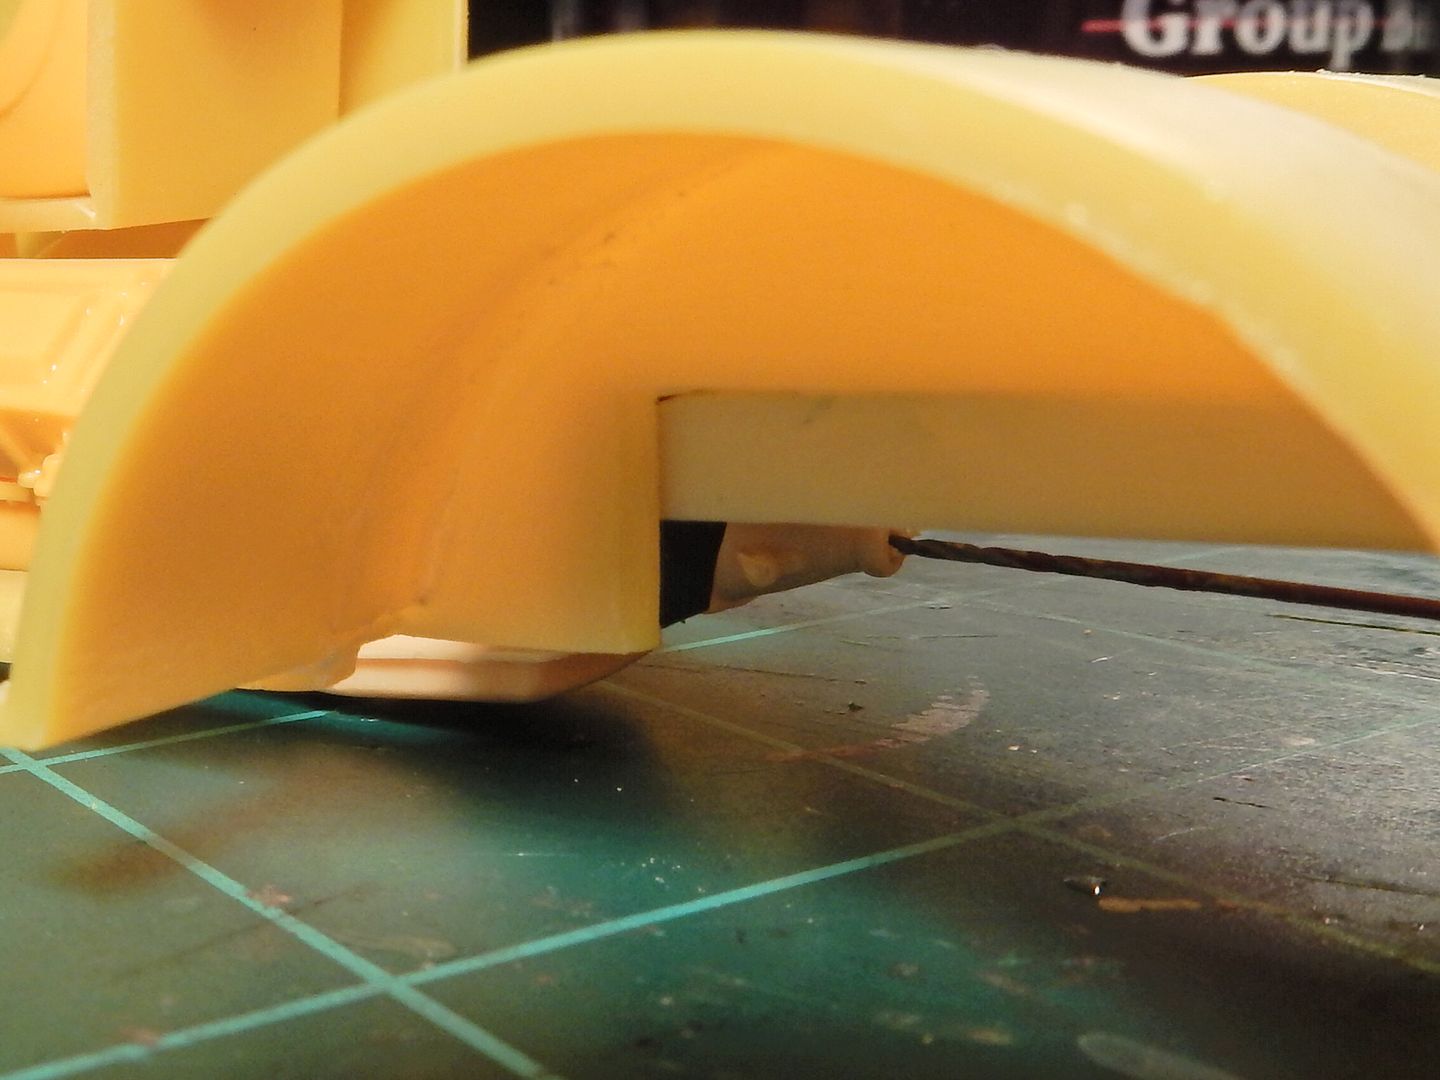
and I'm currently working on relocating the steering column over towards the drivers door to line it up with the drivers seat.
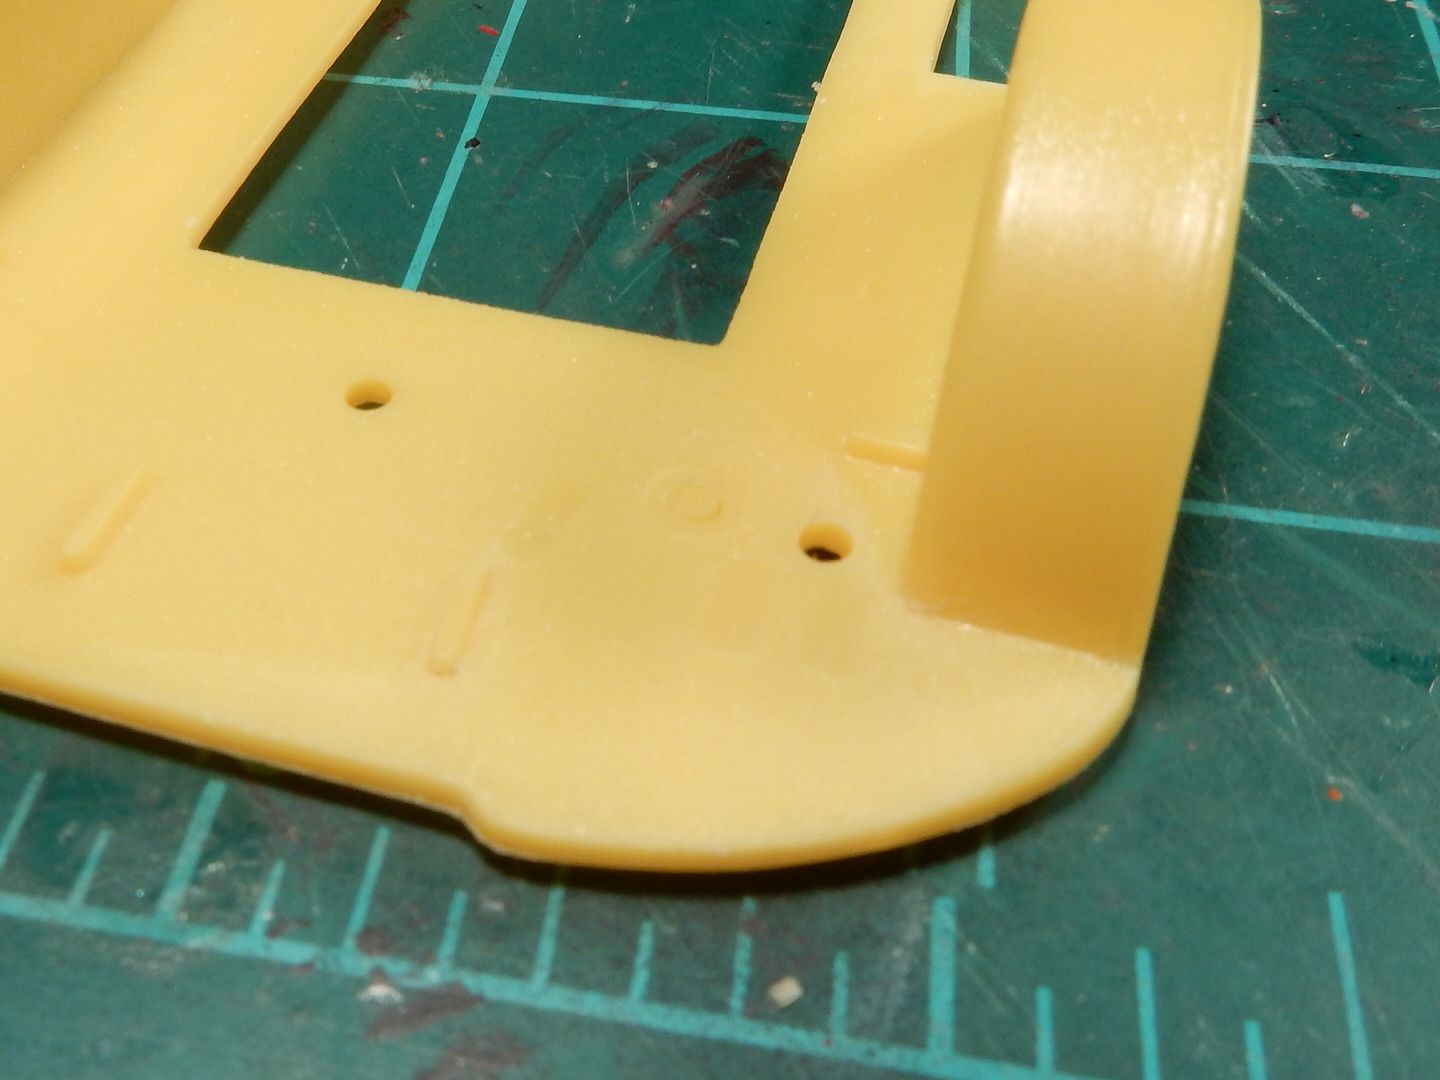
|
|
|
|
Post by stitchdup on Nov 11, 2016 6:21:31 GMT -7
I'm enjoying this one, vw's are my favorite brand and I also have a wild one planned for the june motm
|
|
|
|
Post by mustang1989 on Nov 11, 2016 12:18:29 GMT -7
Thanks Les.
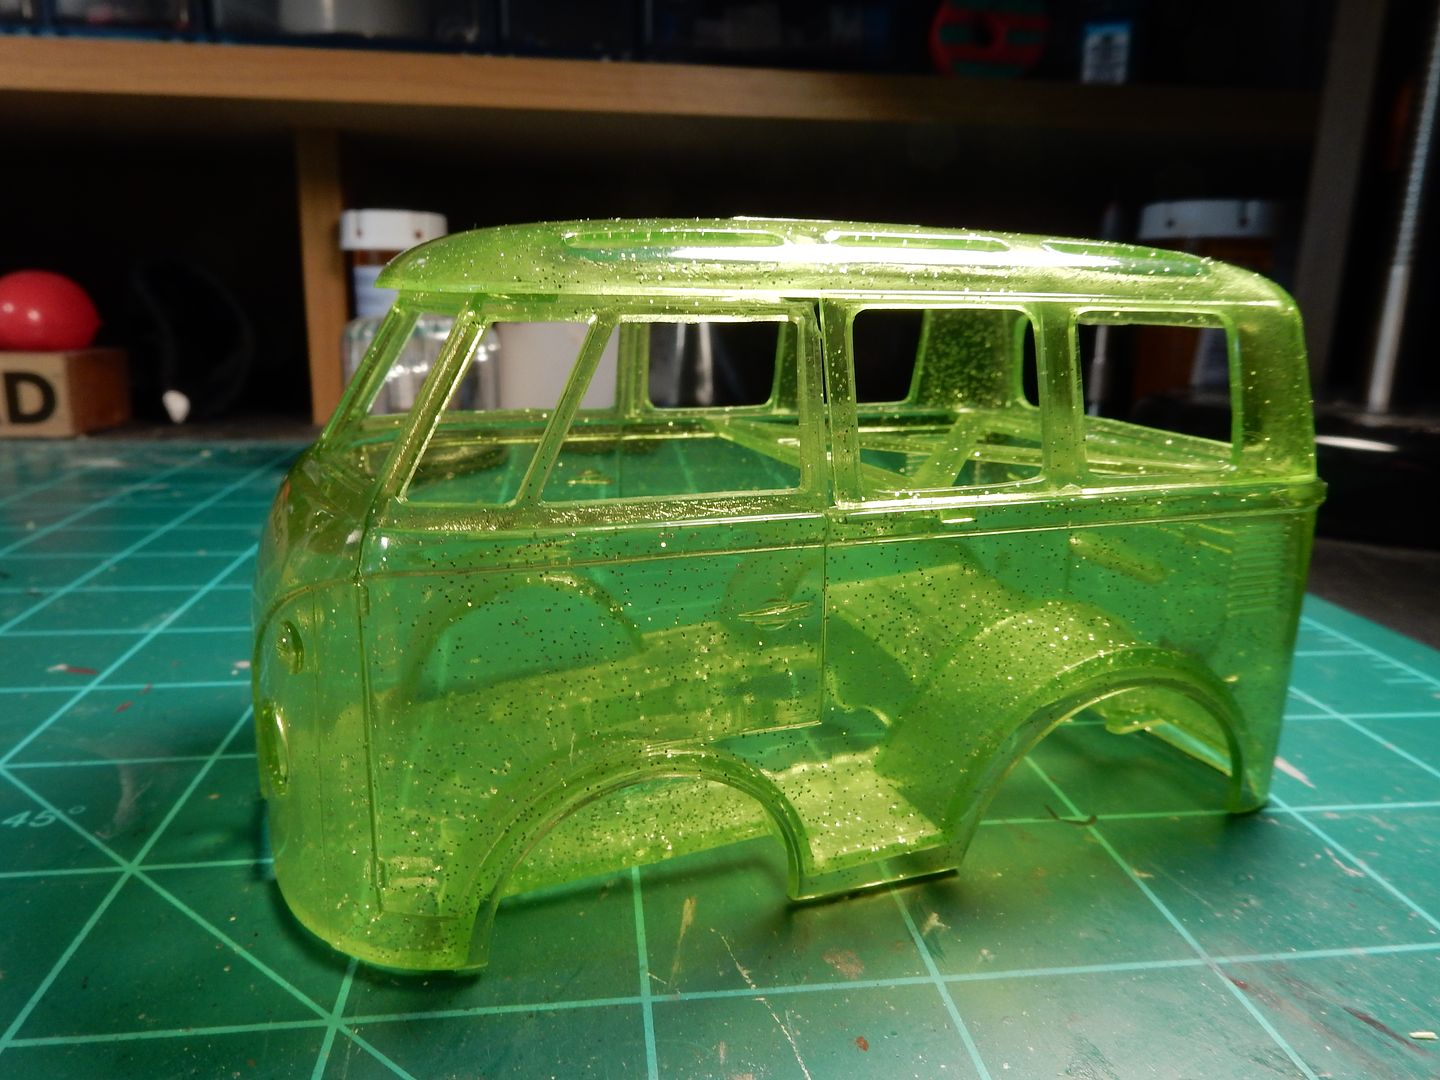
I went out today to pick one of these up from Hobby Lobby because I wanted to one to build OOB (yes.....it's going to happen) just to display my modified one next to an OOB version when finished and got that 1 in 12 that's supposed to be green. Cool color is all I've gotta say. I'm happier than a pig in slop!
|
|
|
|
Post by stitchdup on Nov 11, 2016 12:54:13 GMT -7
That looks awesome. Do you have to use a different glue with it being clear plastic?
|
|
|
|
Post by mustang1989 on Nov 11, 2016 13:16:03 GMT -7
Tamiya thin cement'll do it.
|
|
|
|
Post by mustang1989 on Nov 11, 2016 16:43:55 GMT -7
I think I'm going to put this one together pretty soon.
|
|
|
|
Post by kpnuts on Nov 13, 2016 13:03:44 GMT -7
That looks awesome and very radical.
|
|
|
|
Post by coyotecrunch on Nov 13, 2016 16:10:40 GMT -7
Cool man - that looks really cool!!
|
|
|
|
Post by mustang1989 on Nov 13, 2016 16:55:33 GMT -7
Thanks Ken and Tom.
I've been working on this one since yesterday and I got a great idea from another fellow auto model builder. I'll be painting the inside of the body gold and glossing the outside to bring out the most of that glitter. It'll be a shake n' bake build but I'll try to make the most of that body. |
|
|
|
Post by vcv8273 on Nov 14, 2016 7:26:51 GMT -7
Awesome build will definitely be following this one
|
|
|
|
Post by coyotecrunch on Nov 14, 2016 7:34:39 GMT -7
Thanks Ken and Tom.
I've been working on this one since yesterday and I got a great idea from another fellow auto model builder. I'll be painting the inside of the body gold and glossing the outside to bring out the most of that glitter. It'll be a shake n' bake build but I'll try to make the most of that body. A Ricky Bobby - Shake and Bake build - Woohoo!! |
|
tubbs
Full Member
  
Posts: 189
|
Post by tubbs on Nov 14, 2016 7:53:00 GMT -7
Thanks Les.
I went out today to pick one of these up from Hobby Lobby because I wanted to one to build OOB (yes.....it's going to happen) just to display my modified one next to an OOB version when finished and got that 1 in 12 that's supposed to be green. Cool color is all I've gotta say. I'm happier than a pig in slop!
the build is coming along really nice. you have enough room in the front of that motor for all the blower stuff, or did I miss something? like your idea of the OOB build next to your build, some... well, most of the people out there just don't realize just what all has been done to a build. this gives them some idea.
I also didn't know that it looked more like a real beetle van than the box leads on. thought it was like a Zinger kit. very cool.
|
|
|
|
Post by mustang1989 on Nov 14, 2016 14:00:09 GMT -7
Thanks Tom and tubbs!
Believe it or not there's enough room. I've measured off several times and I did end up cutting more from the front of the opening to allow for the turbos and carburetor.
|
|
|
|
Post by mustang1989 on Nov 17, 2016 19:36:30 GMT -7
Progress on this one starting in the morning.......
|
|
|
|
Post by mustang1989 on Nov 18, 2016 5:04:01 GMT -7
I managed to black base the engine, radiator, cooling fan and battery today and I applied a coat of metal flake blue on the engine. Next up I'll hit all the chrome with a coat of Tamiya Smoke and the one thing I think I will do to the engine is either drill out those tall intake tubes or replace them with aluminum parts brought to a high shine. I'll have to throw some spark plug wires on the motor as well. Pics either late today or in the morning.
|
|
|
|
Post by coyotecrunch on Nov 19, 2016 7:13:51 GMT -7
popcorn popcorn popcorn popcorn
|
|
|
|
Post by mustang1989 on Nov 19, 2016 7:20:13 GMT -7
I've got pics to post but PB is acting stupid AGAIN this morning. If any of you have any gripes about PB and you don't have an account that you bought into just bring it up to me and I'll let 'em have it. I do have bitchin' rights. |
|
|
|
Post by coyotecrunch on Nov 19, 2016 7:21:39 GMT -7
I've got pics to post but PB is acting stupid AGAIN this morning. If any of you have any gripes about PB and you don't have an account that you bought into just bring it up to me and I'll let 'em have it. I do have bitchin' rights. Ever since I did a paid annual subscription with them, and got rid of all the BS ads, PB has worked MUCH better for me |
|
|
|
Post by mustang1989 on Nov 19, 2016 7:35:48 GMT -7
I've got pics to post but PB is acting stupid AGAIN this morning. If any of you have any gripes about PB and you don't have an account that you bought into just bring it up to me and I'll let 'em have it. I do have bitchin' rights. Ever since I did a paid annual subscription with them, and got rid of all the BS ads, PB has worked MUCH better for me Speaking of which....it just came back up. I had the same thing happen. When I started payin' things got better.
Ok where was I? I received my fuel cell yesterday for the XL version that I'm building. This is gonna work out nicely is all I've gotta say....
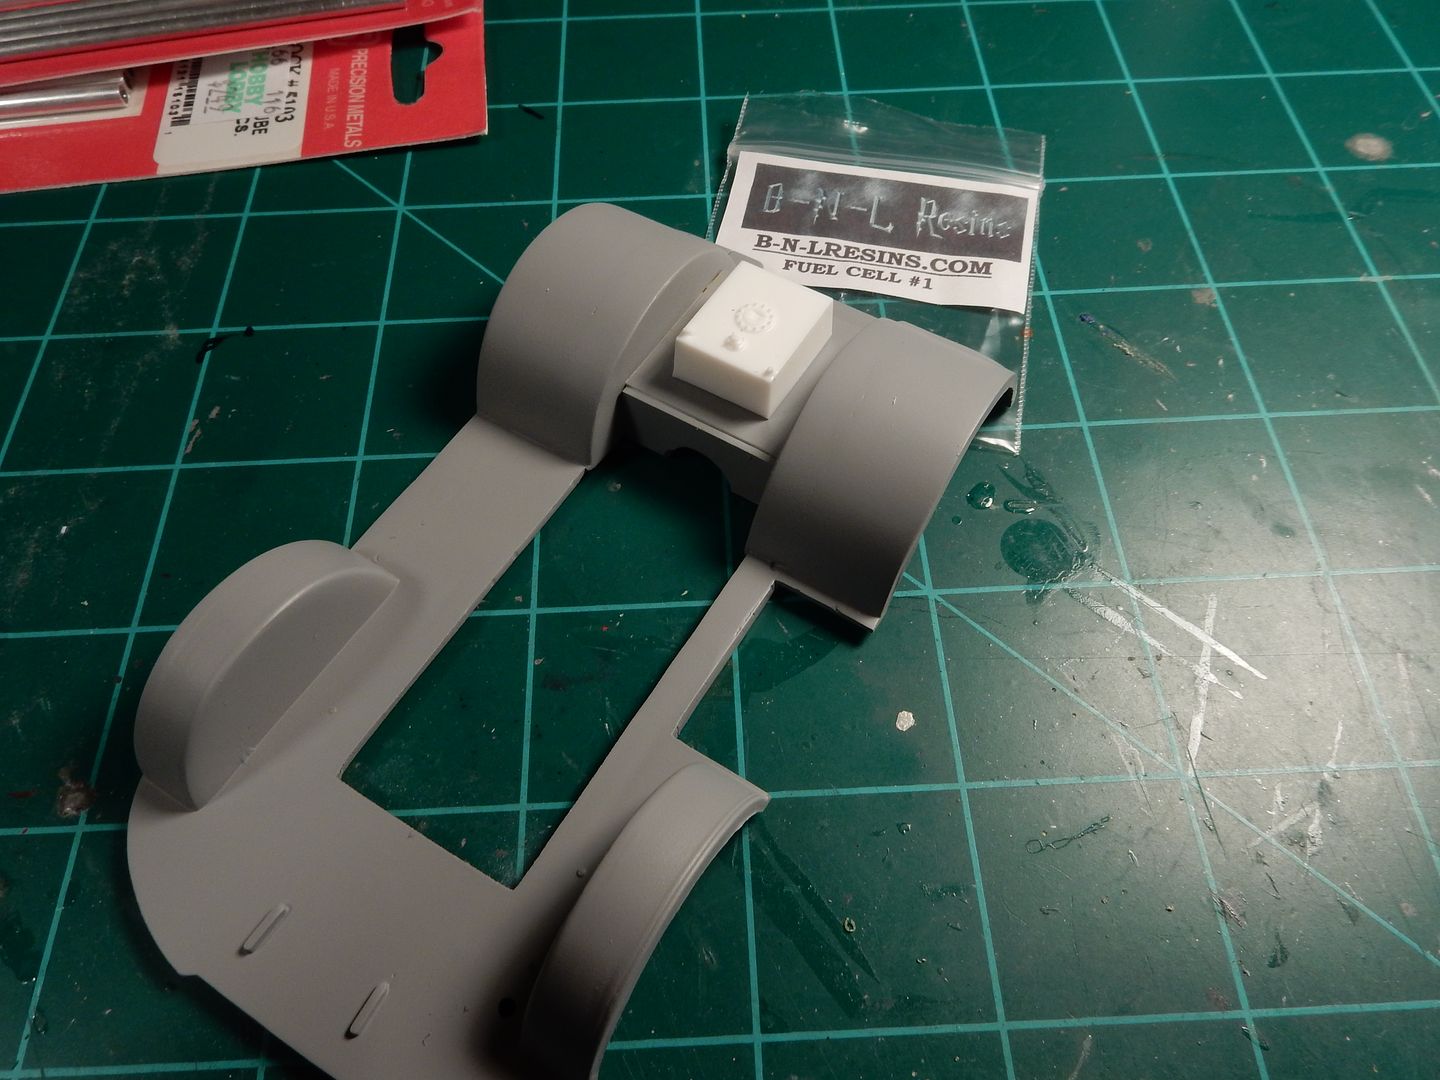
aaaaand I got the inside of the body shot with gold this morning and that's gonna work out well also! 
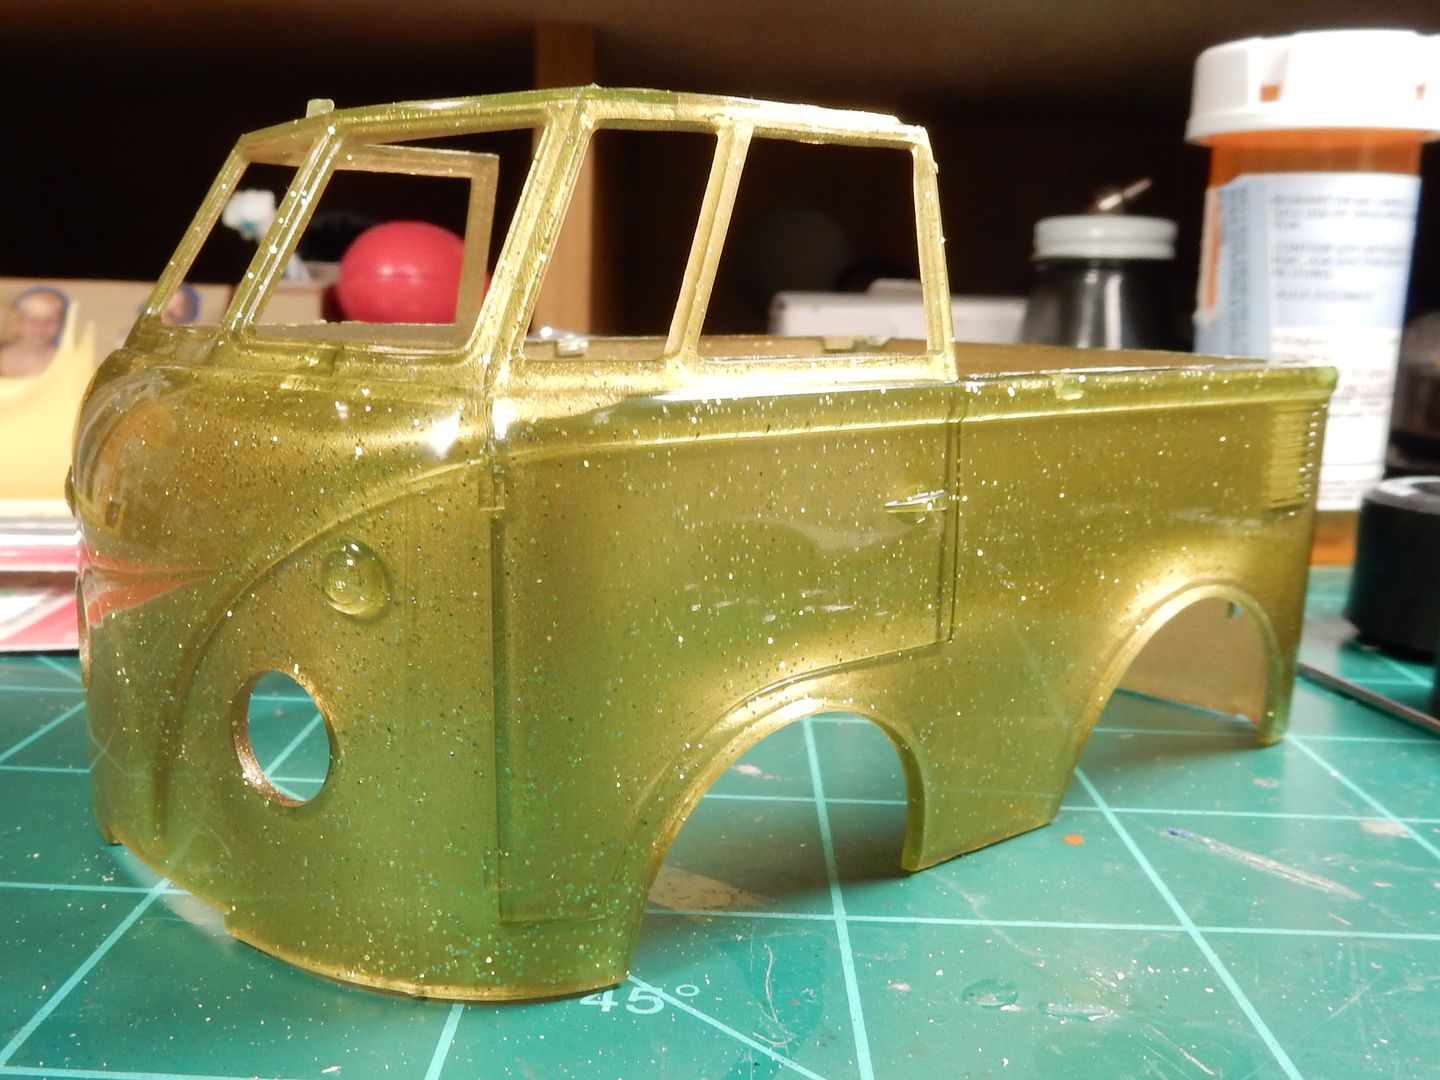
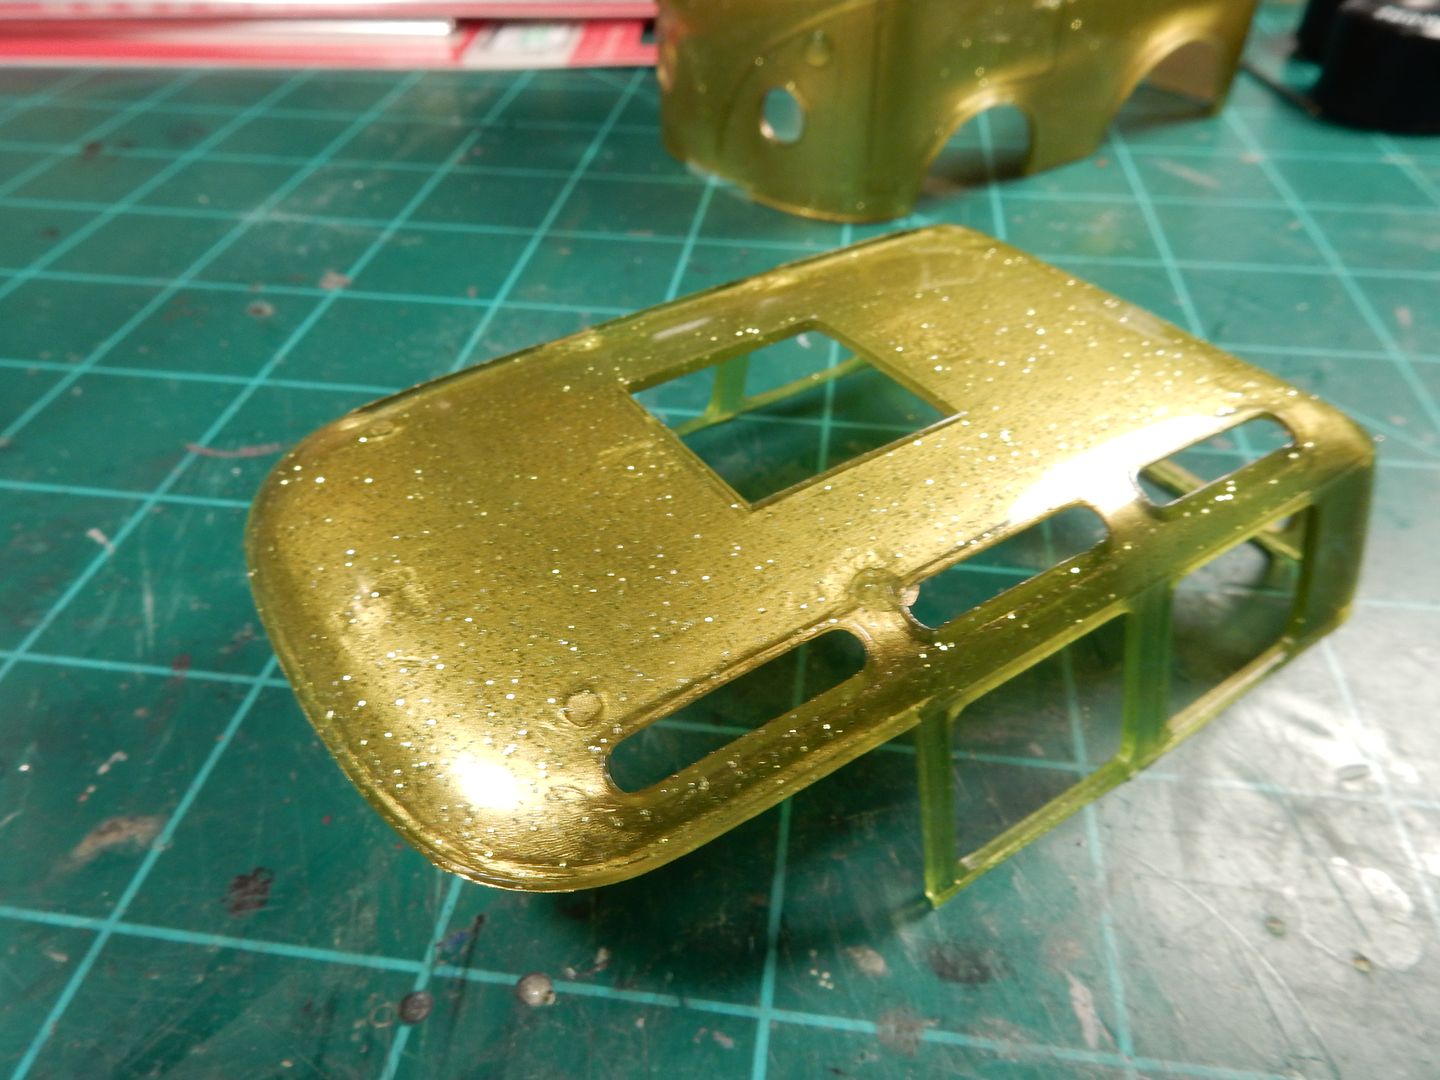
I've got some work to do on the top though. There's those to optional cut out impressions for adding....................antennas?   ?? ??  I've got some sanding to do to get not only those to look right but the ejector pin marks all over the inside of the roof as well. No problem.....................we'll get there. I've got some sanding to do to get not only those to look right but the ejector pin marks all over the inside of the roof as well. No problem.....................we'll get there.   
|
|
|
|
Post by kpnuts on Nov 19, 2016 7:54:00 GMT -7
Looking impressive, lot of work on those pin marks.
|
|
|
|
Post by mustang1989 on Nov 19, 2016 7:55:28 GMT -7
Looking impressive, lot of work on those pin marks. Thanks Ken. As far as the pin marks...................aint nuthin' for a stepper.  |
|
|
|
Post by mustang1989 on Nov 19, 2016 11:00:22 GMT -7
I'll be out of pocket as far as model building goes tomorrow morning. My wife and I are going out on a mini-"staycation" just to get away from home for a night together. Just had to get the heck out of the house for one day at the very minimum. Will be picking back up on Monday morning on the Arado 234 for the week and then it's back on this bad boy Friday morning.
|
|
|
|
Post by stitchdup on Nov 19, 2016 11:05:51 GMT -7
Enjoy your night away mate
|
|
|
|
Post by mustang1989 on Nov 19, 2016 11:19:48 GMT -7
Thanks Les.  |
|
|
|
Post by hurtz on Nov 21, 2016 5:34:57 GMT -7
cool build
|
|
|
|
Post by mustang1989 on Nov 21, 2016 6:36:59 GMT -7
Thanks hurtz.
|
|
|
|
Post by 406 Silverado on Nov 21, 2016 7:31:55 GMT -7
This is excellent! I really enjoy your progress builds.
But...you really have to tell me where you get your smileys from. I'd like to add them to the box here.
|
|
|
|
Post by Big D on Nov 21, 2016 8:12:37 GMT -7
Yes, Do tell.
|
|