|
|
Post by Jay's Mini Scale on Feb 11, 2017 18:54:31 GMT -7
Looking good
|
|
|
|
Post by mustang1989 on Feb 12, 2017 7:44:38 GMT -7
Thanks Jason. Glued the intake manifold down this morning and am thinning the drive belt down some to keep it from having a 2" thick look.
|
|
|
|
Post by lowlife on Feb 12, 2017 9:55:54 GMT -7
Camaros coming along real nice. Lots of little details added that we all miss at times, just goes to show how good a model can be built if you just take a little time and patience !
Looking forward to more on this !
|
|
Deleted
Deleted Member
Posts: 0
|
Post by Deleted on Feb 12, 2017 22:19:27 GMT -7
I like the interior a lot I can't see well enough to paint like that anymore The speedometer and gauges and such
|
|
|
|
Post by mustang1989 on Feb 13, 2017 4:32:30 GMT -7
Thanks Martin and DA. Patience I've got..................eyesight though? It's not as good as it used to be.
|
|
|
|
Post by mustang1989 on Feb 14, 2017 4:04:16 GMT -7
So I picked up this 1/25 scale Revell Camaro for any spare parts I might need along the way, a few of which I have used. I've gotten some commentary on how bad the old Monogram Camaro was in terms of size and overall accuracy in which I can say that those comments are right on in almost every sense of the word. Nevertheless, my original goal was to restore my first auto build and I will be staying true to that course. However there is a temporary set back with the engine.
I test fitted the 396 that I've been building up into the mocked up build and I'm glad I did. Talk about what looks like a mouse motor looking 396 in there between the fenders!!!
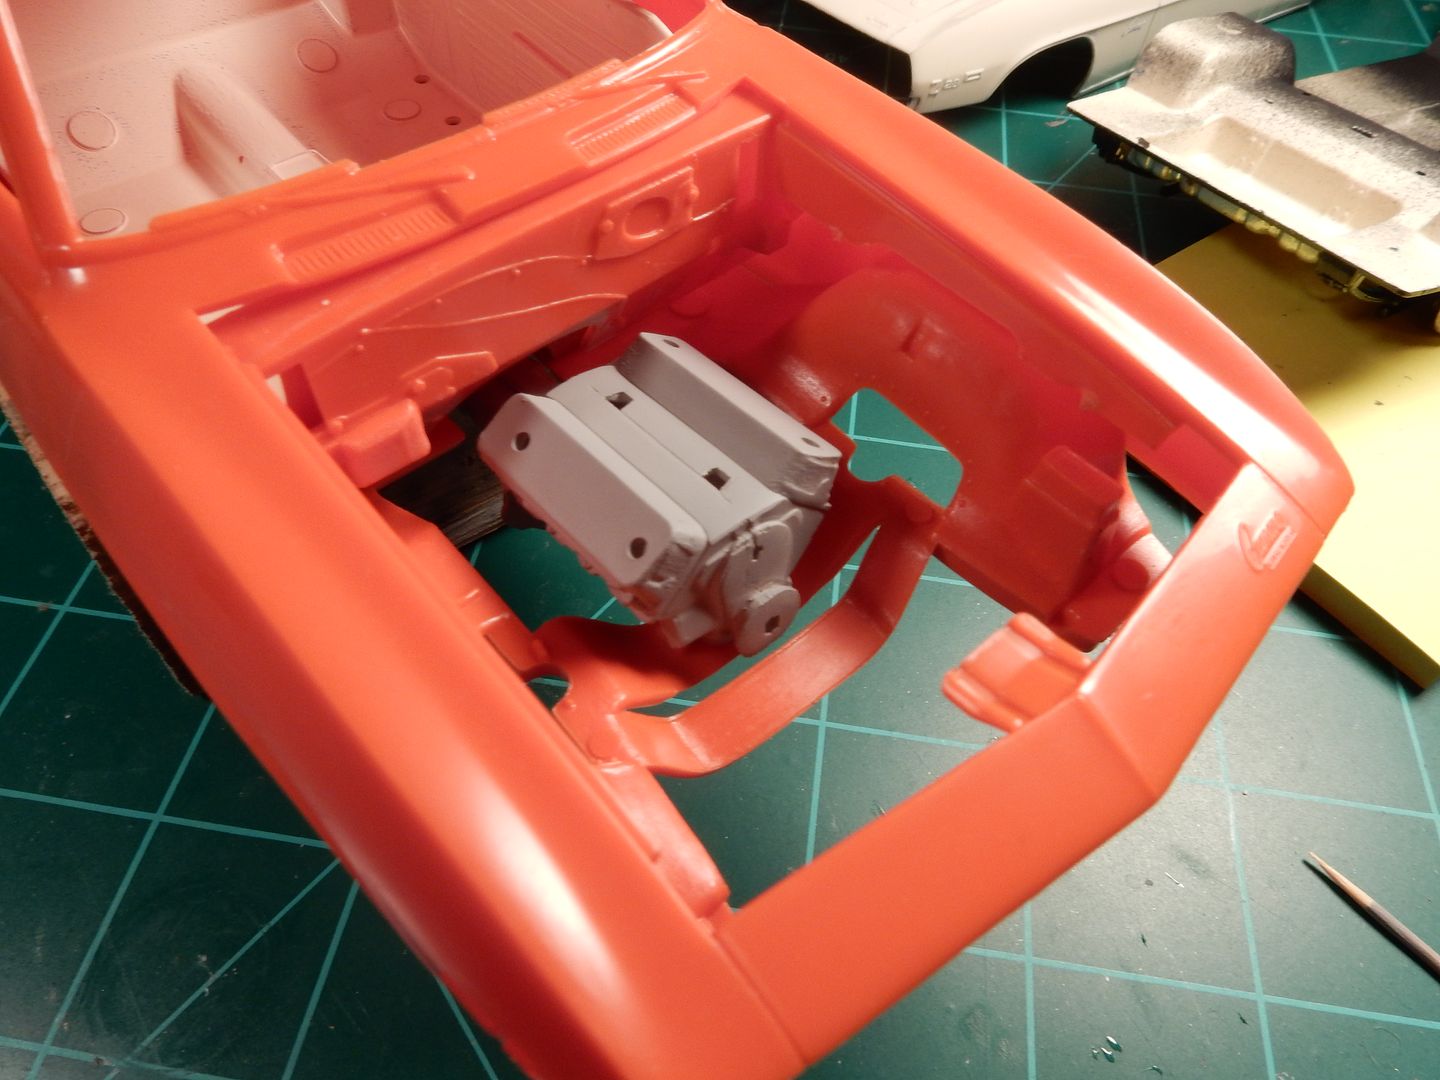
The more I looked at it , the more I saw a distinct difference in not only scale but from the last BB Chevy I built that went into my '54 Panel. So I turned right back to the AMT BB Chevy for an engine build. Both are the "same scale" at 1/25 but look how much bigger AMT's BB is as opposed to Revell's.
I also grabbed a set of 1/24 scale rocker covers from the Pro Stock Camaro kit that I've got for extra "bulk". They fit perfectly.
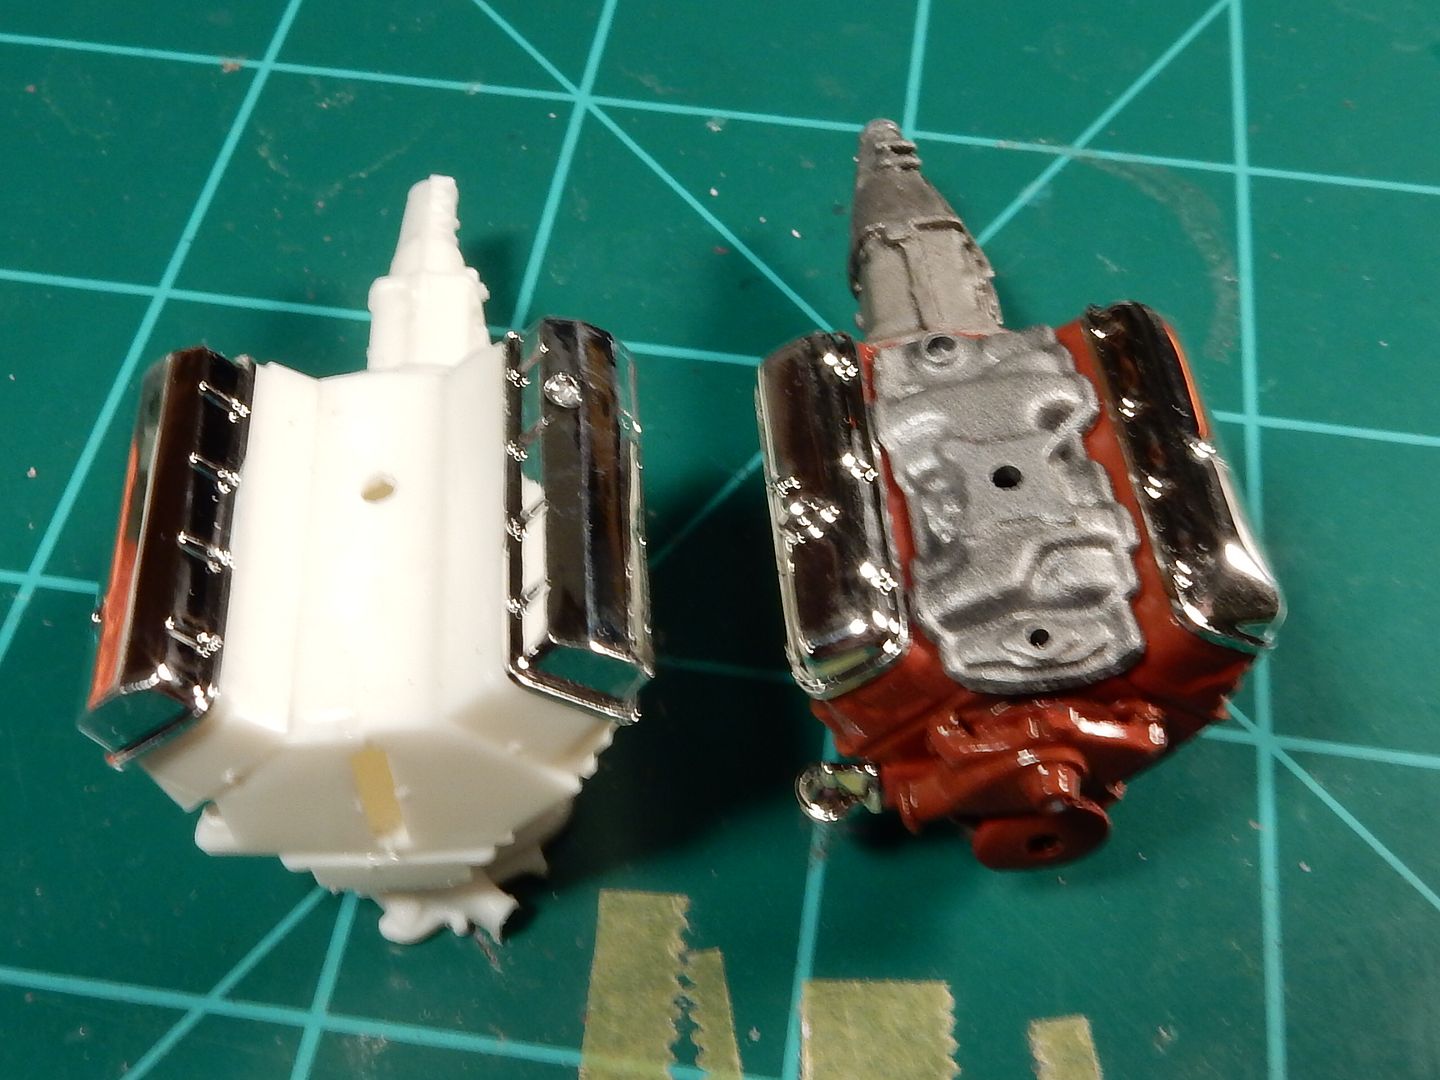
Yeah..................a no brainer right?
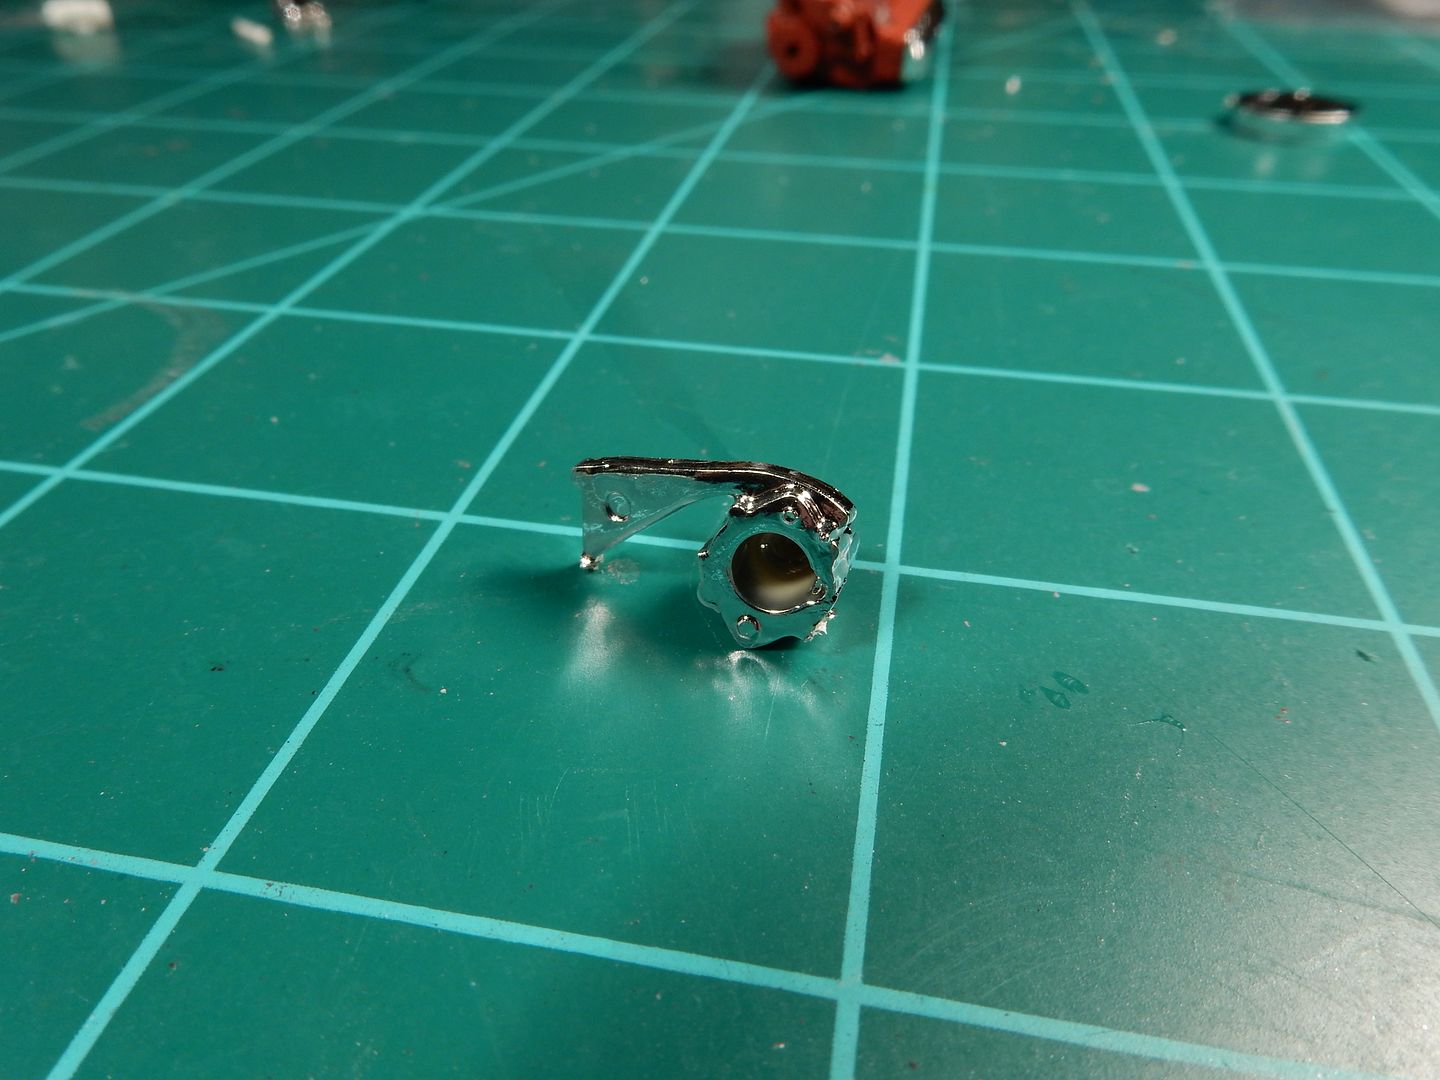
Another thing that I liked about AMT's BB is that it also comes with a bracket for that alternator so I don't have that "mysterious floating alternator" hanging off of the belt out there.
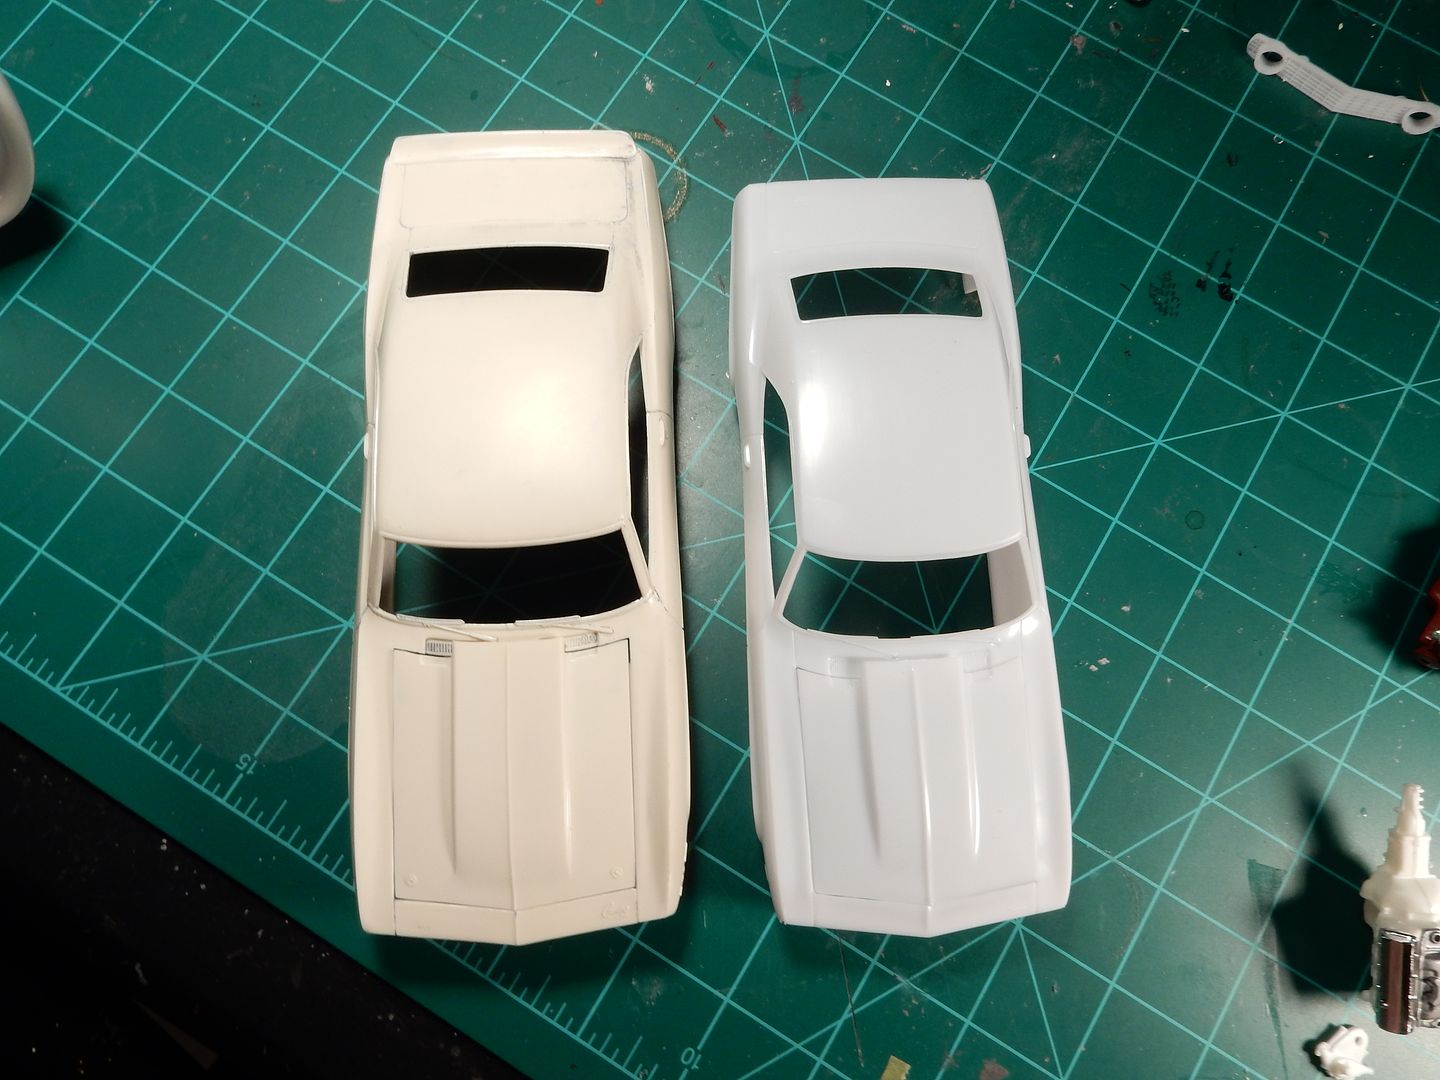
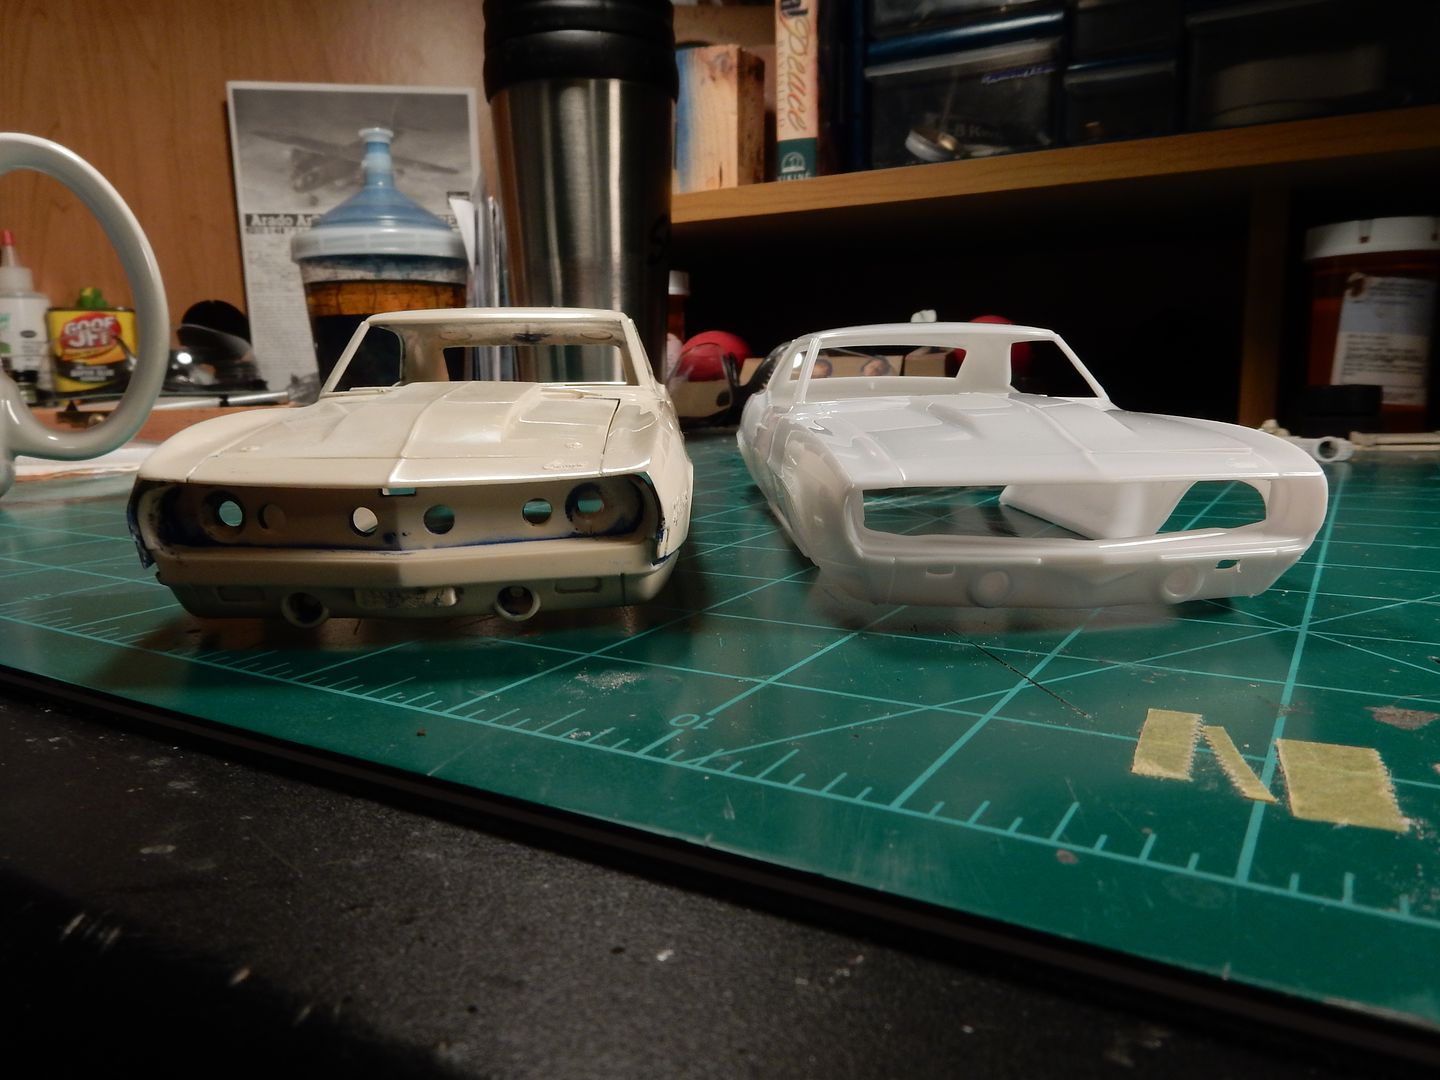
Just as a side note and as a defense to those who are telling me that the Monogram Camaro has some severe dimensional and accuracy issues. Here is the Monogram Camaro body on the left and the Revell one to the right. First off I just don't see how a 1/24th scale model could be this far off in size difference................but that's just me. Secondly there ARE some serious differences in the body lines and curves throughout the body on the Monogram one. Wow! Still................this is all about sentiments so forward with my original intent I go.....
|
|
|
|
Post by mustang1989 on Feb 15, 2017 4:23:19 GMT -7
Ok gang. No pictures today but lots of solid work on the engine. I tend to spend a lot of time in the interiors and engines in particular. The exterior shine and trim are still things I work on but EVERYBODY wants to see what's under the hood of any given performance car and have a look inside so I try to get things as good as possible in both aspects of auto model building. I spent a lot of time cleaning the block up from sprue attachment point appendages, a hole in the oil pan? , seam joint clean up and sanding all mounting surfaces flush like the oil pan to block, cylinder heads to block, timing cover to block and the two halves of the engine and xmsn seam joint. Managed to cut the original oil filter (which looked more like the long and slender AC Delco PF52 oil filter than the much larger in diameter PF1218 that we'll be going with) from the oil pan and mount a more suitable one in it's place. I've got an AC Delco decal that I'll be throwing on that filter as well. I cut the molded in fuel pump from the engine block and will be transferring the chrome one from the engine that I started on over to this one. I've still gotta figure out how I want to approach the rocker cover situation and may try my hand a Alclad again. John Teresi gave me a short tutorial on the way he does Alclad and I've been trying pretty hard to get it right so I may find myself practicing again to get as good as he is at it. I'll try to have progress pics up tomorrow morning guys. Thanks for looking in. , seam joint clean up and sanding all mounting surfaces flush like the oil pan to block, cylinder heads to block, timing cover to block and the two halves of the engine and xmsn seam joint. Managed to cut the original oil filter (which looked more like the long and slender AC Delco PF52 oil filter than the much larger in diameter PF1218 that we'll be going with) from the oil pan and mount a more suitable one in it's place. I've got an AC Delco decal that I'll be throwing on that filter as well. I cut the molded in fuel pump from the engine block and will be transferring the chrome one from the engine that I started on over to this one. I've still gotta figure out how I want to approach the rocker cover situation and may try my hand a Alclad again. John Teresi gave me a short tutorial on the way he does Alclad and I've been trying pretty hard to get it right so I may find myself practicing again to get as good as he is at it. I'll try to have progress pics up tomorrow morning guys. Thanks for looking in. 
|
|
|
|
Post by coyotecrunch on Feb 15, 2017 10:27:13 GMT -7
Popcorn%20and%20drink%20emoticon_zpsnbkzs8ys
|
|
|
|
Post by Jay's Mini Scale on Feb 15, 2017 16:57:37 GMT -7
Big difference between 1/24and 1/25 1/24is an old school
|
|
|
|
Post by mustang1989 on Feb 15, 2017 17:52:02 GMT -7
Big difference between 1/24and 1/25 1/24is an old school Yes siree there is. I dunno about old school though. The Revell "Street Burner" kits in 1/24 are still selling...................... sorry%20bout%20dat_zps1nny96hw |
|
|
|
Post by vcv8273 on Feb 16, 2017 6:59:13 GMT -7
Good move going with the amt big block and like your choice of valve covers. Looking forward to seeing more of this one Joe
|
|
tubbs
Full Member
  
Posts: 189
|
Post by tubbs on Feb 16, 2017 12:04:04 GMT -7
looking good Joe. yep, bought that kit many moons ago. never built it, way too out of shape for me. your making it look good.... and easy! time and patience. your rockin' it pal!!
|
|
|
|
Post by mustang1989 on Feb 16, 2017 13:22:57 GMT -7
Good move going with the amt big block and like your choice of valve covers. Looking forward to seeing more of this one Joe Thanks Steve. I appreciate that. |
|
|
|
Post by mustang1989 on Feb 16, 2017 13:23:53 GMT -7
looking good Joe. yep, bought that kit many moons ago. never built it, way too out of shape for me. your making it look good.... and easy! time and patience. your rockin' it pal!! If it weren't for the sentimental factor I'd be building the newer Revell release. I am, however, trying to work a small miracle with this kit. lol
Thanks Al.
|
|
|
|
Post by mustang1989 on Feb 17, 2017 20:07:01 GMT -7
Got some fair progress on the replacement engine throughout my day off today. Got the motor assembled, cleaned up and got all the sanding , filling and all that done, shot the black base coat and the base color coat and a gloss coat to the long block. I also stripped the chrome from the rocker covers and will start the Alclad process tomorrow . I'll also be applying the subtle dark wash to the long block to tone it down a little and bring out the detail. I'll have some progress shots for you guys tomorrow,
|
|
|
|
Post by DeeCee on Feb 17, 2017 20:36:24 GMT -7
icon_bored_zpscodtnzo5
|
|
|
|
Post by mustang1989 on Feb 17, 2017 21:31:11 GMT -7
Yeah I know................ icon_clockwatch_zpsxnglspgq |
|
|
|
Post by mustang1989 on Feb 18, 2017 5:54:51 GMT -7
Okeedokee Dale and gang. Here's todays update brought to you from the Coastal Bend here in Texas. Today promises to be a warm and sunny day  .................no wait..... that's the forecast!! sorry%20bout%20dat_zps1nny96hw I had what I call lots of progress yesterday. I'm back in the fight again after re-hashing the engine size ordeal and am back on the road with this puppy. First off this thing had a nasty mount hole in the oil pan for the Chevelle that it was supposed to go in so I had to fill that in with super glue, sand flush and smooth out: 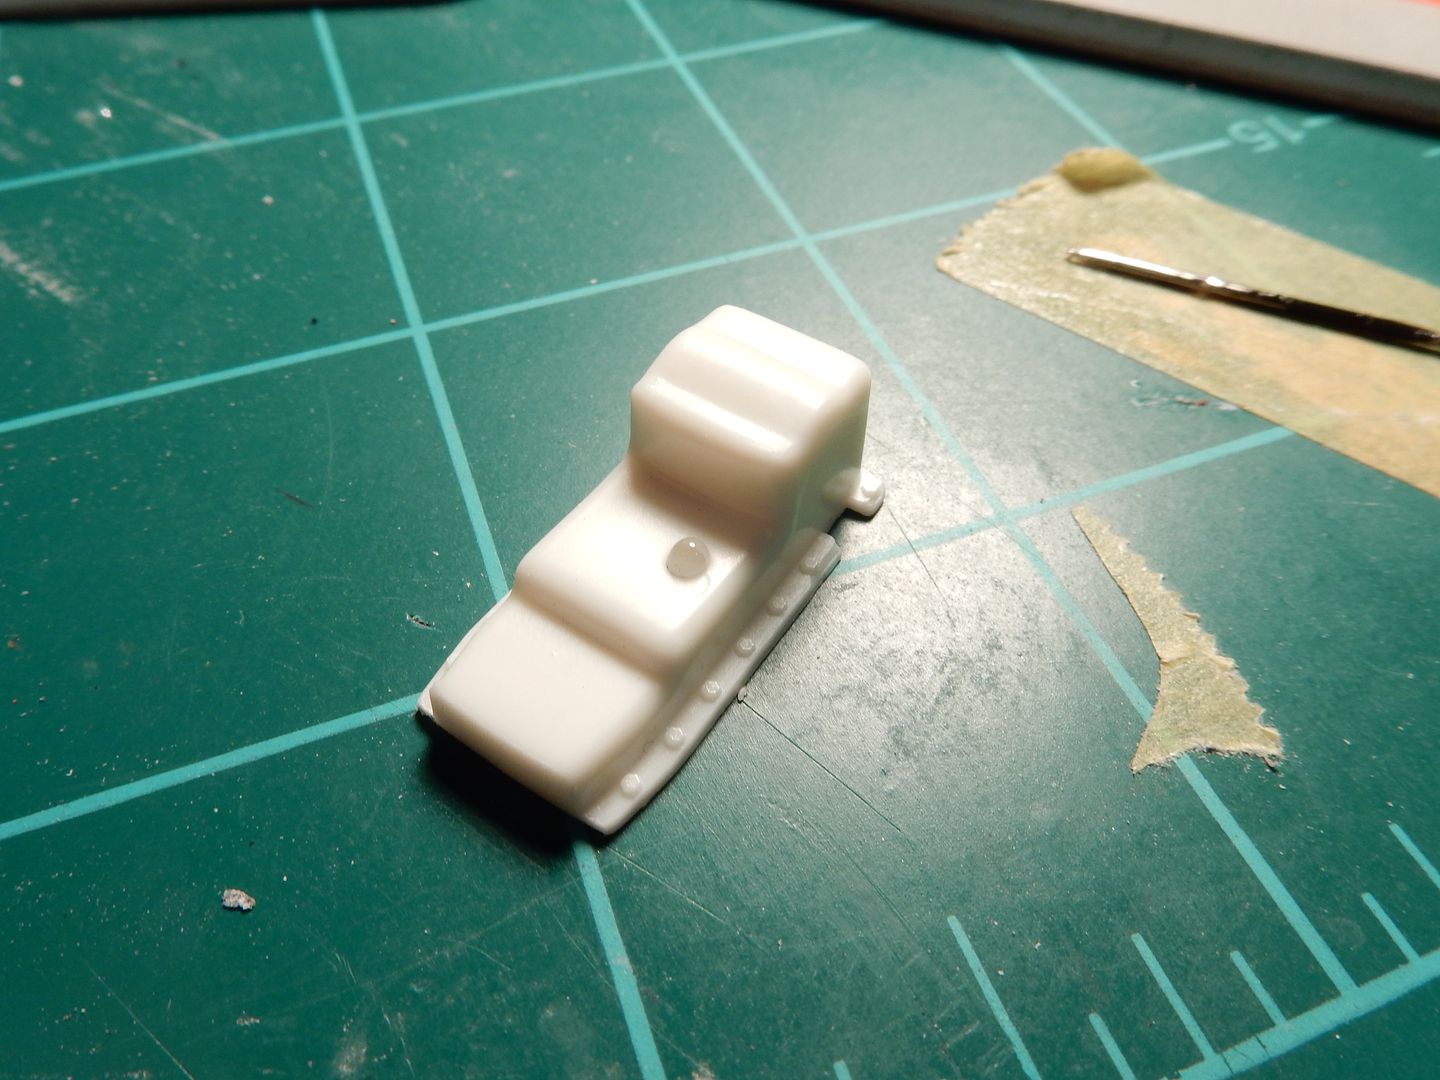 Then I had the sprue attachment points to contend with which always seem to show up in the most unwanted places like at the ends of cylinder heads, smack dab in the middle of the transmissions.........on the bottom nonetheless and places like this timing cover. This stuff bugs me so I got rid of that from the timing cover and the rest of the attachment points on the engine pieces: 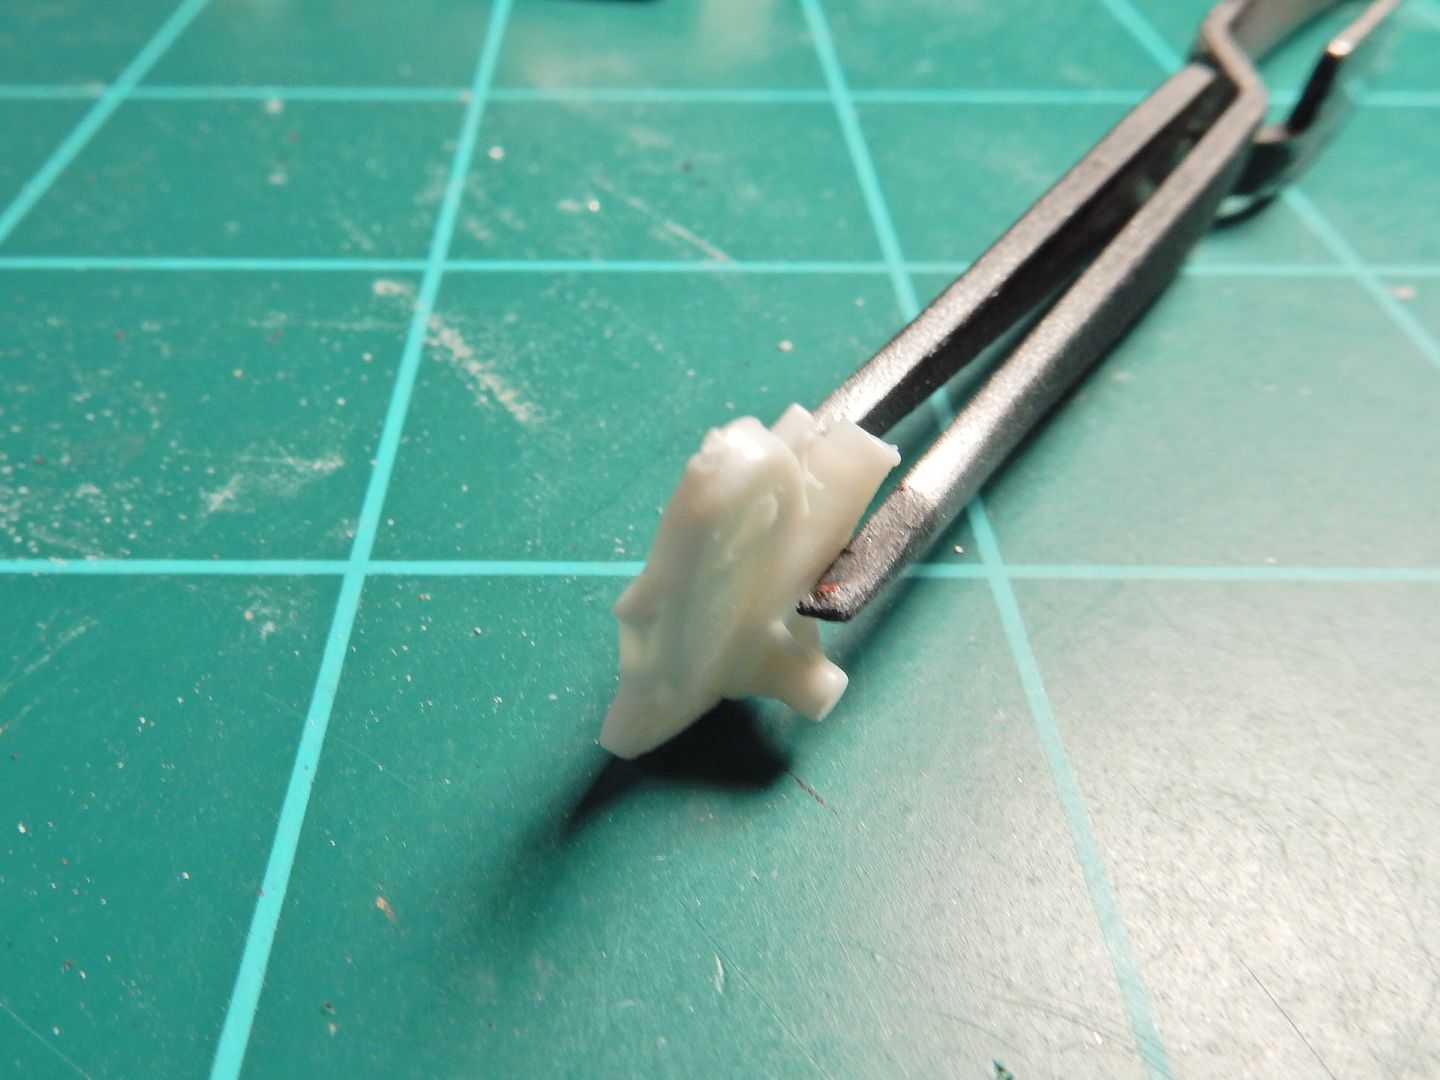 I also got this cool decal sheet with a bunch of oil filter decals on it. Nice touch for the bottom end as well as the PE oil pan drain plug. I toned the engine paint down and brought out the molded in detail with an airbrushed coat of Tamiya Smoke. I've still gotta mask off and hit that transmission with some Steel paint but here she is so far. 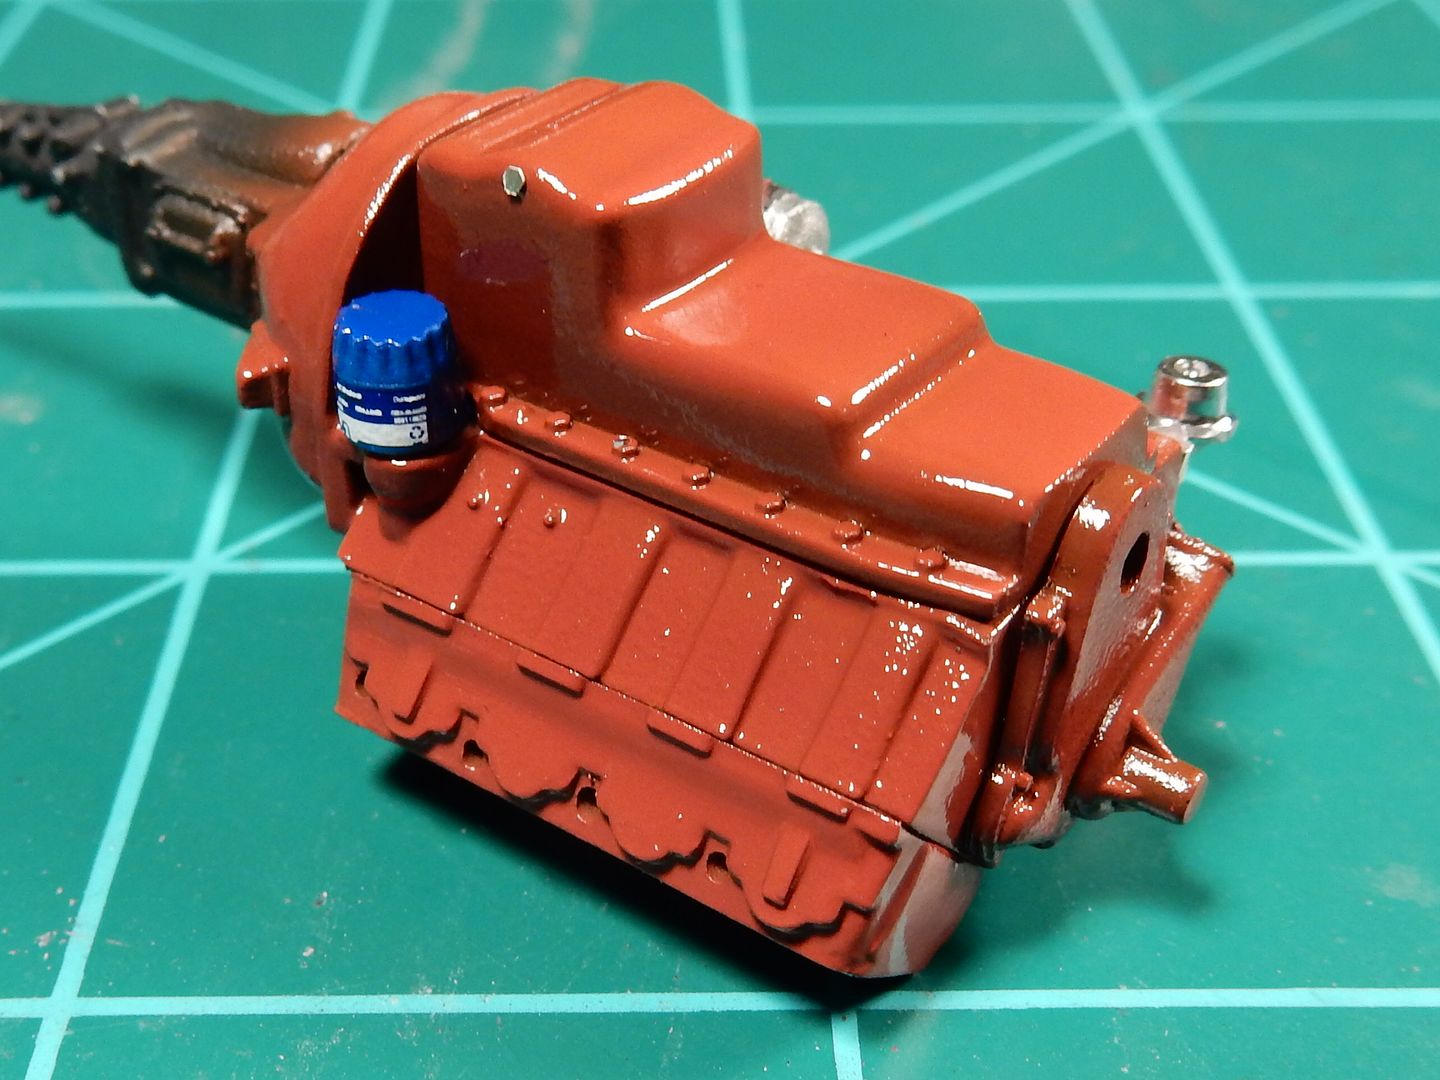 I carried the fuel pump over from the other engine but replaced the starter with the AMT offering because it had better details than the Revell starter did. 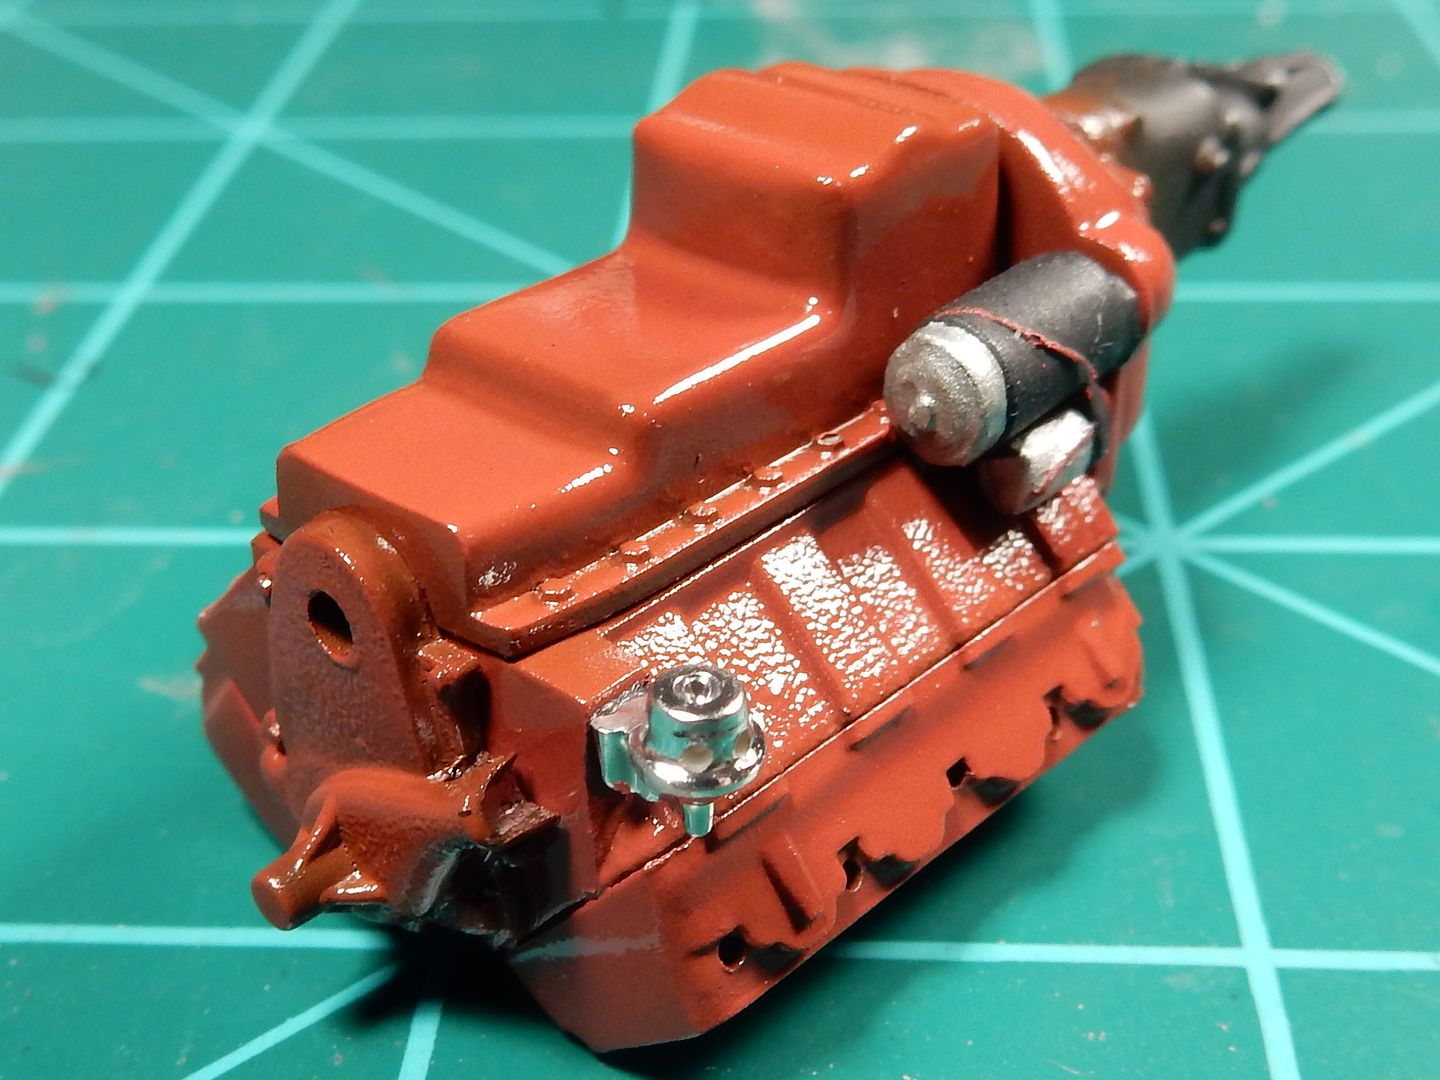 I tried something new with the exhaust manifolds. I primed them in flat black and shot a very light coat of Alclad II Polished Aluminum on them to give them a true iron look. I was happy with the results but the pictures don't seem to capture the dark steel/ iron look that they actually are. Believe me, they aint this flashy: 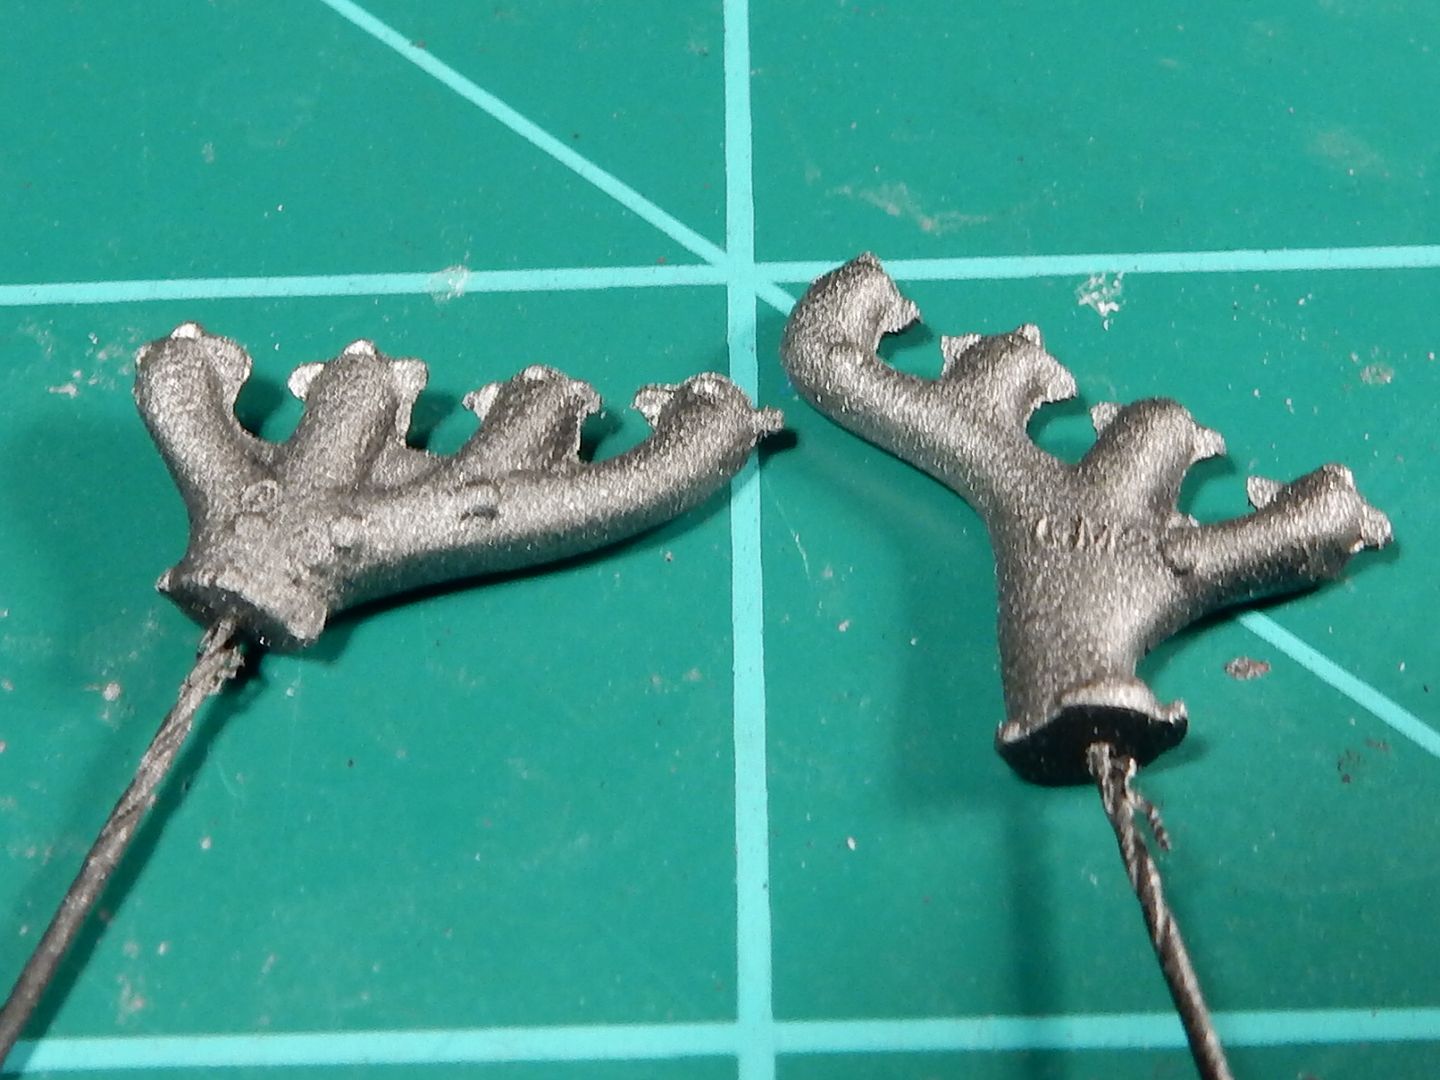 |
|
|
|
Post by DeeCee on Feb 18, 2017 15:18:29 GMT -7
NICE NICE NICE!!! Good progress Joe, can't wait to see this engine all together..
|
|
|
|
Post by mustang1989 on Feb 19, 2017 3:28:37 GMT -7
NICE NICE NICE!!! Good progress Joe, can't wait to see this engine all together.. Thanks Dale. With any luck I won't be on that part for too long. I've pretty much got my regiment down for that part. |
|
|
|
Post by mustang1989 on Feb 19, 2017 7:15:58 GMT -7
Spent the morning touching up paint issues after getting the exhaust manifold mounting surfaces touched up. Note to self.........................do NOT installed small PE parts until engine construction is almost complete. Tough lesson to learn due to my antsiness to see the details on there so the oil pan drain plug fell off from excessive handling of the engine. No worries though. Got plenty of those. I shot the black on the rocker covers and shot the gloss coat on them this morning. It'll take a few days for the gloss to cure out but it's going to be a smooooooooooooooooooth surface for that chrome Alclad. We'll see how that goes. I did want to show the carburetor that I'll be using on this mount. I got these from FAB Resinworks and they look fabulous. Can't wait to put the PE linkage on this thing along with the return spring. frantic 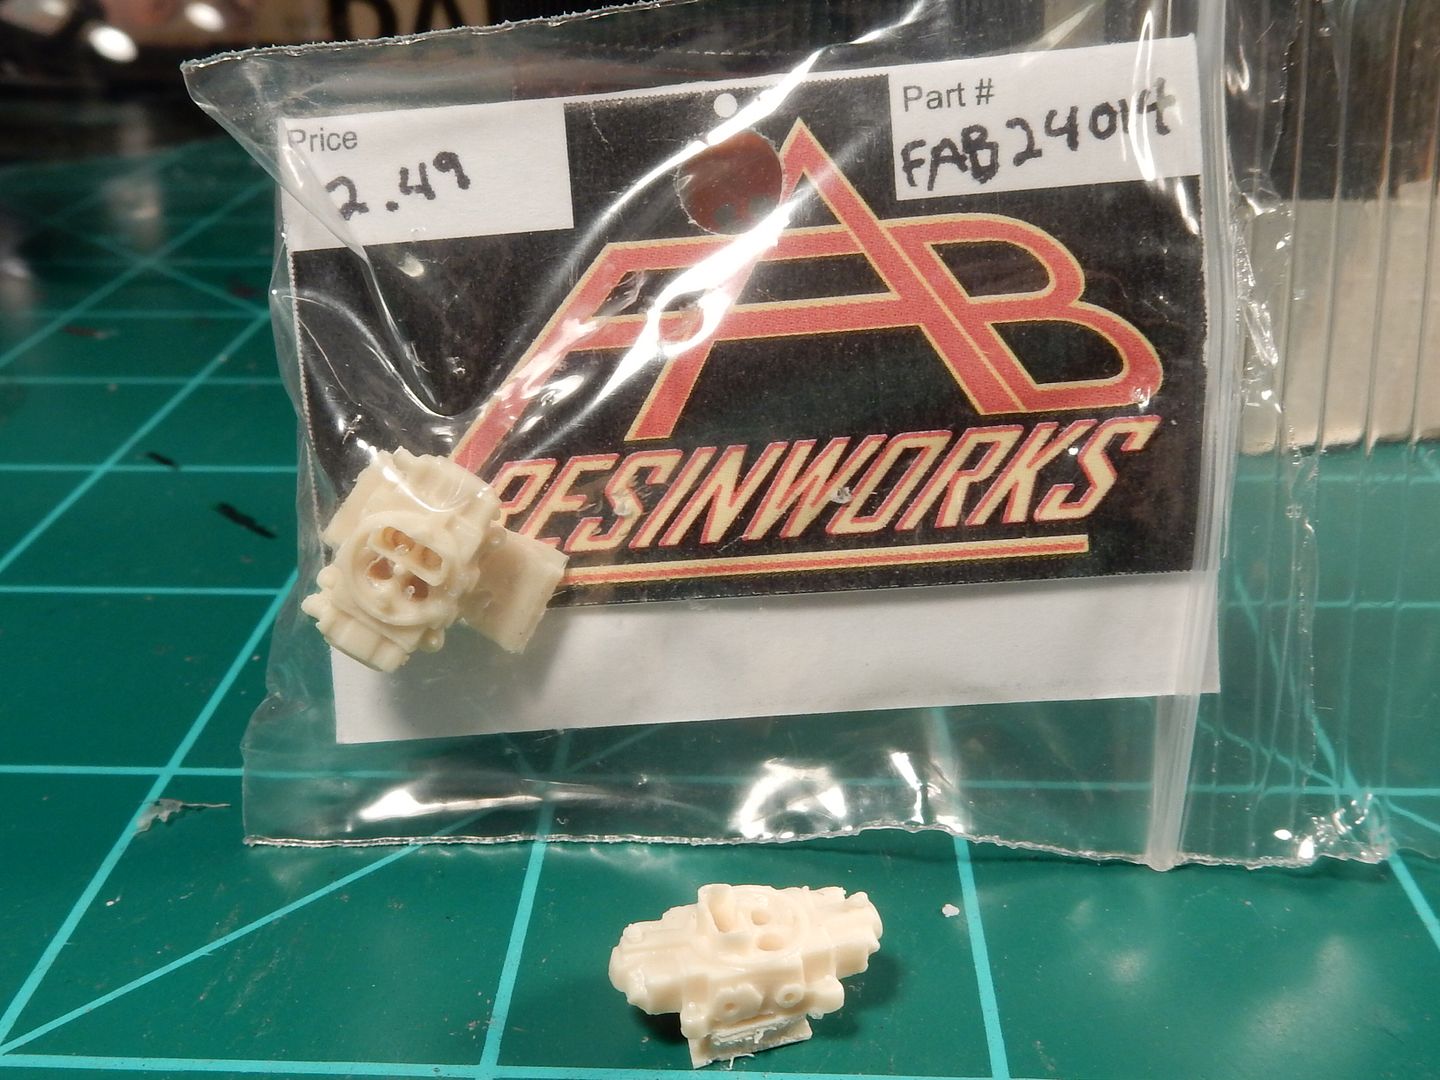 |
|
|
|
Post by kpnuts on Feb 20, 2017 8:55:01 GMT -7
Looking great, as usual
|
|
|
|
Post by mustang1989 on Feb 21, 2017 9:27:28 GMT -7
Thanks Ken. 
Still swingin' away at it. While I'm waiting on the gloss coat on the rocker covers to cure out I switched over to the chassis. I still can't believe the molded in battery that's located behind the R/H front inner fender liner. 4fvgdaq_th I'm cutting that away as well as the molded in detail on the same fender. Ridiculous looking! Totally ridiculous looking I say.
|
|
|
|
Post by Jay's Mini Scale on Mar 9, 2017 13:36:59 GMT -7
Looking good my friend
|
|
Deleted
Deleted Member
Posts: 0
|
Post by Deleted on Mar 10, 2017 0:41:11 GMT -7
Looking real good! I like the detail
|
|
|
|
Post by coyotecrunch on Mar 10, 2017 9:28:27 GMT -7
|
|
|
|
Post by mustang1989 on Mar 10, 2017 9:38:53 GMT -7
Thanks fellas.
I actually had this thing primed and painted as of last Friday but then things went wrong...........REALLY wrong. I had sanded all of the molded emblems from the body and primed with Tamiya Primer. Using automotive paint (Mystic Teal Metallic) I began to shoot the color onto the body. It all looked superb! I mean it was the best coat of color I've laid down yet , and then.....................it went south................in a hurry! My emblems all came back but instead of being raised they were sunken in. I'll Illustrate:
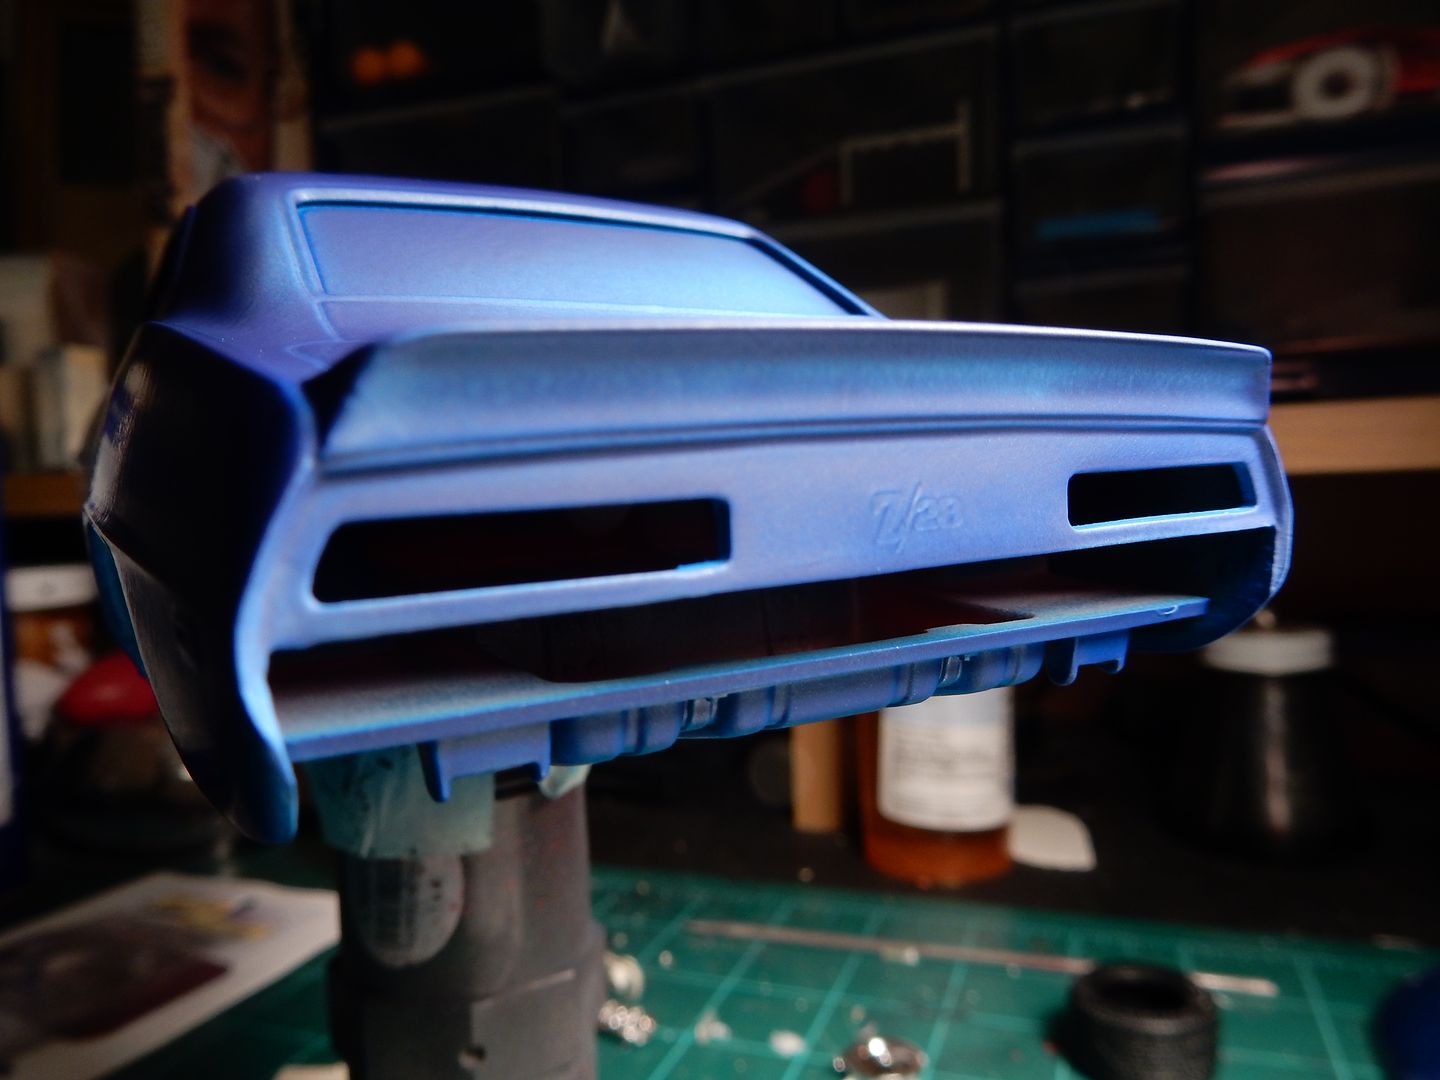
Additionally there were small ripples in the plastic!!!!!!!!!! Dammit!!  I've since stripped all of the paint from the body and have been sanding all dang week. I put some plastic sprue shavings in a jar and mixed some Tamiya thin cement with it to form a liquid plastic and applied it to all areas where the emblems were, let it harden and smoothed all of those back out. I still have some touch up to go but should be ready for AIRBRUSHING this paint on in thin layers by the end of the weekend. I just shot the paint on way to thick is all that happened and the bad thing is ...................I know better. I've since stripped all of the paint from the body and have been sanding all dang week. I put some plastic sprue shavings in a jar and mixed some Tamiya thin cement with it to form a liquid plastic and applied it to all areas where the emblems were, let it harden and smoothed all of those back out. I still have some touch up to go but should be ready for AIRBRUSHING this paint on in thin layers by the end of the weekend. I just shot the paint on way to thick is all that happened and the bad thing is ...................I know better.
I finally got it back in primer this morning after a week of stripping and body work.
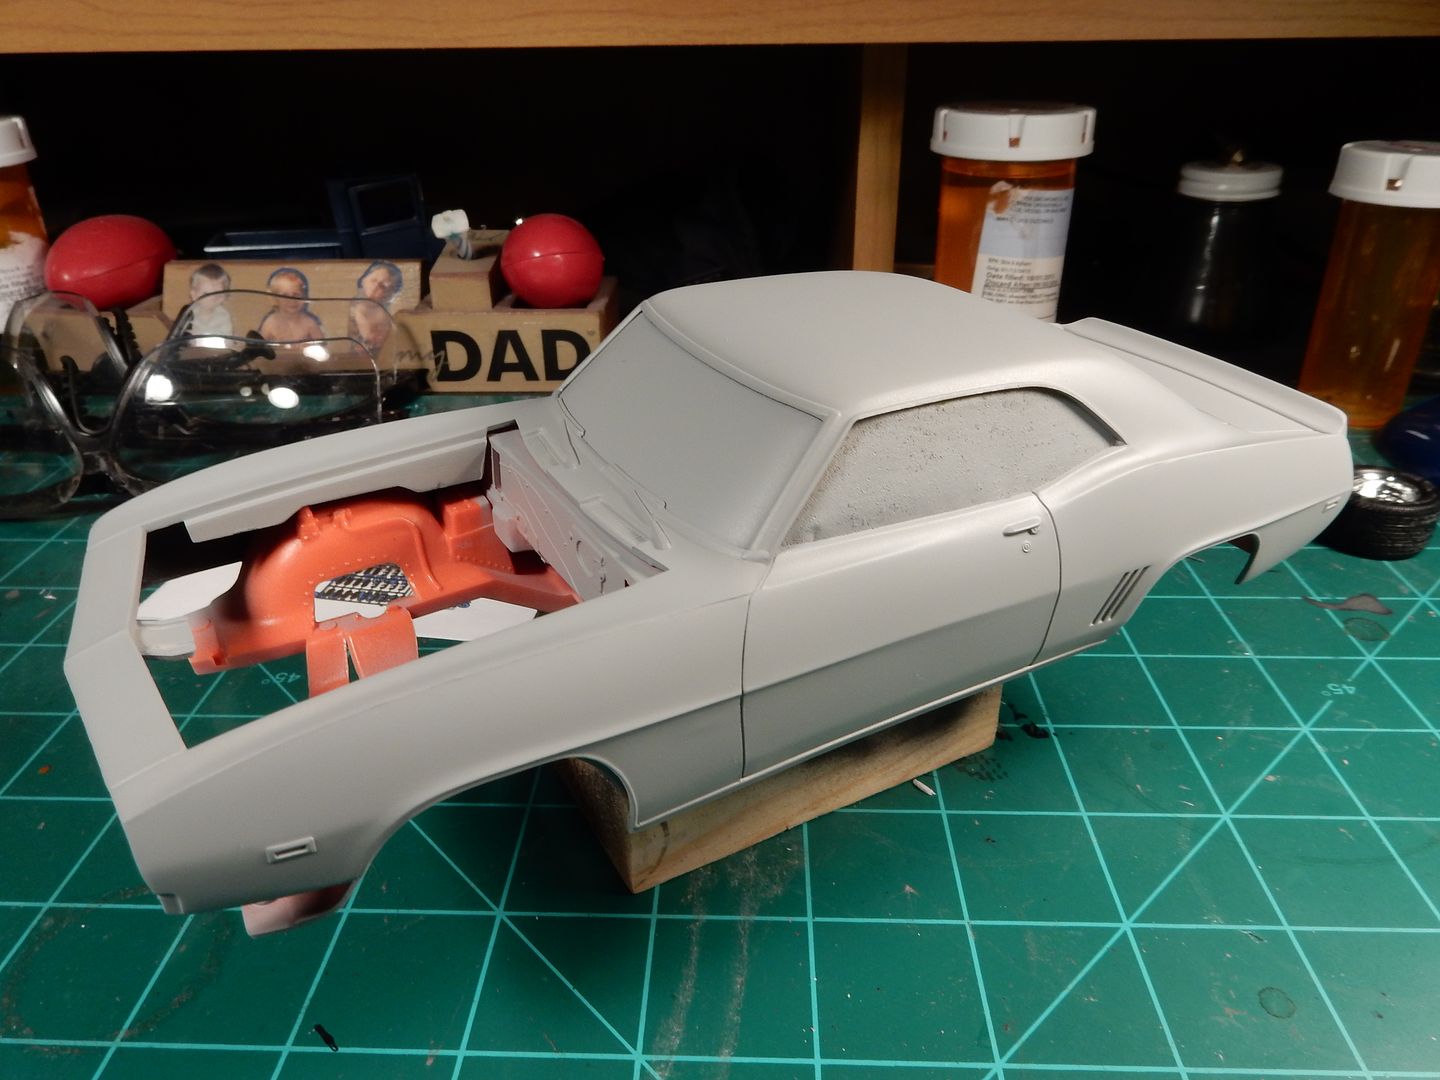
So far so good there. I'll let it dry for a couple of days and try the base coat again with the airbrush.
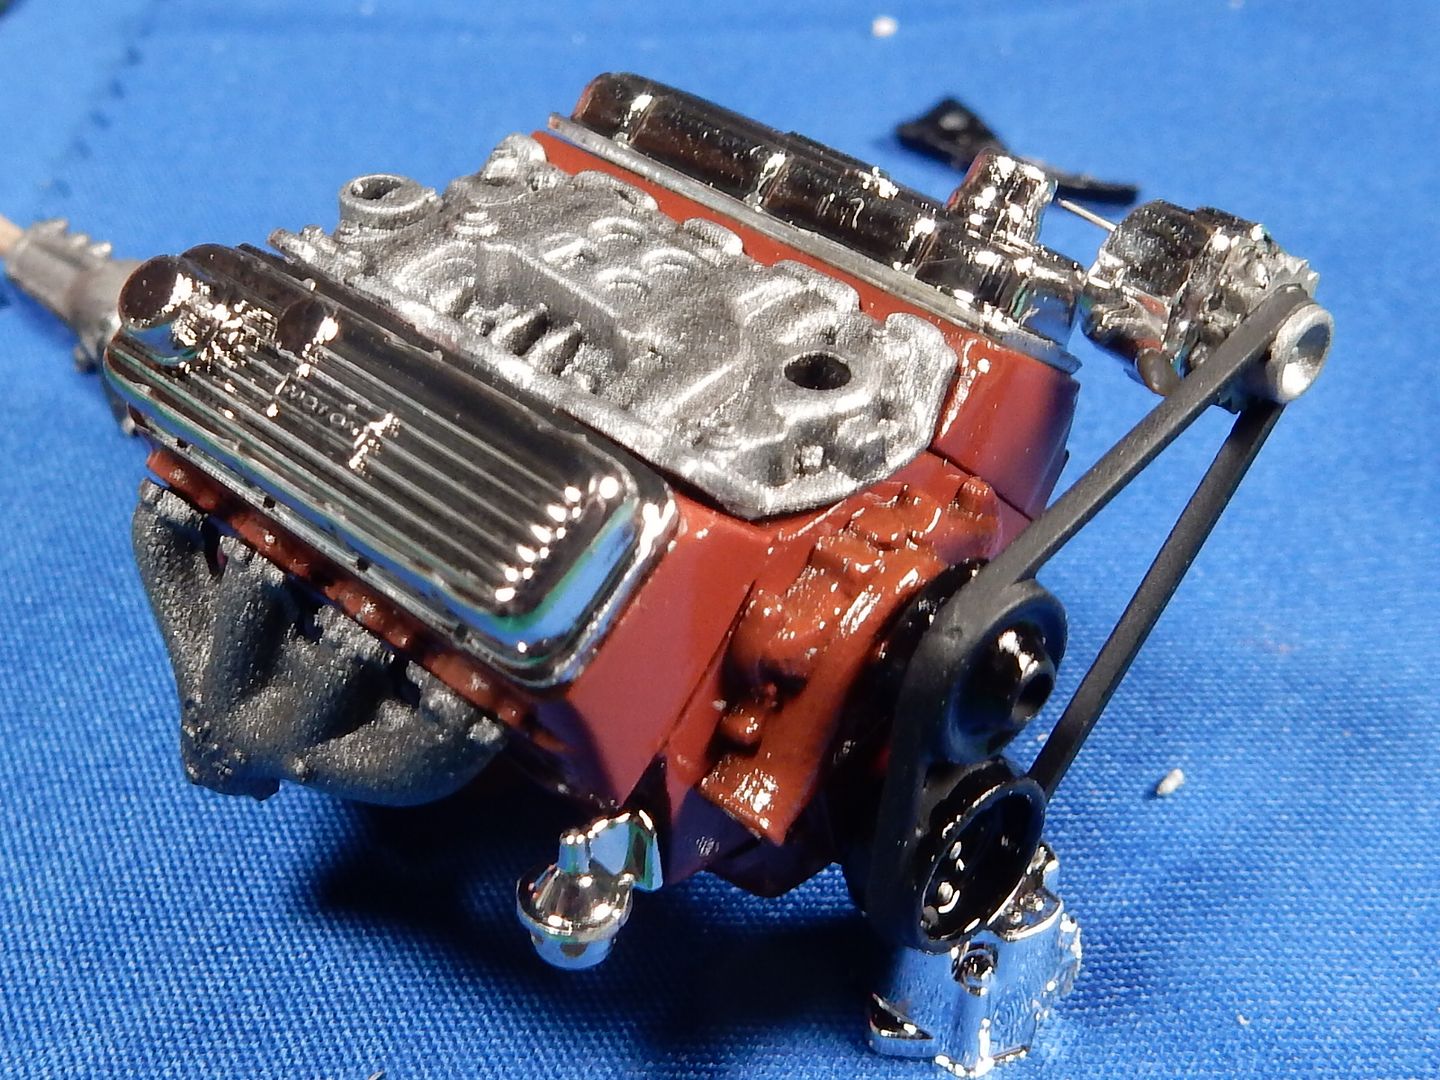
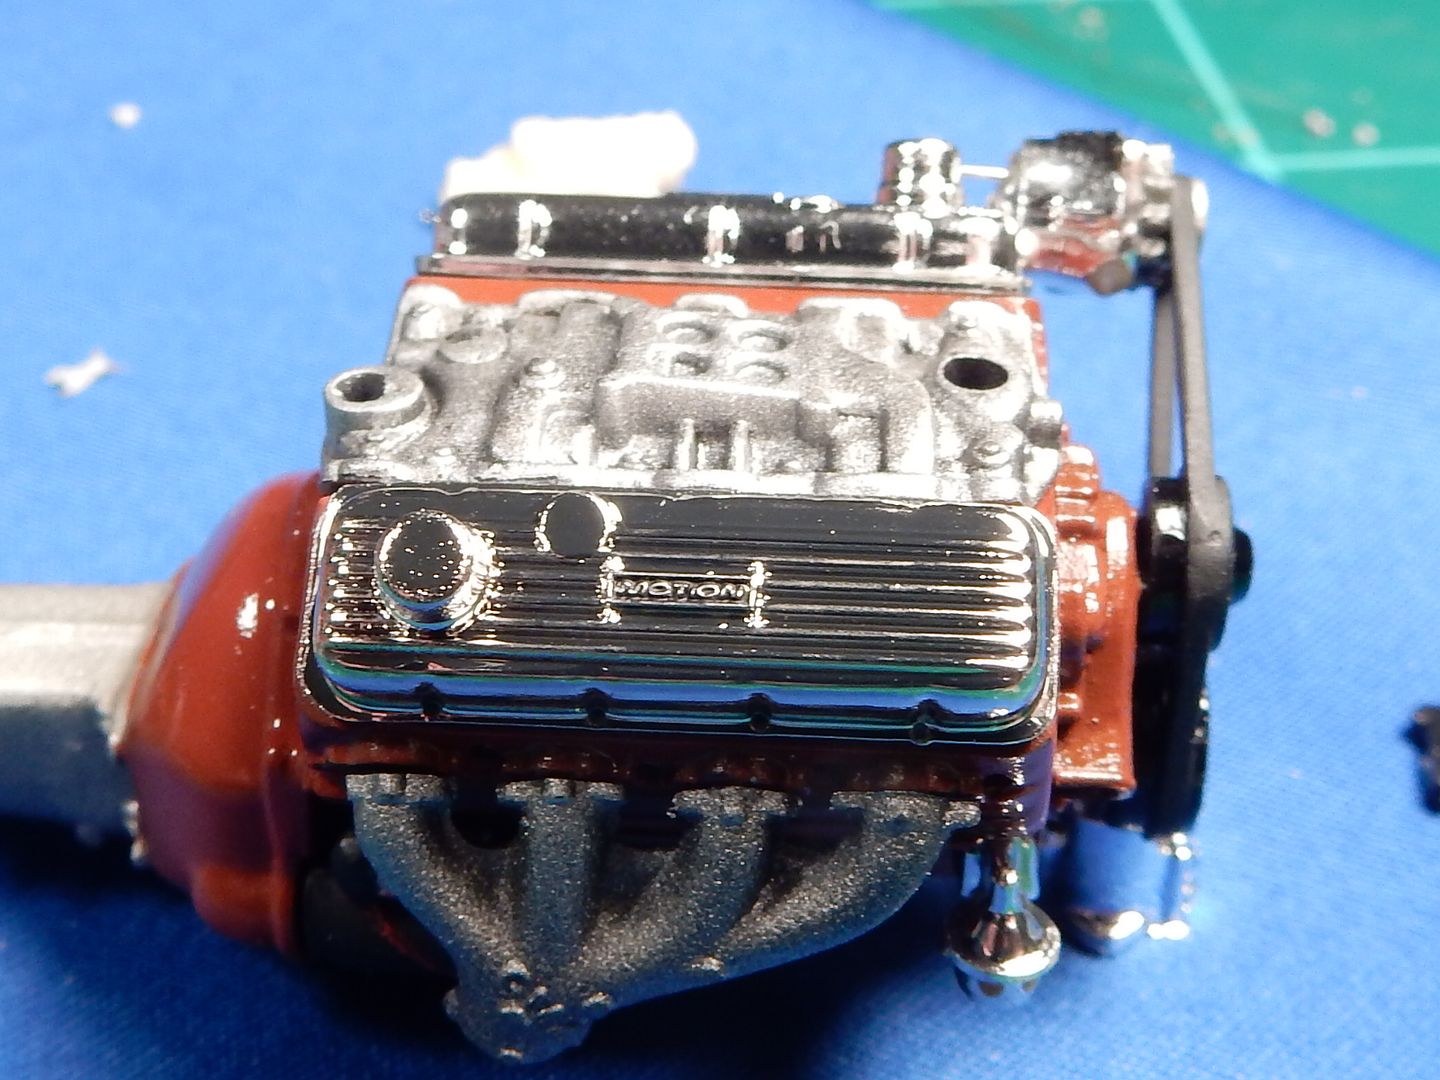
While all that's going on I ended up switching out the rocker covers with a set of Baldwin Motion ones. I shot a coat of Tamiya Smoke over 'em and brought out the "Motion" letters. I drilled the holes out for the rocker cover "wing bolts" that I'll be installing at a later point in the engine build. I also switched out the intake manifold and painted that this morning. Belt and alternator are now mounted and I'm fabricating an alternator mount for it so we don't have that mysterious floating alternator out there. I'll be breaking out that Molotow chrome pen to fill in the sprue attachment points on the alternator and clip that pin that's hanging out of the back of the alternator closer and install a terminal end with the ckt going to it and a retaining nut over the terminal end. In short..............there's some work to do.
I also have some small detailing to do on the rocker covers but that'll get done pretty quick:
|
|
|
|
Post by stitchdup on Mar 10, 2017 9:48:20 GMT -7
Nice looking motor Joe. I was told to sand a little low when doing badge removal or larger seams, then give it a skim of filler to prevent ghosting.
|
|
|
|
Post by mustang1989 on Mar 10, 2017 9:53:48 GMT -7
Nice looking motor Joe. I was told to sand a little low when doing badge removal or larger seams, then give it a skim of filler to prevent ghosting. Thanks Les. I never had the problem before now.................but I've never used Automotive paints until now either. lol .
Hopefully the second time'll be the charm on this one.
|
|
|
|
Post by stitchdup on Mar 10, 2017 10:11:21 GMT -7
Nice looking motor Joe. I was told to sand a little low when doing badge removal or larger seams, then give it a skim of filler to prevent ghosting. Thanks Les. I never had the problem before now.................but I've never used Automotive paints until now either. lol .
Hopefully the second time'll be the charm on this one.
I also use filler primer for the first couple of coats if it's got filler on it. It lays on a little thicker and usually fills up any pin holes. All my bodies and larger bits are auto paint now but I still brush small parts with enamel |
|