|
|
Post by kpnuts on Jan 1, 2017 12:32:28 GMT -7
Hi all Im not a plane guy but I got some money for Christmas and saw this is remembered building it with my dad (well not the Tamiya one but the Airfix one) and I remembered being amazed by the parts count, so I couldn't resist, I would imagine being tamiya there will be no fit issues, being me I have no intention of doing it as normal (mostly to hide my ignorance and bad plane skills.   |
|
|
|
Post by Big D on Jan 1, 2017 12:37:49 GMT -7
Looks like a fun plane to build. Sure is armed to the teeth.
|
|
|
|
Post by coyotecrunch on Jan 1, 2017 14:59:15 GMT -7
Cool!! Definitely gonna take some notes from this build!!!
Popcorn%20and%20drink%20emoticon_zpsnbkzs8ys Popcorn%20and%20drink%20emoticon_zpsnbkzs8ys
|
|
|
|
Post by mustang1989 on Jan 9, 2017 15:36:54 GMT -7
Hi all Im not a plane guy but I got some money for Christmas and saw this is remembered building it with my dad (well not the Tamiya one but the Airfix one) and I remembered being amazed by the parts count, so I couldn't resist, I would imagine being tamiya there will be no fit issues, being me I have no intention of doing it as normal (mostly to hide my ignorance and bad plane skills.   You'll have some fun with that kit. Being a Tamiya kit, they pretty much put themselves together. |
|
|
|
Post by Big D on Jan 9, 2017 15:39:25 GMT -7
With your skills it will come out alright I reckon.
|
|
|
|
Post by kpnuts on Aug 19, 2017 12:03:10 GMT -7
|
|
|
|
Post by mustang1989 on Aug 19, 2017 12:12:30 GMT -7
Oh HELL yeah!!!! And it's a Tamiya kit at that!! Looking good Ken!!! More please.  |
|
|
|
Post by kpnuts on Aug 30, 2017 11:56:43 GMT -7
Hi all well I'm still doing it and here is the next update.   |
|
|
|
Post by mustang1989 on Aug 30, 2017 17:12:44 GMT -7
Hi all well I'm still doing it and here is the next update.   Heya Ken. Looking good so far buddy!! A little tip that I've learned along the way is to assemble the fuselage and after adhering the two halves together, run a bead of Tamiya glue along the seams. This'll melt any "slag" plastic and will fill in some of the seam. Then mask off the canopy and detailed areas that you have all painted up. After that comes the wings which'll need some sort of filling. A trick to minimize the gap between the fuselage and the wing root is to cut a piece of plastic sprue and wedge between the fuselage halves at the wing mid point area. Before you do that, test fit the wings to see what kind of gap that you do have and then you'll make the sprue piece long enough to spread the fuselage to make a snug fit between the fuselage and the upper wing root. After you're satisfied with the fit between the two just glue the sprue piece into place. This works perfect every time and greatly reduces the amount of work that you'll need to do in filling in the wing root to fuselage area.  |
|
|
|
Post by kpnuts on Aug 30, 2017 23:18:50 GMT -7
Thanks for the tip mate.
|
|
|
|
Post by mustang1989 on Aug 31, 2017 16:52:20 GMT -7
|
|
|
|
Post by kpnuts on Sept 19, 2017 12:43:54 GMT -7
|
|
|
|
Post by kpnuts on Jan 13, 2019 8:54:48 GMT -7
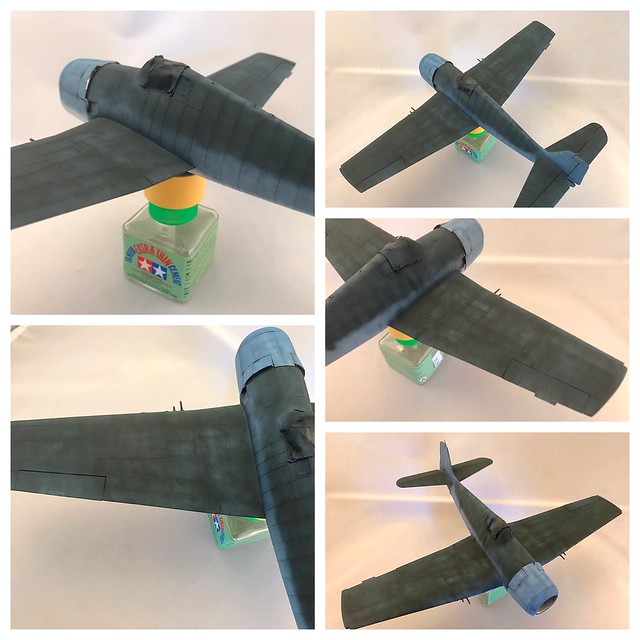
Hi all well I've developed a bad habit of starting models and not finishing them(I get to a boring bit or a tricky bit, or it's just not going very well (like this one) and I shelve it) Well I've decided this yr I'm going to try and restart, and who knows maybe even God forbid finish a few. Well this one not being a subject im very good at got left as soon as the going got even slightly tricky, when I left off (The kit dose not have the option for landing gear up but that was how I wanted it, simple enough I thought) the landing gear doors would not shut properly so I valiantly struggled for about 5 mins then shelved it and gave up. Well I've started it again and ive done my best with landing gear doors, had a go at doing the panel lines with a pin wash ruined it, stripped the paint off had another go, same result so this time I repainted it and tried my own idea I got some 600 grit and a piece of black pastel which I sanded over the wing I then rubbed it in with my finger, then wiped the mess off with a damp cloth, i am quite pleased with the effect. I've added some weathering (probably not great as I know little about planes but I'm happy with how it's going)        |
|
|
|
Post by mustang1989 on Jan 13, 2019 10:49:17 GMT -7
Those panel lines came out great Ken. Nice and subtle.
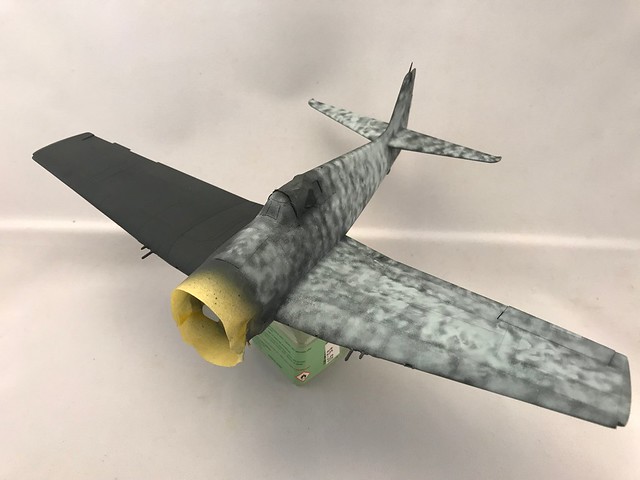
There's a cool trick to keep in mind when painting war worn older aircraft in regards to presenting a weathered paint job. It's called marbling. I don't know if you've seen it but after a base coat it looks something like this Hellcat that I borrowed from another forum:
The upper surfaces all started out as a coat of dark blue and then this fella painted over it with a grey:

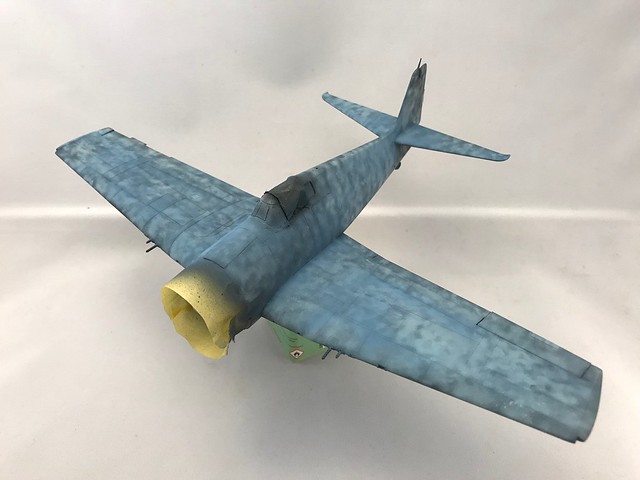
Then as a contrasting color went back over it with Light Blue:

and then back over it with your final coat of color:

I'm looking forward to my next aircraft build because I'm certainly going to try this on for size.
|
|
|
|
Post by kpnuts on Jan 13, 2019 13:21:09 GMT -7
Thanks for that mate, you don't need to get any tips from anyone, your planes are Great. Tbh if I get this finished ok I've just got my b17 and a minions hornet to finish and that will be the last of planes I will attempt.
|
|
|
|
Post by kpnuts on Jan 17, 2019 12:08:52 GMT -7
|
|
|
|
Post by mustang1989 on Jan 18, 2019 21:08:04 GMT -7
Looks to me like the decals went down nice n' smooth Ken. Enjoy the cruise buddy. I've been wanting to go on a cruise for a long time. Maybe next year'll be the year.
|
|
|
|
Post by kpnuts on Feb 8, 2019 10:58:09 GMT -7
|
|
|
|
Post by kpnuts on Feb 28, 2019 12:49:43 GMT -7
|
|
|
|
Post by mustang1989 on Feb 28, 2019 12:53:25 GMT -7
Man that thing is an ordnance HOG!!! Wow!! All kinds of storage under those wings!! Looking good Ken.
|
|
|
|
Post by kpnuts on Mar 5, 2019 13:06:26 GMT -7
|
|
|
|
Post by stitchdup on Mar 5, 2019 13:42:18 GMT -7
Nice work mate,
|
|
|
|
Post by mustang1989 on Mar 5, 2019 15:11:13 GMT -7
Weathering is lookin' good on this Ken. Really good.
|
|
|
|
Post by leon on Mar 5, 2019 15:50:49 GMT -7
Looking really good Ken!
|
|