|
|
Post by mrversatile on Mar 10, 2021 12:25:22 GMT -7
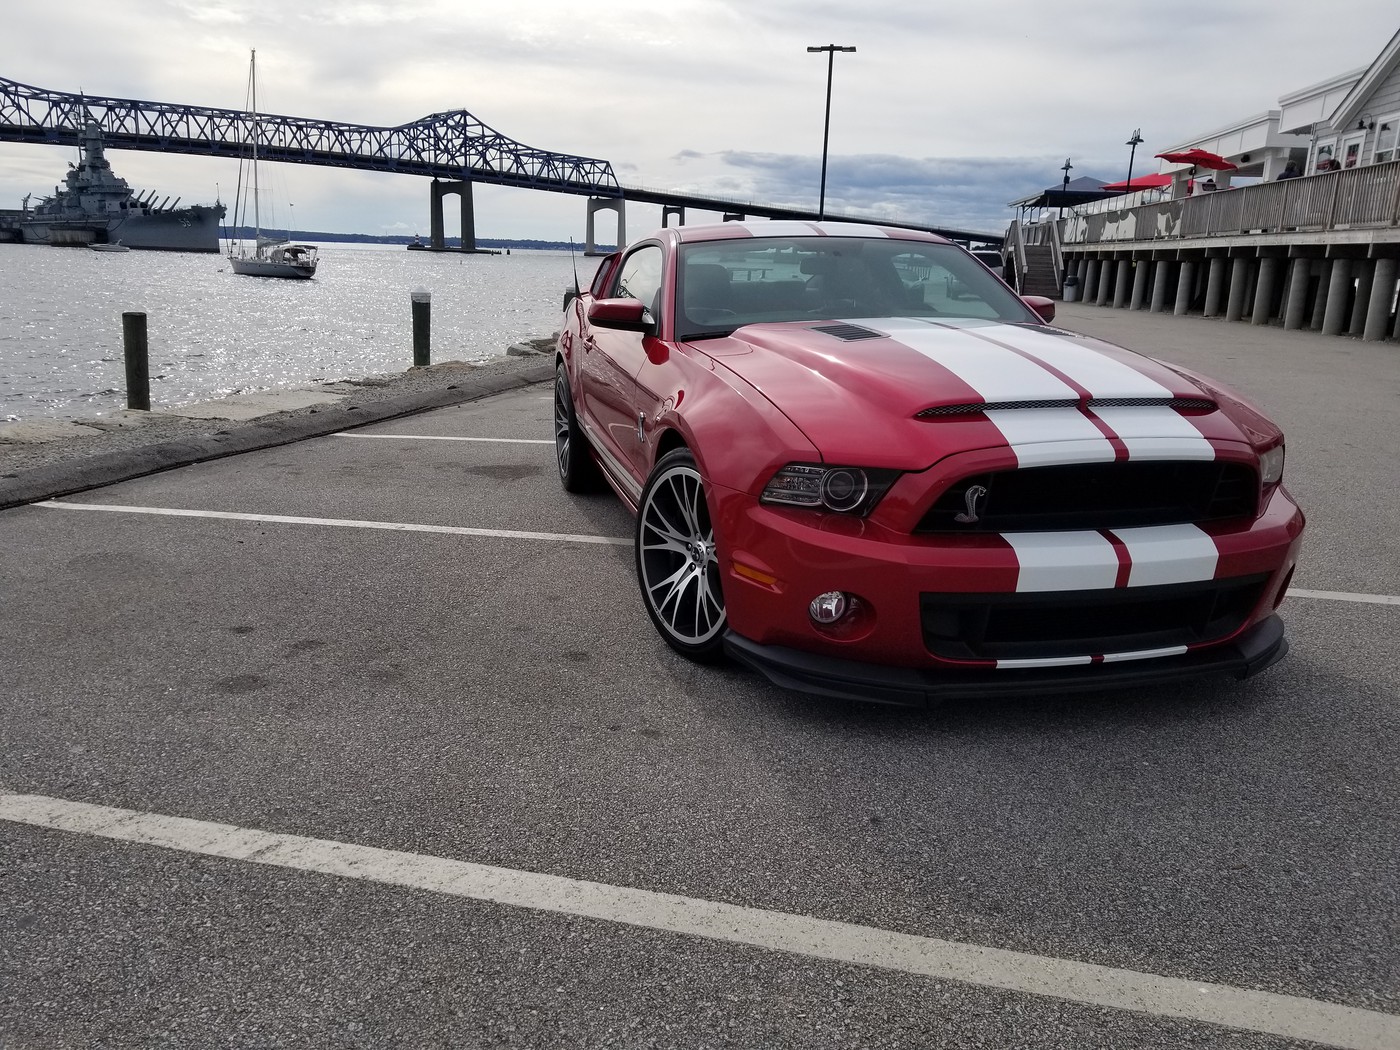
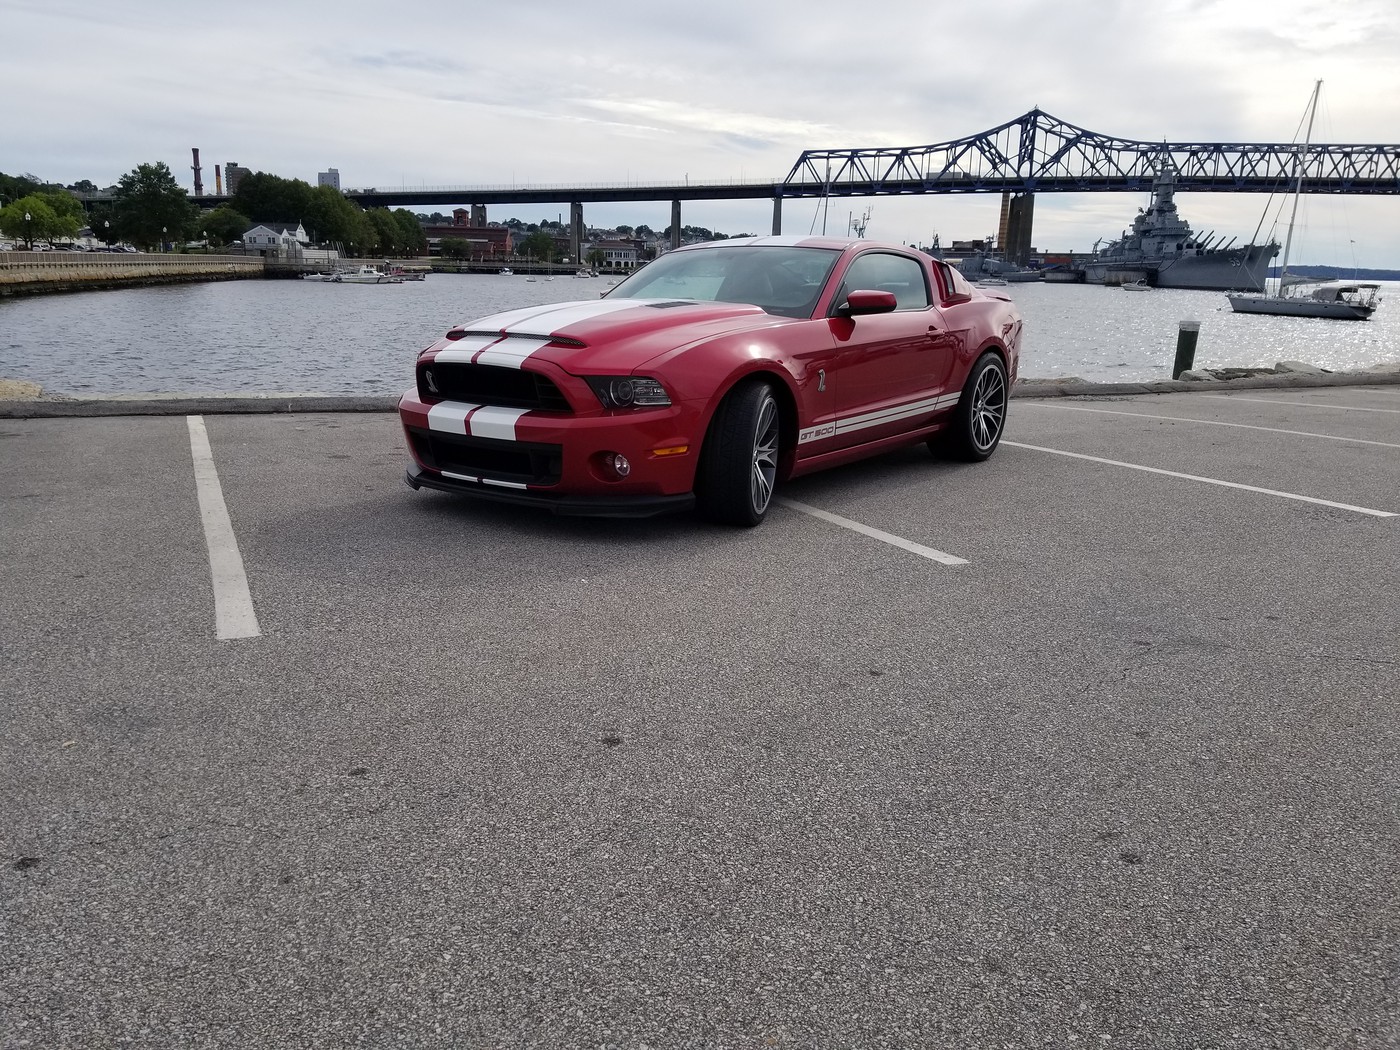
My last project has just been finished but I have been itching to start on this project that is dear to my heart. It is a replica of my 1:1 toy, a 2013 Ford Shelby Gt-500. I kept this in the factory stock thread because technically it is even though it has an authentic Shelby "Super Snake" hood and Shelby aftermarket wheels. I then added the rear window scoops to finish off the look. Here it is below:   
So I initially obtained the Plamoz transkit which converts the Revell 2010 Shelby Gt500 to the 2013 because I didn't know if I could source the wheels, hood and rear window scoops like my car has. Fortunately for 3d printing and the cottage industry I was able to reach out to a gentleman in the Ukraine who sells 3d printed wheels on ebay, and after sending him some pictures and dimensions he was able to produce a set of wheels. (20" rear and 19" front). I then scoured the internet and was able to find a resin hood to fit the 2010. It isn't exact, but I will modify it to work. Next, I chose to use the rear scoops from the 67 Shelby kit and they fit close enough to be effective. Finally, I ordered the factory color coded "Candy red" paint from Scalefinishes. So you can understand why I am excited to get started.
Below are a closer look at the wheels. They even include the engraved "Shelby" name
|
|
|
|
Post by leon on Mar 10, 2021 15:45:18 GMT -7
This is going to look great Gil!
|
|
|
|
Post by mmthrax on Mar 11, 2021 19:37:32 GMT -7
I'm for sure onboard for this. Carry on sir....  |
|
|
|
Post by pete on Mar 20, 2021 13:59:19 GMT -7
Looks like you have your ducks in a row for this one Gil!! I too have a soft spot for these Mustangs. I drive an 07 GT daily.  Just an aside here Gil: If you have not used Scale Finishes basecoat before, beware...It is HOT...I recommend the primer he offers for it, since it likes to eat almost everything else you put it over. Better do a few test panels on some plastic spoons or something with the primer of your choice before committing to the body. |
|
|
|
Post by stitchdup on Mar 20, 2021 21:04:09 GMT -7
Cool project Gil, isn't it great how many aftermarket options we have now
|
|
|
|
Post by mustang1989 on Mar 21, 2021 4:27:12 GMT -7
No shortage of references there!  Looking forward to this one and that is one Bad A$$ car you've got yourself there Gil. |
|
|
|
Post by mrversatile on Mar 21, 2021 7:30:07 GMT -7
Thanks guys, and Pete, I have used their paint before without any issues but I will keep that in mind. Interestingly, I used a little of this paint to touch up a paint chip on the real car and the match was perfect. Also, when I bought this car I was also looking at the 08 GT500Kr's. Those are sharp as well. I have been working on the hood and side scoops and will have an update shortly.
|
|
|
|
Post by mrversatile on Apr 1, 2021 17:38:03 GMT -7
This is my first update and it will focus on the modifications of the hood and side scoops. As you have seen, I have obtained a resin hood that purportedly fit the 2010 Shelby, however, as one can see by the pic below of the two hoods together, the kit hood curves down toward the front and the resin hood is straight and wouldn't fit flush.
So the only solution that I could see would be to cut the hood away on either side of the scoop and then sand it down to modify it to look more like it should. I could then attach it and blend it in to the kit hood. Below you can see the nearly finished product. I used glazing putty and milliput white to merge the pieces together.
Now for the hood scoops; For these I modified the scoops from a 1967 Shelby kit. As is they aren't the same and were modified by carving them out to mimic the one's on my 1:1 as seen below: (the top one is the original but opposite side to the one that is modified below it)
They look good, right? but they didn't fit perfectly into the rear window openings so I decided to install the rear window glass and blend them flush with the body. I could then sand down the bottom of the scoops flat and then glue them in place over the filled window openings. All that was left was to fill the small gaps around the scoops as below: Of course I have to now prime and perfect the bodywork before moving on to the changes required by the Plamoz transkit. Stay tuned
|
|
|
|
Post by mustang1989 on Apr 2, 2021 4:33:54 GMT -7
Man that is some crazy cool foot work that you're doing with that hood Gil! Dang man.  |
|
|
|
Post by mmthrax on Apr 2, 2021 6:46:04 GMT -7
I'm really liking this.
Captivated.
Carry on sir....
|
|
|
|
Post by transammike on Apr 2, 2021 13:57:09 GMT -7
Very cool looking Mustang you have there. Good luck with the build, I'll be watching the build up.
|
|
|
|
Post by mrversatile on Apr 10, 2021 6:32:33 GMT -7
Well, It's ready for paint I think. As an aside, the whole rear clip is a resin part from the Plamoz transkit. Here she is in Tamiya Fine Primer: |
|
|
|
Post by mustang1989 on Apr 10, 2021 14:36:18 GMT -7
Well, It's ready for paint I think. As an aside, the whole rear clip is a resin part from the Plamoz transkit. Here she is in Tamiya Fine Primer:
That sure is some clean body work Gil. |
|
|
|
Post by mustang1989 on Apr 14, 2021 11:39:49 GMT -7
Dunno why I didn't see it earlier Gil. Maybe it was because of that cool (Word Censored By Forum Administrator) car you've got. Isn't that BB-59, USS Massachusetts in the background?
|
|
|
|
Post by mrversatile on Apr 14, 2021 14:45:24 GMT -7
Got the Stang painted and polished. I love this color on my car and the model. It really pops, especially in the light. I had no major issues with the paint either. I know some, as Pete had noted, have issues with the "hotness" of the "scalefinishes" paint. I used Tamiya primer and made sure there was a a solid coat before spraying the color coat with light passes at first. Also note that I had to grind out the plastic in the grill area to make way for the resin inserts from the Plamoz kit. And yes, Joe, that is BB-59 "The Big Mamie" behind my 1:1. It is berthed in my city as a memorial attraction along with a number of other ships. In fact I made a model of it in 1/350 scale and mounted it on an actual piece of teak decking from the ship.
|
|
|
|
Post by mmthrax on Apr 14, 2021 20:27:52 GMT -7
That is looking good.
Looks like the paint went down nicely.
Carry on sir....
|
|
|
|
Post by mustang1989 on Apr 17, 2021 11:51:40 GMT -7
Your color looks great on this Gil. Smooth as a baby's butt too!! You got a pic of that ship model. I'd love to see that.
|
|
|
|
Post by pete on Apr 18, 2021 7:20:15 GMT -7
Coming along nicely Gill, you going to use decals for the Le Mans stripes?
|
|
|
|
Post by mrversatile on Apr 19, 2021 6:03:54 GMT -7
Thanks guys, and Pete, yes I have decals I got from Plamoz as well. In fact, because of the different hood arrangement the decals in the set would have been short. I reached out to Plamoz and he was nice enough to send me some extra roof decals for free. These should work nicely. Joe, here is a link to the BB-59 model. Not the best pics, but you get the idea: BB-59 |
|
|
|
Post by mrversatile on Jul 12, 2021 20:55:46 GMT -7
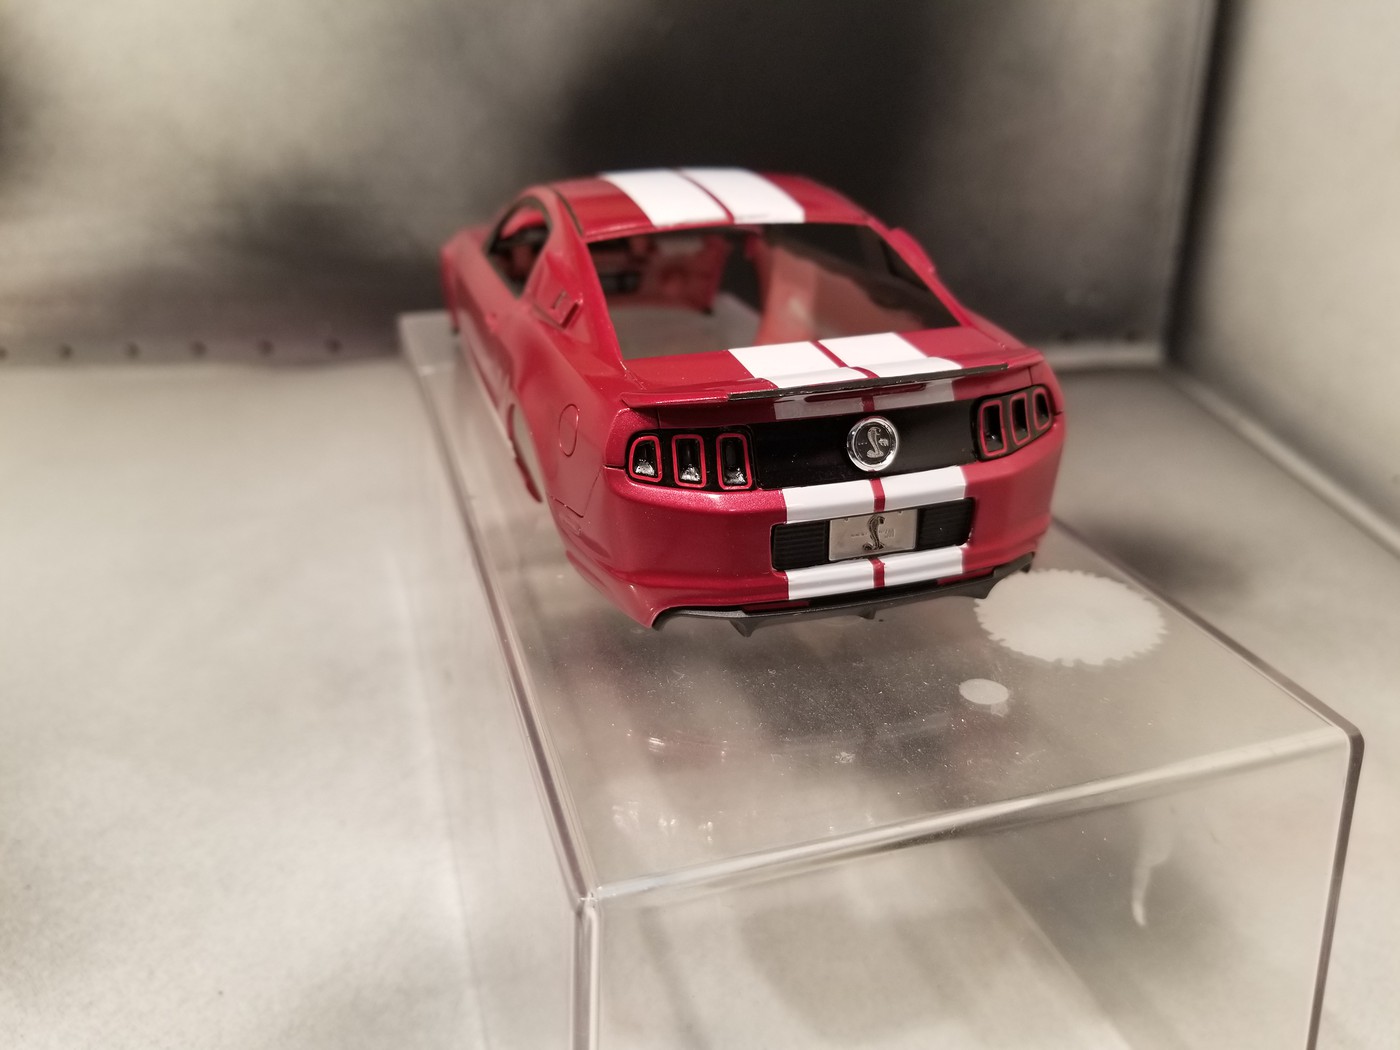
Ok, I know it has been a while, and I want to apologize to anyone who took the time to follow this project, but I have been ultra busy lately in this post covid error. Although my bench time has been limited and having to overcome a bit of a setback, (more on that later), I have returned and made some positive progress. First, the setback: I was using Plamoz decals purchased separately from the trans kit and found out pretty quickly that they were mucho difficult to work with. Basically they refused to cooperate with the various contours and insisted on wrinkling and not settling no matter how much solvent I used. The worst was the stripes on the roof which wrinkled permanently. I then elected to remove them with masking tape which ended up removing a bit of clear coat from the perfectly polished finish. I then ordered two sets of white decal paper bc the first was way too translucent. After repairing the paint, I cut the decal paper into new stripes, sealed it, and applied two layers to make them opaque enough. I was finally able to continue with the body and below you will see the results. It is nearly complete with only the P/E script, mirrors, and glass for its completion. I really think it is starting to mimic my 1:1. Keep in mind that the whole rear clip including rear lights, lower diffuser, rear plate support section, front headlamp buckets, and front grills are resin replacements. The original plastic behind each grill had to be removed and photetched transmission cooler and intercooler details were provided to be seen through the distinct 2013 grill openings. Now for the pictures:    |
|
|
|
Post by mustang1989 on Jul 13, 2021 4:27:22 GMT -7
WOW!!! Man that is some really good work on that body Gil! Sorry about your decal debacle. That really sucks when we get what we think are gonna be a really bad a$$ product only to find out it's a bust. I went through that with my 262. NEVER buy Peddinghaus decals is all I've gotta say.
|
|
|
|
Post by pete on Jul 13, 2021 13:23:44 GMT -7
Lookin' Really sharp Gill!! Bummer about the decal issues though but, looks like you pulled it off anywhoo.
|
|
|
|
Post by poet on Jul 13, 2021 18:02:44 GMT -7
Awesome project coming along nicely!
|
|
|
|
Post by mrversatile on Aug 12, 2021 15:36:45 GMT -7
A quick update. I can see the finish line now. Here is a picture of the finished undercarriage. I like detailing undercarriage and I think they set a model apart on the contest table. The mufflers with the quad pipes are resin pieces from the transkit. The tips were finished with brushed Molotow chrome. I am also nearing the end of the interior so more pics to follow.
|
|
|
|
Post by sharp on Aug 12, 2021 19:04:48 GMT -7
Detailing looks awesome Gill!! I like the heat shields. What did you use to make those?
|
|
|
|
Post by mrversatile on Aug 13, 2021 9:42:09 GMT -7
Detailing looks awesome Gill!! I like the heat shields. What did you use to make those? Thanks, it was just some brushed on Molotow chrome ink. The molded detail is pretty good on this kit. |
|
|
|
Post by lowlife on Aug 13, 2021 14:39:07 GMT -7
Looks great so far, great paint, and killer reference material !!
|
|
|
|
Post by mrversatile on Aug 22, 2021 6:49:12 GMT -7
The interior is done. I didn't use the Recaro seats included in the transkit bc my car doesn't have that option. I did use the photoetched seat belts though and was impressed with the stock decal sheet which includes a myriad of details for buttons and switches in the interior. Various blacks, like Tamiya "NATO Black" were used to break up the monochrome effect.
|
|
|
|
Post by poet on Aug 22, 2021 18:26:46 GMT -7
Looking good!
|
|
|
|
Post by pete on Aug 23, 2021 17:07:40 GMT -7
Very nicely done Gil...The Nato black definitely adds dimension to the look of it.
|
|