|
|
Post by vcv8273 on Jan 27, 2019 20:14:51 GMT -7
Awesome job on the pedal set up Joe, this interior is going to be stunning when finished
|
|
|
|
Post by mmthrax on Jan 28, 2019 9:09:00 GMT -7
Those pedals look great Joe.
Looks like the real deal.
So much better.
Keep up the great work.
|
|
|
|
Post by mustang1989 on Jan 30, 2019 10:12:50 GMT -7
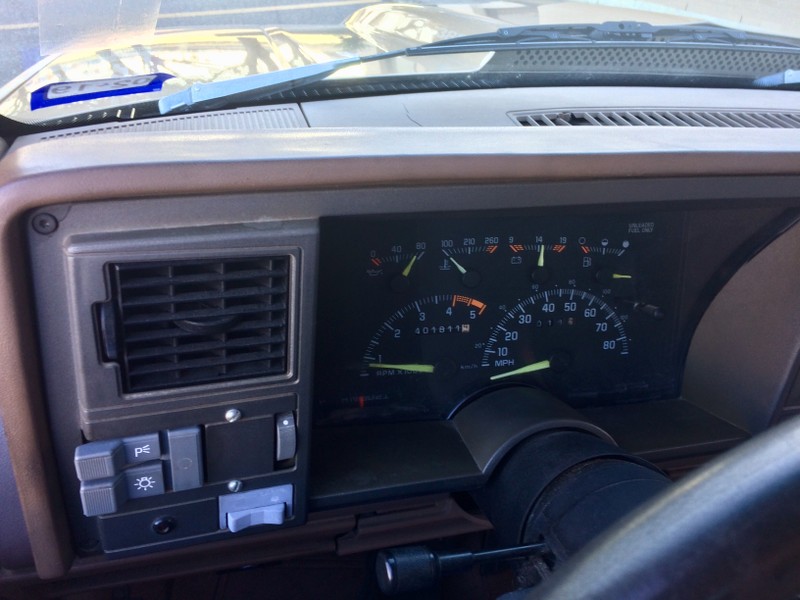
Thanks Les, Leon, Steve and Mark. I'm currently working on the dash but that's taking me some time as I'm trying to get that puppy right. Lots of color tone variations especially around the instrument cluster area. Reference view from my own truck sitting in the drivers seat.  Th  en the cluster itself and yes....the odometer reading is correct at 401,811 miles. icon_whistle |
|
|
|
Post by mmthrax on Jan 31, 2019 1:40:02 GMT -7
Wow, that is a lot of variation. Looks like a challenge.
Can't wait to see how you do it.
|
|
|
|
Post by mustang1989 on Feb 1, 2019 4:38:34 GMT -7
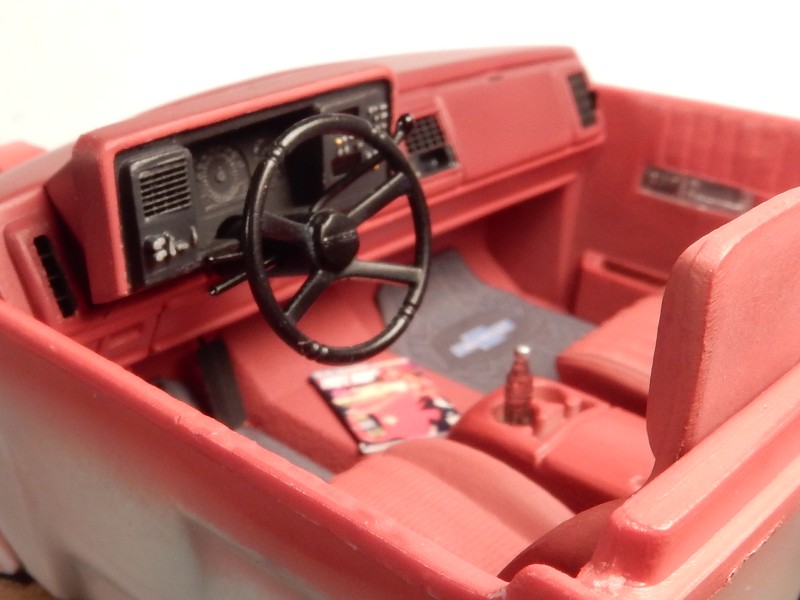
Wow, that is a lot of variation. Looks like a challenge. Can't wait to see how you do it. Well.....there wasn't as much to work with as I thought but I got through it. After 4 days of painting and detailing I've got the dash finished. Lots of masking and painting tonal variations and colors involved but I managed to get it done.

|
|
|
|
Post by stitchdup on Feb 1, 2019 11:01:53 GMT -7
tha dash looks sweet mate
|
|
|
|
Post by mmthrax on Feb 1, 2019 11:44:01 GMT -7
Outstanding work Joe.
That is excellent.
|
|
|
|
Post by DeeCee on Feb 1, 2019 13:16:16 GMT -7
SPECTACULAR work there Joe, you have patience like nobody i have met before mate.
|
|
|
|
Post by mustang1989 on Feb 1, 2019 21:28:55 GMT -7
Thanks guys. I thought I was gonna go cross eyed after working with that one. lol
|
|
|
|
Post by mustang1989 on Feb 6, 2019 20:00:09 GMT -7
Steering column installed with the scratch built gear shift lever, turn signal/ multifunction switch and tilt lever. I also managed to put an ignition switch as well as the ignition key and door lock key on a key ring. The ignition key was then inserted into the switch and glued into place.
There.....that's more like it:


|
|
|
|
Post by stitchdup on Feb 6, 2019 21:40:12 GMT -7
Neat, i like the keys
|
|
|
|
Post by RetroSpectKustoms on Feb 6, 2019 21:53:50 GMT -7
That looks amazing Joe, Well done. I agree with Les, the keys are a super neat touch.
|
|
|
|
Post by mmthrax on Feb 6, 2019 22:45:42 GMT -7
The keys are over the top. That is the coolest thing I have ever seen!! sSig_youtheman_zpsb3e30900
|
|
|
|
Post by vcv8273 on Feb 7, 2019 2:40:01 GMT -7
Wow Joe that interior looks stunning, detailing is over the top
|
|
|
|
Post by leon on Feb 7, 2019 3:44:12 GMT -7
Great work on the interior Joe! The keys are a cool addition.
|
|
|
|
Post by mustang1989 on Feb 7, 2019 20:31:53 GMT -7
Thanks fellas! I’ve been working on separating the windshield and rear glass from that nasty center piece for a little more realistic looking headliner. I’ve also got some sun visors in the works.
|
|
|
|
Post by mustang1989 on Feb 8, 2019 7:00:08 GMT -7
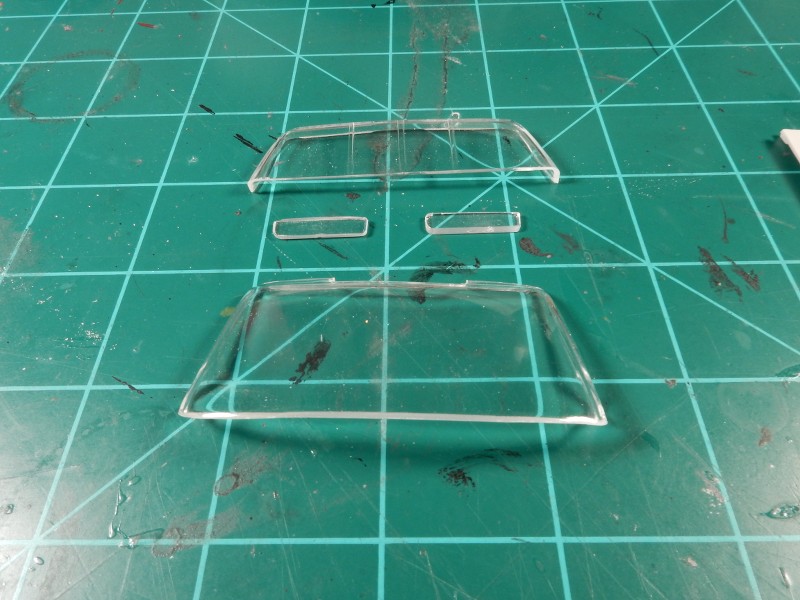
I simply could NOT fathom doing all that work to the interior and then using such a crappy OOB glass assy like this:

So ….. I cut it up into sections and cleaned the sections up some. I also fabricated some sun visors to help the realism out a tad:

|
|
|
|
Post by mmthrax on Feb 8, 2019 7:17:48 GMT -7
Nice work. I like the sliding rear glass.
Funny story. I used to have an 83 Toyota p/u with a sliding glass like that. One day I finished off a can of soda and pitched it into the bed.
A little while later the wind vortex grabbed it and threw it back into the cab. Never put trash back there again!
|
|
|
|
Post by mustang1989 on Feb 13, 2019 10:37:18 GMT -7
Nice work. I like the sliding rear glass. Funny story. I used to have an 83 Toyota p/u with a sliding glass like that. One day I finished off a can of soda and pitched it into the bed. A little while later the wind vortex grabbed it and threw it back into the cab. Never put trash back there again! Thanks Mark and that is a funny story. 
I have been looking over the body and prepping it for paint for the last couple of days. You know...the seam lines, ejector pin marks, flash and all of that stuff. I thought I was just about done with it all...............until..................I looked at the tailgate.
Somehow I overlooked the detail "ghosting" from the back side of it to the outside skin: icon_whistle

Some wet sanding cured that however:

|
|
|
|
Post by vcv8273 on Feb 14, 2019 4:05:54 GMT -7
Sweet work on the separation of the window glass Joe and nice save to the ghosting, that little bit of attention to detail before paint usually saves a lot of head aches after paint
|
|
|
|
Post by mustang1989 on Feb 14, 2019 6:17:14 GMT -7
Sweet work on the separation of the window glass Joe and nice save to the ghosting, that little bit of attention to detail before paint usually saves a lot of head aches after paint Thanks and right on brutha. It's ALL in the preparations. |
|
|
|
Post by mrmike on Feb 14, 2019 6:46:11 GMT -7
It's been a while since I looked in on your build, Joe. I had to go back a few pages to reintroduce myself to this build and I must say thatt you are doing an excellent job bringing this together. Keep it going!
|
|
|
|
Post by Jay's Mini Scale on Feb 18, 2019 17:12:05 GMT -7
Whats up buddy truck looking good
|
|
|
|
Post by mustang1989 on Feb 20, 2019 5:48:52 GMT -7
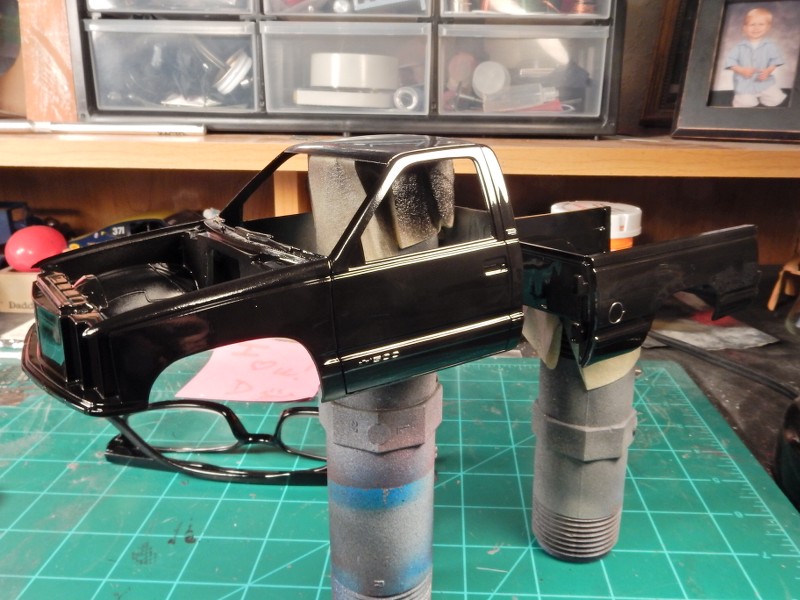
Thanks Mike and Jay! I got the base color on this morning. I still need to do some wet sanding here and there to remove a couple of dust specks and smooth some areas out. I've got her in the drying booth now for the next couple of days.  |
|
|
|
Post by sharp on Feb 20, 2019 6:37:25 GMT -7
Nice job on the base color Joe.What type of paint did you use?
|
|
|
|
Post by mustang1989 on Feb 20, 2019 8:03:04 GMT -7
Thanks Mike.
I used Testors Semi-Gloss Black Lacquer and dispensed it into a paint jar and sprayed it through a Badger 350 airbrush. Perfect results....every time.
Testors Part Number for this is 28156

|
|
|
|
Post by mustang1989 on Feb 20, 2019 8:04:31 GMT -7
Nice job on the base color Joe.What type of paint did you use? Meant to quote you to give you a heads up in the post above. Testors "Wet Look" clear makes a Purdy shine over this as well. Hope this helps you out. |
|
|
|
Post by mmthrax on Feb 20, 2019 9:47:08 GMT -7
Hey Joe,
Nice progress, and thanks for the tips and tricks.
Just wondering, what are the mongo pipe fittings on your desk?
|
|
|
|
Post by mustang1989 on Feb 20, 2019 10:50:39 GMT -7
LOL!! "Mongo" pipe fittings.  . Those are my paint stands. I just put some paper tape at the top of them in an "X" pattern and stick the body (and truck bed in this case) onto the top and you can turn them freely while painting. Got the tip from Donn Yost and it works great. . Those are my paint stands. I just put some paper tape at the top of them in an "X" pattern and stick the body (and truck bed in this case) onto the top and you can turn them freely while painting. Got the tip from Donn Yost and it works great.
Thanks Mark. |
|
|
|
Post by mmthrax on Feb 20, 2019 10:58:36 GMT -7
Well, I do realize that they are now being used as your painting apparatus, but I was wondering what they actually are for, or from where you obtained them. They are quite unusual to say the least.  |
|