|
|
Post by mustang1989 on Jan 2, 2019 4:29:32 GMT -7
Chassis is now complete. I did make the front wheels steerable as I've always wanted a model with posable front wheels. It was a lot easier to do with this kit than it has been with some of the builds that I've done. The ones in the past and really delicate and finicky parts or they had no option for steering at all.

|
|
|
|
Post by leon on Jan 2, 2019 10:11:56 GMT -7
Chassis looks good Joe!
|
|
|
|
Post by mustang1989 on Jan 3, 2019 10:28:47 GMT -7
|
|
|
|
Post by vcv8273 on Jan 3, 2019 17:02:58 GMT -7
Chassis looks real clean and neat Joe
|
|
|
|
Post by RetroSpectKustoms on Jan 3, 2019 18:31:04 GMT -7
Nice update, chassis looks great. Nice wheel choice too.
|
|
|
|
Post by mustang1989 on Jan 9, 2019 11:24:16 GMT -7
Thanks fellas!
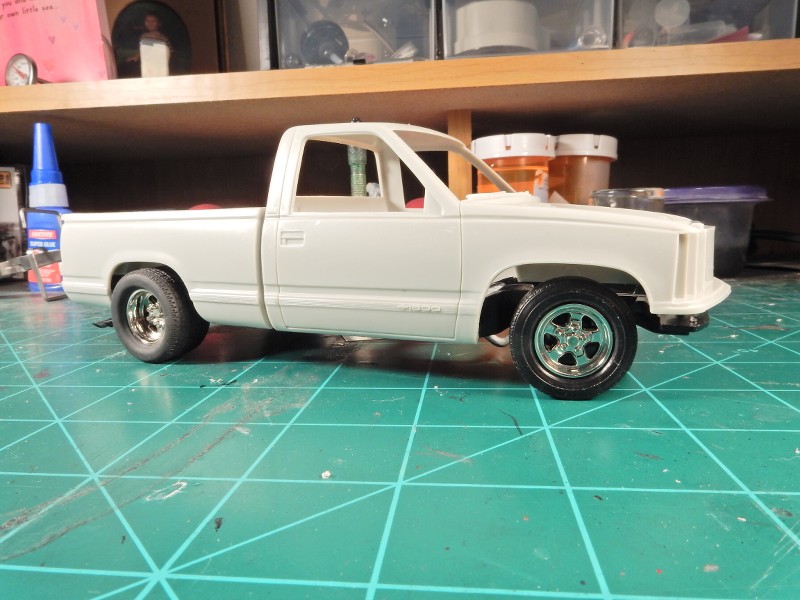
I still have to move the rear tires inwards a little but I've just about got the wheel/ tire and stance set up where I want it. The wheel and tire fit was a little bit of a trick for the rear wheels but I managed to get it to work alright. I coated all wheels with Tamiya Smoke (X-19) to get rid of the toy chrome look. The chassis isn't adhered to the body yet which will pull the body down to set a better stance but you get the idea anyways.
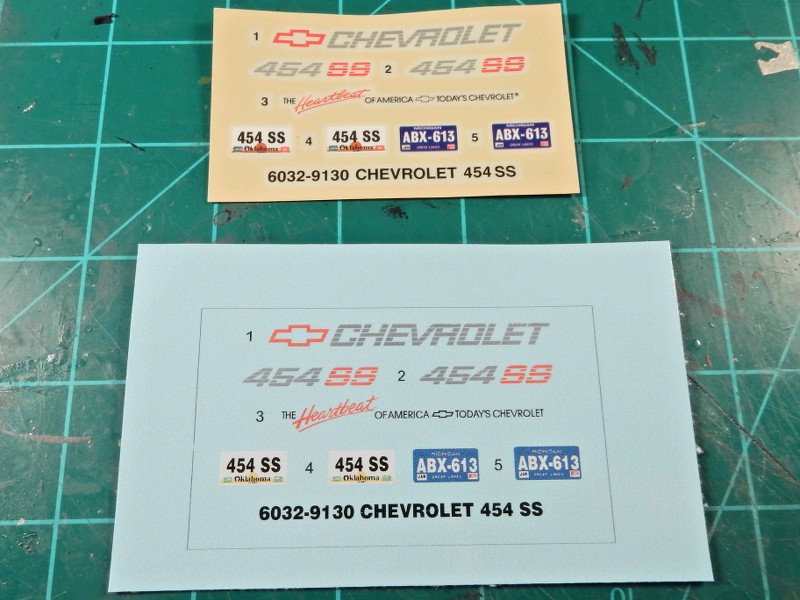
I also received my re-mastered decals from Thomas at Speedway Decals.
|
|
|
|
Post by stitchdup on Jan 9, 2019 12:40:40 GMT -7
The wheels suit the body lines better than I expected Joe,
|
|
|
|
Post by mustang1989 on Jan 9, 2019 12:50:58 GMT -7
The wheels suit the body lines better than I expected Joe, Thanks Les. I guess that's one thing I've always had an eye for was the proper wheels for a given vehicle.
One thing I guess I DON'T have an eye for is to make sure that I've got all the parts in the kit box. I was missing the grill and both bumpers from the kit. Now how does a guy miss that?
I've already got those parts on the way to me. Should all be here tomorrow.
|
|
|
|
Post by stitchdup on Jan 9, 2019 13:33:03 GMT -7
I've had that happen, I bought a revell 40 ford and didn't notice the chassis was missing which is annoying
|
|
|
|
Post by leon on Jan 9, 2019 15:28:22 GMT -7
Stance is looking good Joe! Those rear tires are going to this look mean!
|
|
|
|
Post by RetroSpectKustoms on Jan 9, 2019 15:32:53 GMT -7
Looks great, love those wheels on it.
|
|
|
|
Post by mustang1989 on Jan 10, 2019 5:42:17 GMT -7
I've had that happen, I bought a revell 40 ford and didn't notice the chassis was missing which is annoying Right you are about annoying Les. lol
Should have the parts today.
|
|
|
|
Post by mustang1989 on Jan 10, 2019 5:43:01 GMT -7
Thanks Leon and Bruce.
|
|
|
|
Post by vcv8273 on Jan 10, 2019 7:48:54 GMT -7
Looking real nice Joe on its rims Joe and nice score with the decals nothing worse than using yellowed decals
|
|
|
|
Post by mustang1989 on Jan 10, 2019 13:12:24 GMT -7
Looking real nice Joe on its rims Joe and nice score with the decals nothing worse than using yellowed decals Thanks and I hear you on that with the decals brutha. That will include decals that crack as well. |
|
|
|
Post by mmthrax on Jan 16, 2019 10:06:11 GMT -7
Just found this and went through it Joe. Really great stuff. The engine is fabulous. All the different shades. When the thread first opened I thought I was looking at a reference photo.
No kidding. I did a triple take. Inspiring work sir.
|
|
|
|
Post by mustang1989 on Jan 22, 2019 13:20:35 GMT -7
Just found this and went through it Joe. Really great stuff. The engine is fabulous. All the different shades. When the thread first opened I thought I was looking at a reference photo. No kidding. I did a triple take. Inspiring work sir. Thanks Mark!
Well......the livestock show is now officially over. Our son placed fifth with his pig and for his first year that wasn't bad. We had a fairly sad morning this morning as we had to say goodbye to piggy but Joseph is handling it pretty well.
We didn't have to go feed a pig tonight so you know what that means?? It's BENCHTIME!!!! I had initially primed the interior pieces to include the tub. I was looking at it even with the ejector pin marks on the floor and thinking to myself, "Yeah.....that's gonna......no....no it aint gonna work!!" The ejector pin mark, even though it's in a terrible place I can actually deal with. More on that in a minute. That chintzy brake and accelerator pedal just isn't gonna do at all.
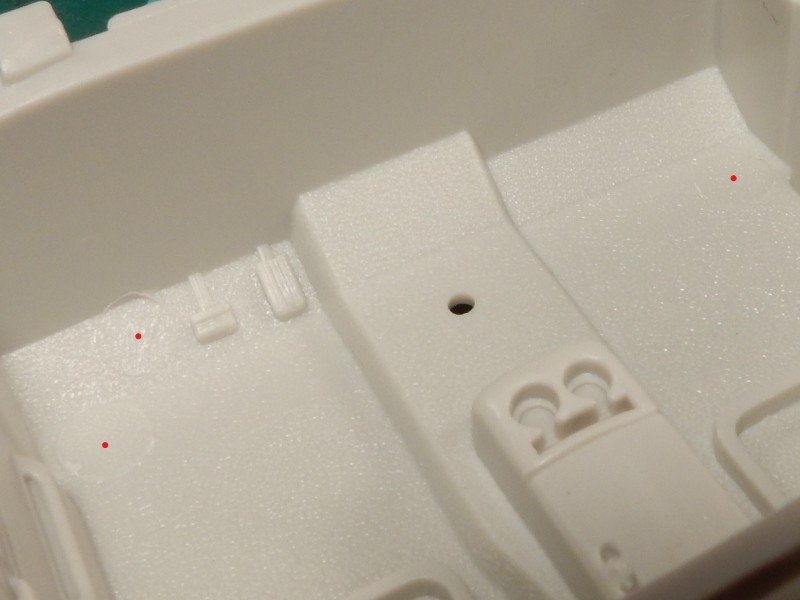
So ………...I put my thinkin' cap on.. :hmm:
I found another floorboard from a parts kit that I've got in the stash and cut the whole section out of this floor board. Then I cut a section out from the parts donor.

Then the replacement piece was glued into place.
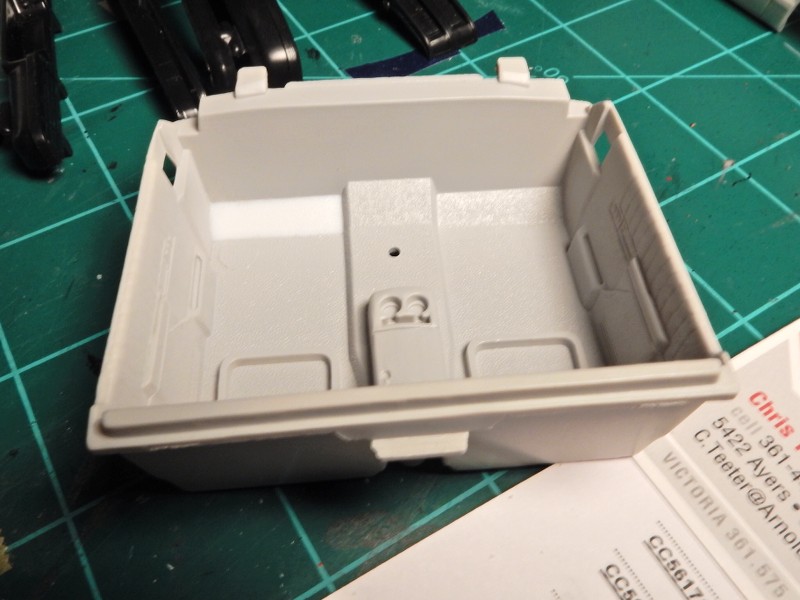
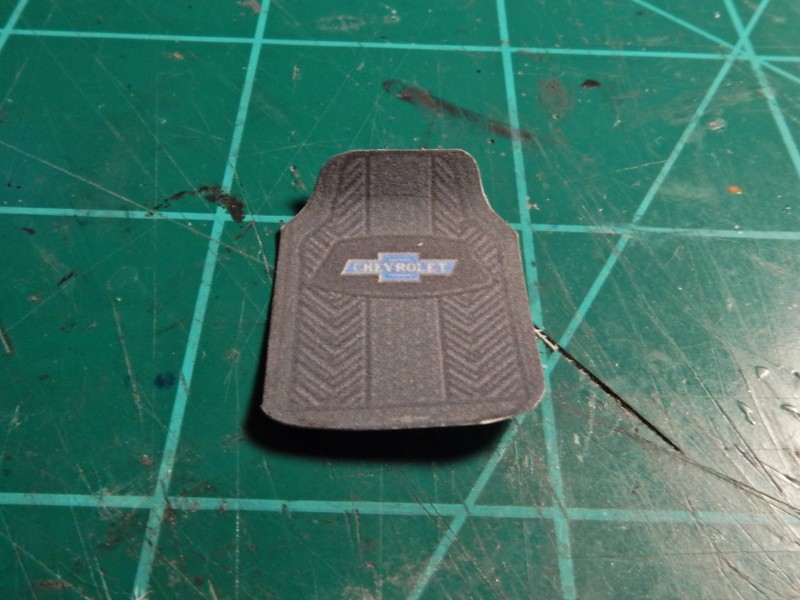
We'll be using some PE pedals to have a little more true to scale and true to references look. Now to address those disgusting ejector pin marks. Those...…..will be covered up by these floor mats that I acquired which just came in the mail a couple of days ago.
|
|
|
|
Post by mmthrax on Jan 22, 2019 16:43:28 GMT -7
I love it Joe. What did you use to cut out the floor section? That is a super clean cut.
Did you start it with a drill and then jewelers saw it?, or razor saw it from the backside? Hmmm
It looks fantastic. I totally agree that you had to get rid of those ridiculous kit pedals.
|
|
|
|
Post by leon on Jan 22, 2019 17:30:13 GMT -7
Nice work on the floor board Joe!
|
|
|
|
Post by DeeCee on Jan 23, 2019 1:33:58 GMT -7
Nice work Joe, and love those mats.
|
|
|
|
Post by mustang1989 on Jan 23, 2019 12:16:34 GMT -7
I love it Joe. What did you use to cut out the floor section? That is a super clean cut. Did you start it with a drill and then jewelers saw it?, or razor saw it from the backside? Hmmm It looks fantastic. I totally agree that you had to get rid of those ridiculous kit pedals. Thanks Mark. I just sanded off the bottom of that part of the floor pan till there was nothing left but an open rectangle there in the floor. |
|
|
|
Post by mustang1989 on Jan 23, 2019 12:17:12 GMT -7
Thank you Dale and Leon for the encouragement.
|
|
|
|
Post by mustang1989 on Jan 24, 2019 10:37:58 GMT -7
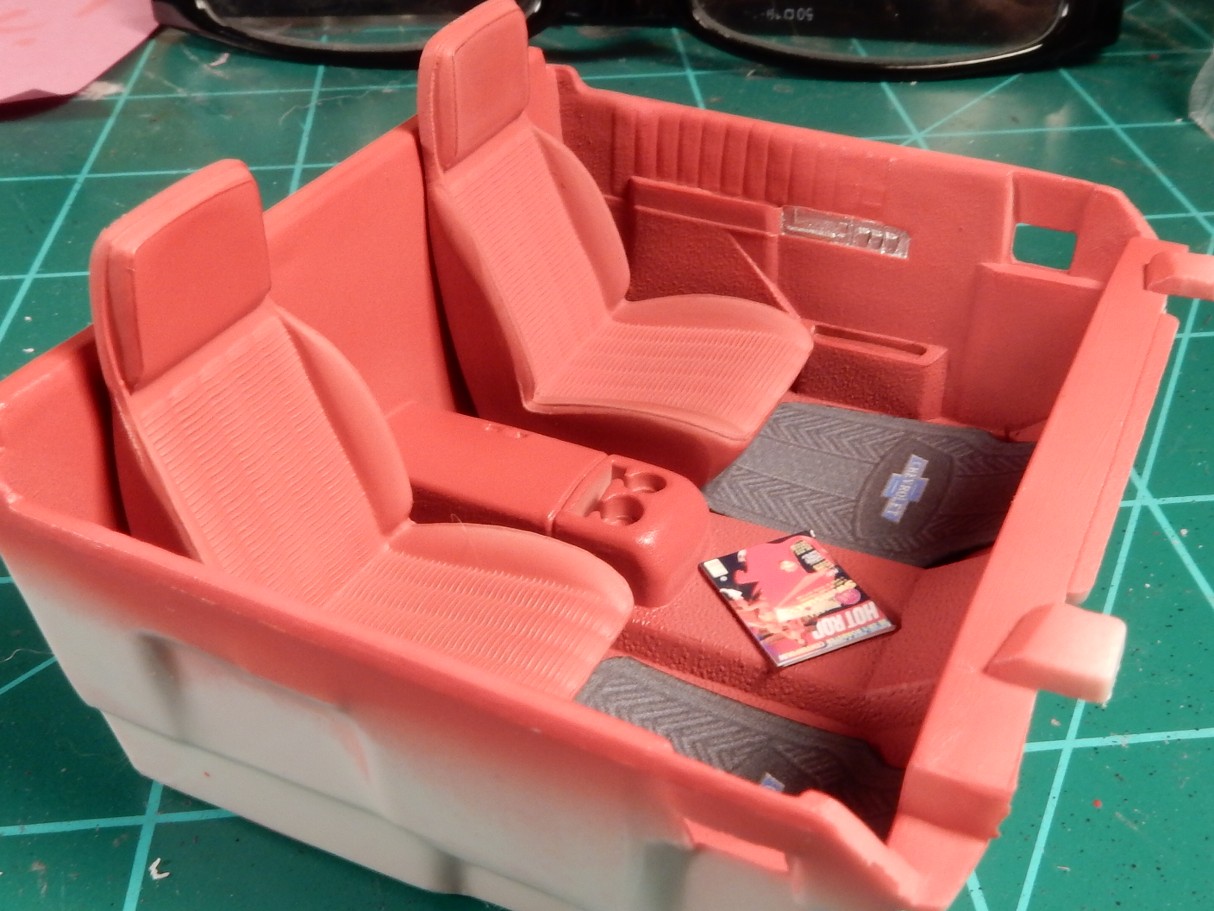
This interior is long from being done. I'm just posting this to post some progress. I've been working on the color tones and surface textures with the differences in the seat fabric, carpet and on the door panels by using different colored pastels. You can see the contrasting colors on the seat between the weaved and the smooth sections of the drivers seat. That seat will directly contrast the passengers side seat which hasn't been touched up yet. I've got the door handle/ switch bezel painted but still have to fill in the details on those and then get the foot pedals taken care of.
Progress so far:
|
|
|
|
Post by mmthrax on Jan 24, 2019 11:29:07 GMT -7
Joe that is unreal. Fantastic work. I love it.
I am noticing that each member has "way" they like to build models, kind of like a musician having a signature lick.
I can tell that you love 'the details". I am really digging your work.
Inspirational.
Carry on sir...
|
|
|
|
Post by stitchdup on Jan 24, 2019 13:32:46 GMT -7
Nice work Joe, I like that pastels trick
|
|
|
|
Post by vcv8273 on Jan 24, 2019 21:25:33 GMT -7
Awesome job on the floor pan mods Joe may have to do something similar to my charger build have 4 major ejector pin marks on the interior floor pan at least 1 to 1.5mm high
|
|
|
|
Post by mustang1989 on Jan 25, 2019 5:22:26 GMT -7
Mark: Thanks bud. Yeah it's kinda like a shoe that fits just right after a while. You just get in a groove and follow it. There's a lot of advise and tricks out there but each one of us finds what really works for us.
Les: I use pastels all the time in military modeling and figured that it'd work here as well.
Steve: Thanks for your comments as well. I hear ya. I wonder why the manufactures couldn't put the gates somewhere else? I mean what tha heck?? 
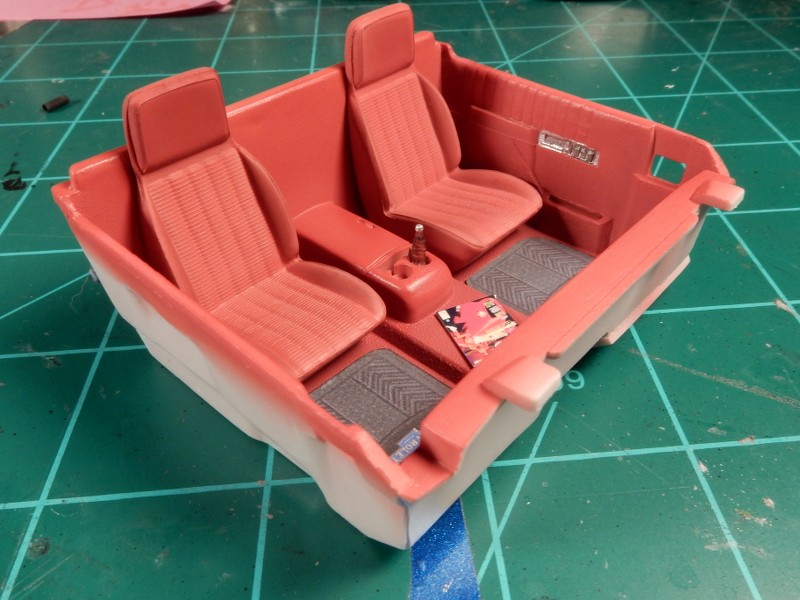
Ok gang. I've got the interior tub pretty much done except for the foot pedals. I really like this photo as it shows the color contrast on the seats very well. I finished up the passengers seat this morning with the color contrast. I left the pleated part of the seat the original color that I painted it and used a mixture of red with a little black ground up pastel and dry brushed it onto smooth parts of the seat to slightly darken the color tone for a subtle yet highly noticeable contrast. I was surprised with the results. Everything is adhered into place. The door handle/ switch bezels and all details have been painted here and I thought I'd add a Coke to the cup holder. I mean....why not? I'm smilin' so why not have a Coke to go with it? 
|
|
|
|
Post by mustang1989 on Jan 27, 2019 13:26:47 GMT -7
Ok folks. I've got the foot pedals finished up. I used a couple of strips of solder formed and flattened on both ends so I could adhere one end to the inside of the firewall and the pedal to the other end. I've got the dash (which I painted a two tone color of maroon and red) test fitted into place and will be by next area of emphasis.
Anyways, foot pedal wise..we go from this:
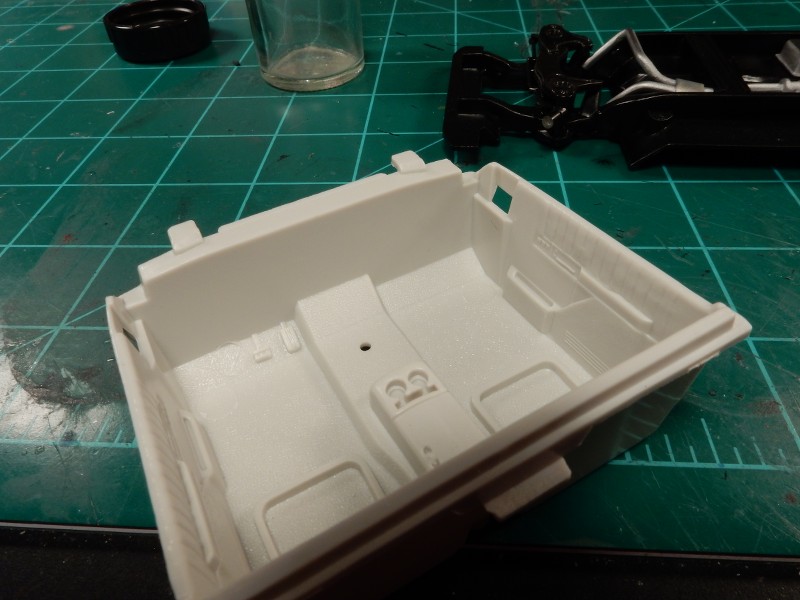
To this:

|
|
|
|
Post by stitchdup on Jan 27, 2019 13:34:39 GMT -7
Thats a massive improvement over the stock ones. Shoot, the whole interior is massivly improved
|
|
|
|
Post by leon on Jan 27, 2019 17:05:19 GMT -7
WOW...You really nailed the interior Joe! icon_shoutout_zpsg7nrfmdc
|
|