|
|
Post by vcv8273 on Nov 17, 2016 2:47:13 GMT -7
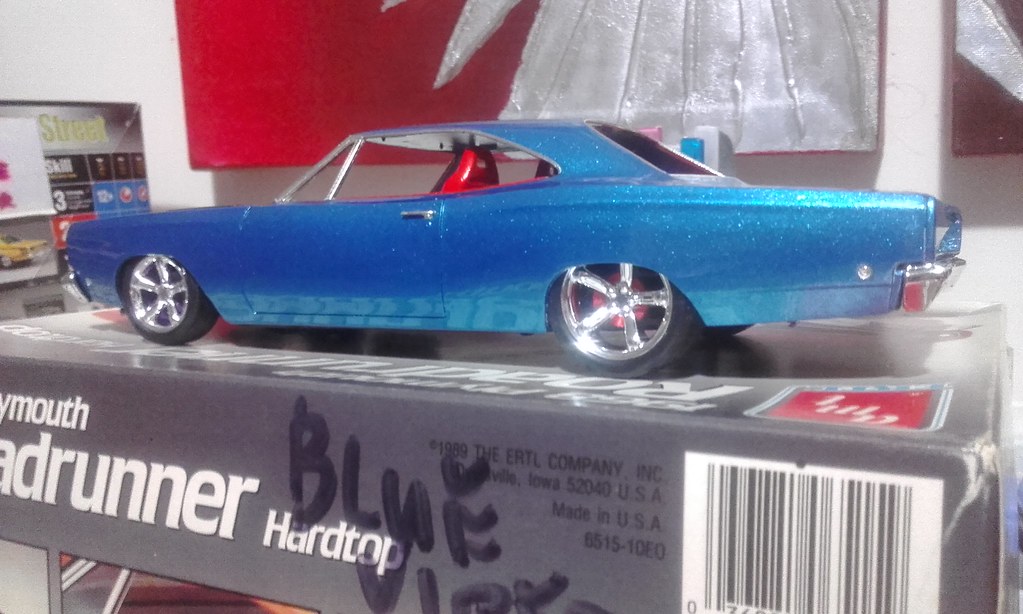
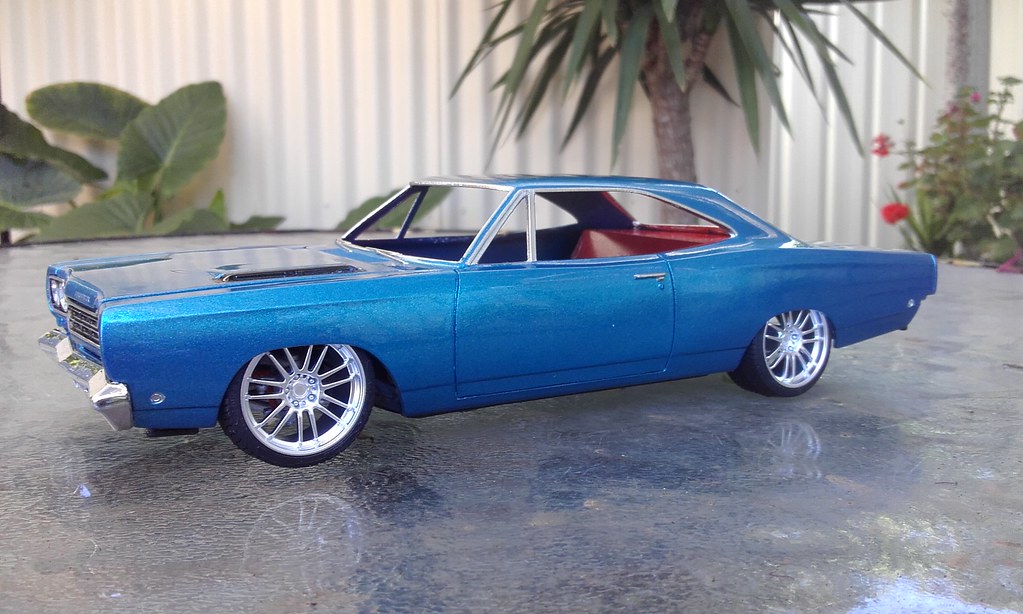
Hi this has been one of my long term projects that is nearing completion. Will post up whats been done so far. Using the amt 68 roadrunner and crossing it with the amt dodge viper rt/10 kit. I will be using as much of the viper as I can including front and rear suspension, motor ,trans and rear end, tyres, dash, console and buckets. So far I have cut out the rear floor pan to be able to fit the rear end and suspension and also modified the trunk floor of the viper to fit, had to narrow it to fit the roadrunner.I have also modified the roadrunner dash to fit the viper dash facia and it took a bit of work getting the engine to fit right as I didnt realise how far back the engine would sit..Had to glue in the firewall to the body as the clearance for the motor was thinning out the top of the firewall so thin that it made more sense gluing it in position so it was a lot stronger. Though I would try the inner guards from the viper and thought they would have been too big but they fitted in there like a glove no mods. Only problem now is that now Im installing the front guards and had to add the viper rear inner guards for that balanced look. Finished up the floor pan and chassis and all that's left to do is finish off the fuel tank /rear floor pan section and the front inner guard assembly.Finished off the inner guards, primered and painted in duplicolor cyan blue rattle can and the underneath in black duplicolor. Also have primered and painted the fuel tank and floor section in black duplicolor. Havent glue them in yet as still need detailing. Also started on the motor and have one rocker cover done to see how it looks against the blue. Thinking that I may also do the interior red instead of the usual black or white for something a little different. Working on the rear end I noticed after painting the diff mount the middle section of the sway bar was square and wasn't satisfied with it and although you cant really see it, it didn't look right so I removed the centre section and replaced it with some round styrene and now looks heaps better. Also with the diff bracing it was solid so I removed some of the plastic to make it look more realistic.I wasnt impressed on the chrome headlights after all the work I have done to the rest of build so I drilled out the chrome lenses and had to file down some parts box lenses as everything was to big. I cut some styrene and bmf it then glued it behind the head lamps. On the tail light side I sanded down the outer part of the lense and then glued some styrene to the outer rim of it, then sanded it down to a suitable trim size. Then bmf it then painted it and think they look better than the stock ones. I also removed the plastic from behind the tail lights so they fit more flush. And yes the left is on the right and visa versa as they seem to line up better with the boot crease.Have started paint work on the interior and will be mainly a combo of testers bright red but with dull-cote, gloss and straight from the can combo. Have opened up the headrest on the front buckets and also made a backing for them as you don't see the backs in a viper. The dash now fits well and have the gauge decals in but still have to detail the dash. Converting the floor to a flat smooth finish for a different look and have removed the window cranks to simulate having power windows. Still have to wait until i have finished attaching the interior panels and dash to the floor so I can get the right position of the console so i can get everything fitting flush like it is supposed to be there. Sorry for being long winded took what I have done from another site and transfered it here. Cheers and thanks for looking Steve 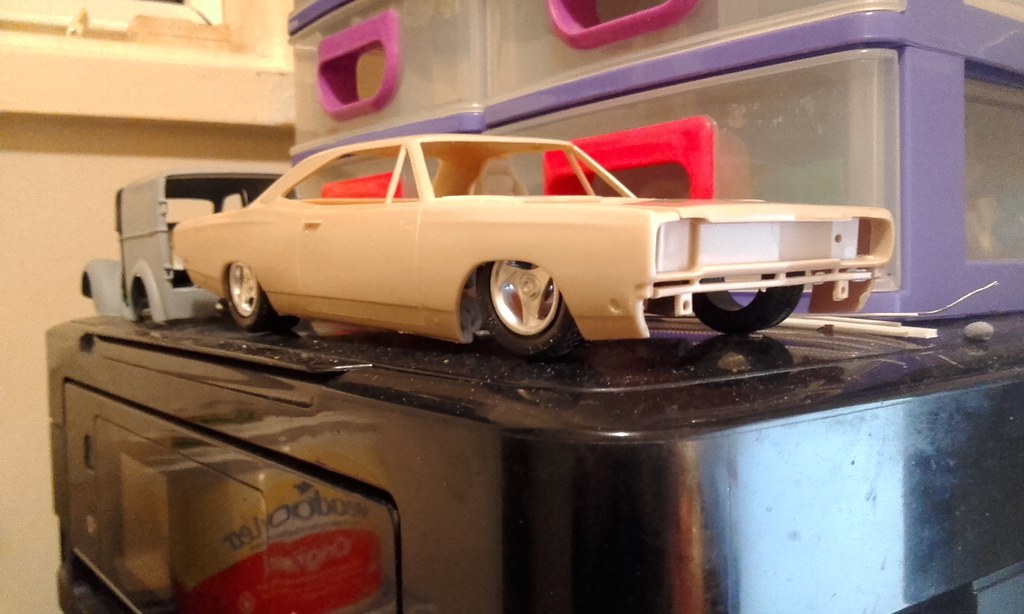                      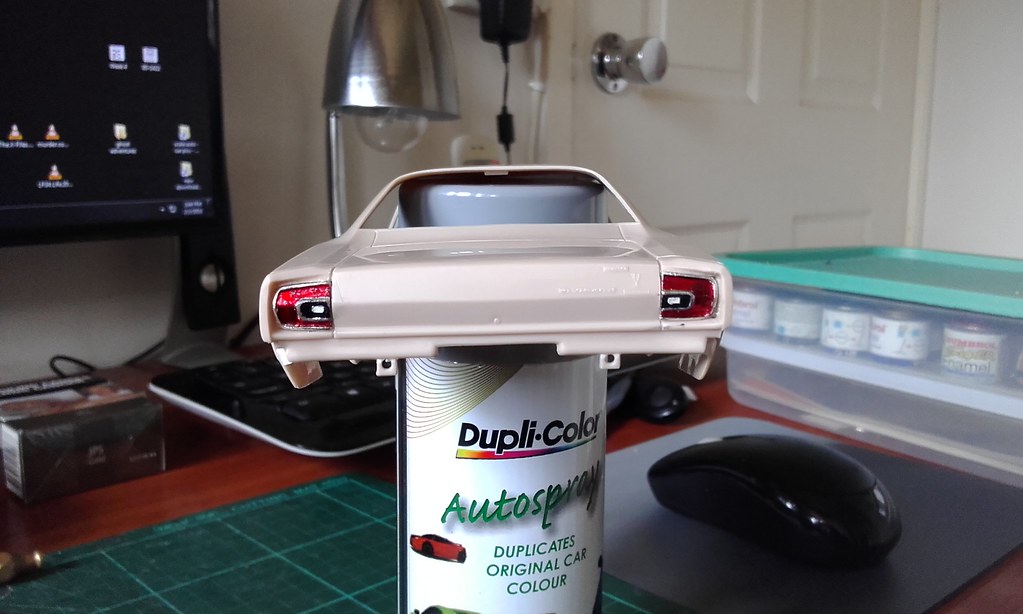  |
|
|
|
Post by stitchdup on Nov 17, 2016 3:22:05 GMT -7
I;m doing something similar just now with a gtx, mine doesn't look as nice as yours though and I'm using a charger chassis.
|
|
|
|
Post by DeeCee on Nov 17, 2016 3:33:33 GMT -7
I love all the custom Viper work you have put into this build mate, can't wait to see it finished.
|
|
|
|
Post by Big D on Nov 17, 2016 8:13:37 GMT -7
Lot of work but you sure are making it look good.
|
|
|
|
Post by 70cudatj on Nov 18, 2016 4:33:02 GMT -7
Love that colour dude two-thumbs-up-smiley-emoticon
|
|
|
|
Post by coyotecrunch on Nov 19, 2016 7:16:08 GMT -7
Oh My God
cant-believe-my-eyes-smiley-emoticon
WOW man - talk about stop, chop, drop and rock and roll!!!!
|
|
|
|
Post by vcv8273 on Nov 23, 2016 2:01:31 GMT -7
Thanks everyone will try to finish this one by the end of the year, plan was to finish it in one go but with so many mods I sort of burned myself out on it and had to put it away. Cheers Steve
|
|
|
|
Post by mustang1989 on Nov 23, 2016 2:30:34 GMT -7
Jeeeeeeeeeeeeez man!!! One of these days I'll be this good. So many things to look at and admire. You're kicking this things butt from one side of the bench to the other!!!! ![]() |
|
|
|
Post by vcv8273 on Nov 23, 2016 3:39:54 GMT -7
Thanks Joe but knowing your work I wouldn't say that I was any better that der beetle bus is build awesome. Cheers Steve
|
|
|
|
Post by vcv8273 on Dec 11, 2017 22:41:30 GMT -7
Pulled this one out today and gave the body a clear coat. With a bit of luck will have this one finished by xmas time. Will post some pics tomorrow of the completed body
|
|
|
|
Post by DeeCee on Dec 12, 2017 1:16:52 GMT -7
I knew i had seen something like i am working on at the moment... just could not remember where... now i can steal a few more ideas for the rear end set up... thanks Steve..  |
|
|
|
Post by vcv8273 on Dec 12, 2017 2:07:39 GMT -7
When I saw yours on the go Dale it reminded me that I still had this one to finish off which shouldnt take that much to finish off. Found if I cut the floor pan to accept the whole of the rear chassis from the viper that the only mods was to the floor pan which was a lot easier than modifying every thing else. Only thing that lets it down a bit is the rims, wish I had a set of nice aftermarket rims for it to give it a more pro touring look.
|
|
|
|
Post by vcv8273 on Dec 22, 2017 9:07:15 GMT -7
|
|
|
|
Post by DeeCee on Dec 23, 2017 3:50:20 GMT -7
WOW!! Those wheels have really made a difference mate, the Viper ones are pretty ordinary.
|
|
|
|
Post by vcv8273 on Dec 23, 2017 3:56:41 GMT -7
Thanks Dale also going to use the prowlers disc's as they are a lot bigger
|
|
|
|
Post by stitchdup on Dec 23, 2017 4:32:07 GMT -7
Neat, the wheels really bring it to life
|
|
|
|
Post by mustang1989 on Dec 23, 2017 6:04:42 GMT -7
Now this looks friggin' killer right there Mister!!! Great to see you on this one again Steve!!!
|
|
|
|
Post by Jay's Mini Scale on Dec 28, 2017 17:11:25 GMT -7
Now this looks friggin' killer right there Mister!!! Great to see you on this one again Steve!!! I agree it look slick |
|
|
|
Post by Jay's Mini Scale on Dec 28, 2017 17:12:17 GMT -7
Now this looks friggin' killer right there Mister!!! Great to see you on this one again Steve!!! I agree it look slick |
|
|
|
Post by vcv8273 on Nov 1, 2018 23:26:34 GMT -7
|
|
|
|
Post by DeeCee on Nov 1, 2018 23:43:05 GMT -7
Those rims really do suit it mate.
|
|
|
|
Post by vcv8273 on Nov 1, 2018 23:45:46 GMT -7
Thanks Dale
|
|
|
|
Post by vcv8273 on Nov 3, 2018 20:55:23 GMT -7
Started work on the engine, painted in duplicolor aluminum and the induction and valve covers red. Used bmf on the viper script then painted it up and used polish to cut back the red of the viper scipt and turned out good so onto the next valve cover. Hope to have the engine completed tonight. Cheers and thanks for looking   |
|
|
|
Post by leon on Nov 3, 2018 21:21:14 GMT -7
That is looking great Steve! Nice choice on the rims.
|
|
|
|
Post by Deano on Nov 3, 2018 23:33:05 GMT -7
Great work and detailing, looks awesome.
|
|
|
|
Post by vcv8273 on Nov 4, 2018 0:30:12 GMT -7
Thanks Leon and Deano for your comments
|
|
|
|
Post by kpnuts on Nov 4, 2018 5:55:08 GMT -7
Looking good mate
|
|
|
|
Post by RetroSpectKustoms on Nov 4, 2018 23:03:51 GMT -7
Wow, that is a lot of work in the chassis!! Turned out amazing, Great looking build so far.
|
|
|
|
Post by vcv8273 on Nov 6, 2018 2:10:45 GMT -7
Thanks Ken and Bruce for your comments. Hope to have an update tomorrow as finishing up the engine and coil overs tonight
|
|


